It Took Us Less Than 1 Hour to Build a PgAdmin Clone with Low Code: Here’s How We Did It?

PostgresDB is an open-source database that uses and extends the SQL language. It’s used widely across many organizations to build a variety of apps. Developers tend to love and prefer PostgresDB for its simplicity and extensibility. Postgres Admin (PgAdmin) has a neat interface for accessing any Postgres instance from any device with a web browser. It allows administrators to carry out tasks like managing user accounts, databases, clusters, and more.
However, PgAdmin has a few biting downsides; here are a few:
Installation can be difficult
Troubleshooting and debugging is a complication, especially if you’re new to Postgres
Takes time to load on a machine, and is prone to freezing, especially when establishing a new database connection
Slow to respond to queries
Cumbersome interface when dealing with multiple databases
I think these are problems that can be dealt with if there was just a better user experience. I set out to build a new version of the PgAdmin! And I did this in under a few minutes. In this blog, I will tell you how I did this.
But, I have to say, cloning the PgAdmin app is not an easy task; there are multiple challenges here, as we have to implement several functionalities. With a fully functional PgAdmin app, we should be able to:
Establish connection on any remote cloud-based Postgres instances
Manage databases, roles and users
Create, alter, and drop tables on the connected databases
Provide UI for data export/import from CSV files, schema checker, etc.
Write queries on an editor to run SQL statements and see the results of querying against your database
Doing all this in under minutes is an impossible task if we have to code things from scratch, so we will be using a low code platform like Appsmith. Using Appsmith to build internal applications is super fun; we can connect to any data source, write queries, and build UI 10x faster than usual. This is entirely web-based; depending on the preference, we either self-host this on any server or simple use the community cloud edition.
How did we build this?
It took us less than an hour to build this, as Appsmith comes with a Postgres data source integration. With this, we can run any PG query and use it anywhere across the application using dynamic JS bindings. We will talk more about the features of the application in the following sections; before that, here is a sneak peek of how the application looks:
The application has two pages, one for managing tables (Table Manager) and another for testing and running queries (Query Executor). Now, let’s deep dive into each of these tables, and talk a bit more about their functionalities.
Table Manager
On the table manager, you can find all the tables from the connected PG data source. It offers all the functionalities that a PgAdmin does; you can create, read, update and delete these tables on this admin panel. Performing these CRUD operations on tables is pretty straightforward on Appsmith. Additionally, you can filter the tables based on the schema and update them whenever needed.
When you click any table name (select a row) from the table widget, you’ll see a new container on the right, where we display the three essentials:
General Table Details
: Here, we can update the information of the table and set the owner.
Column Details
: Configure all the settings for columns inside the selected table.
Constraints
: Add any relations between the columns inside the table.
Using these three features, we can manage the column properties and add different relations between them. We’ll talk a bit more about this in the next sections.
Query Executor
This is the second feature of our Appsmith PGAdmin. Here, we can execute any queries.
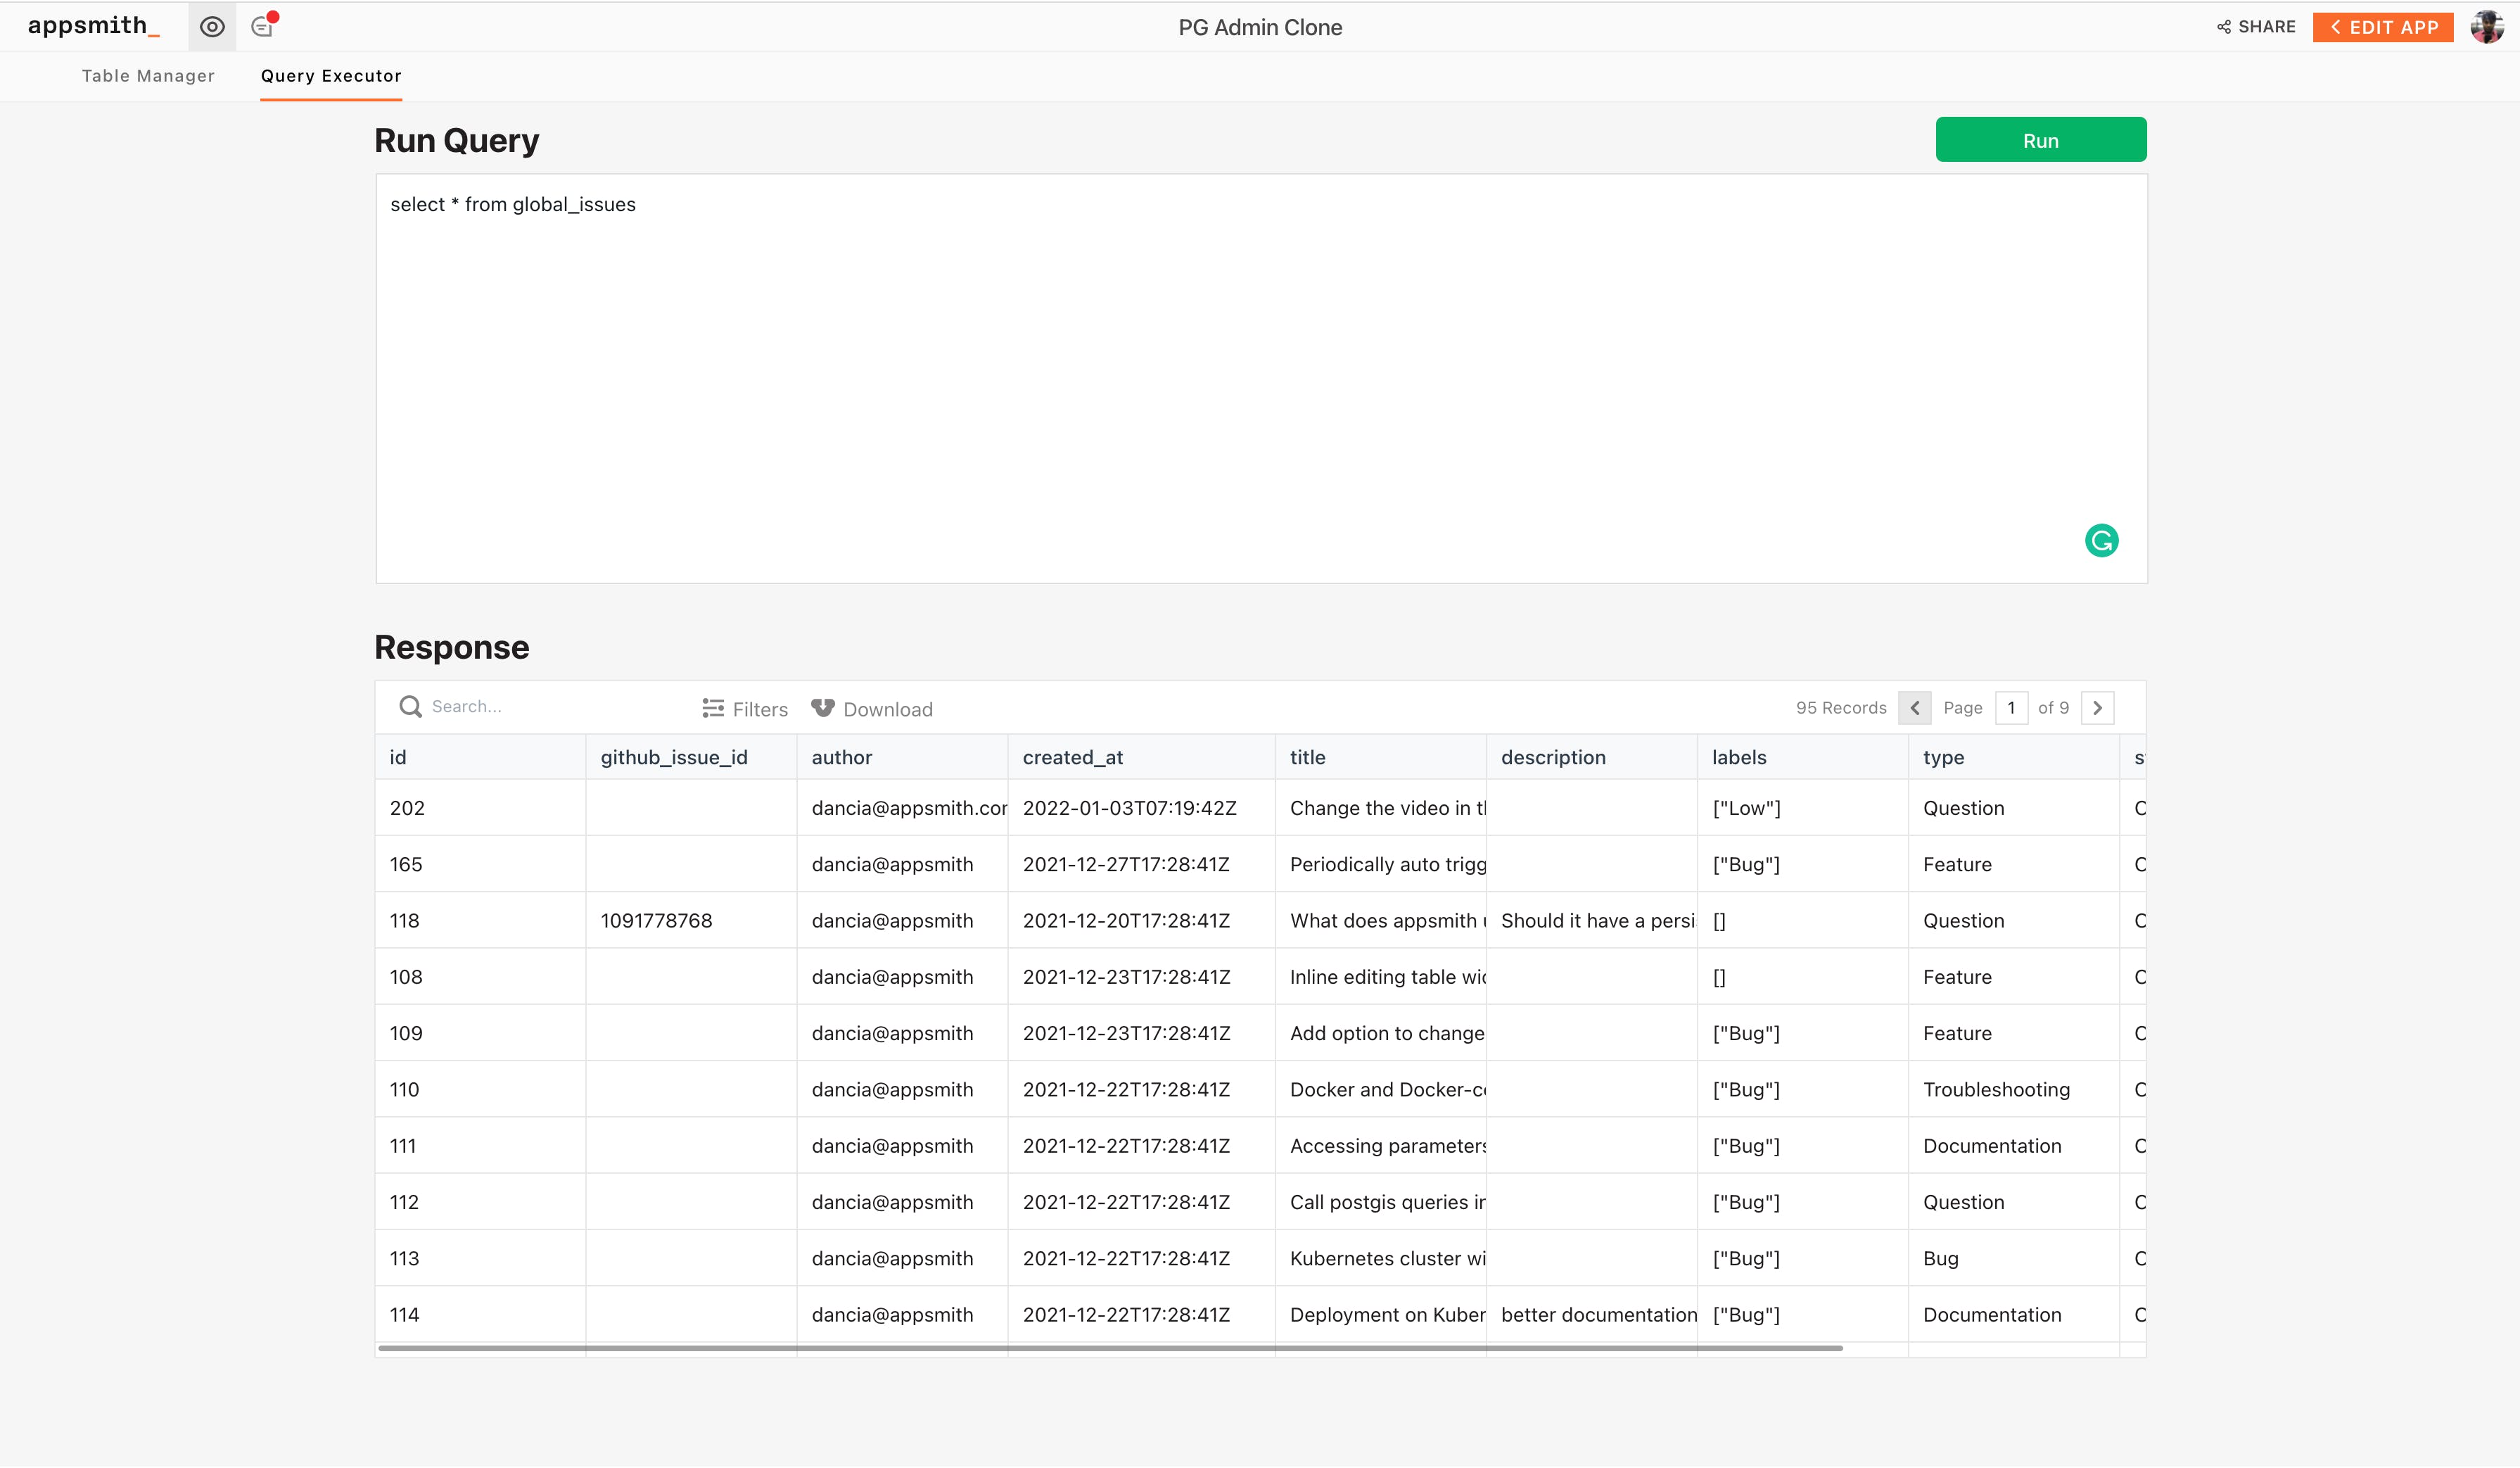
Our auto-complete and slash commands feature will make it much easier to test queries in real-time. For building this, we’ve used the RichText Editor widget on Appsmith; whenever we execute the query, we display all the responses on the table widget. However, this can be customized within minutes based on different use-cases.
Now, Let’s Use the Appsmith PgAdmin
In this section, we’ll talk about the different functionalities provided by the Appsmith PgAdmin with a few examples. We’ll also deep dive into some of the queries that were used on Appsmith to implement the functionality.
“”To see this in action, you will need to switch data sources on Appsmith. For this, you can connect your PG database by clicking on the + icon next to the Datasources section. Next, on every query we will see the data source it’s connected to. Here, we can switch the data source by selecting it in the data source dropdown.
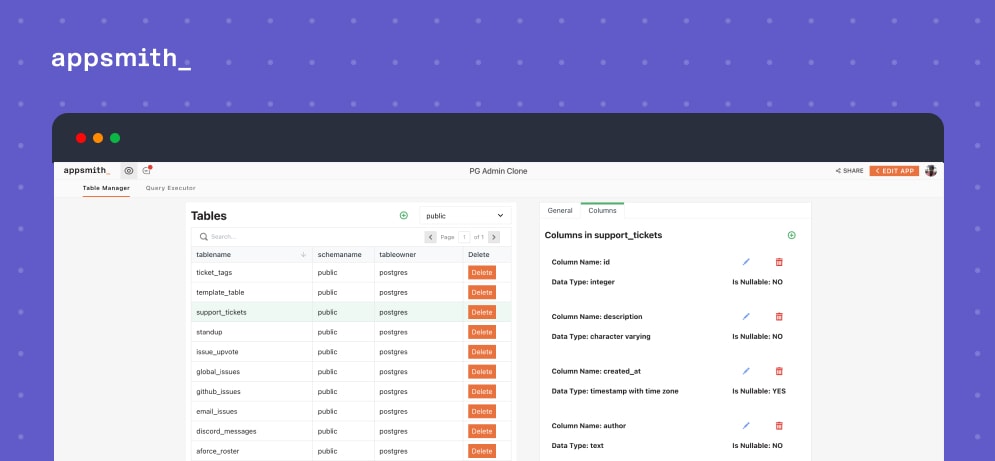
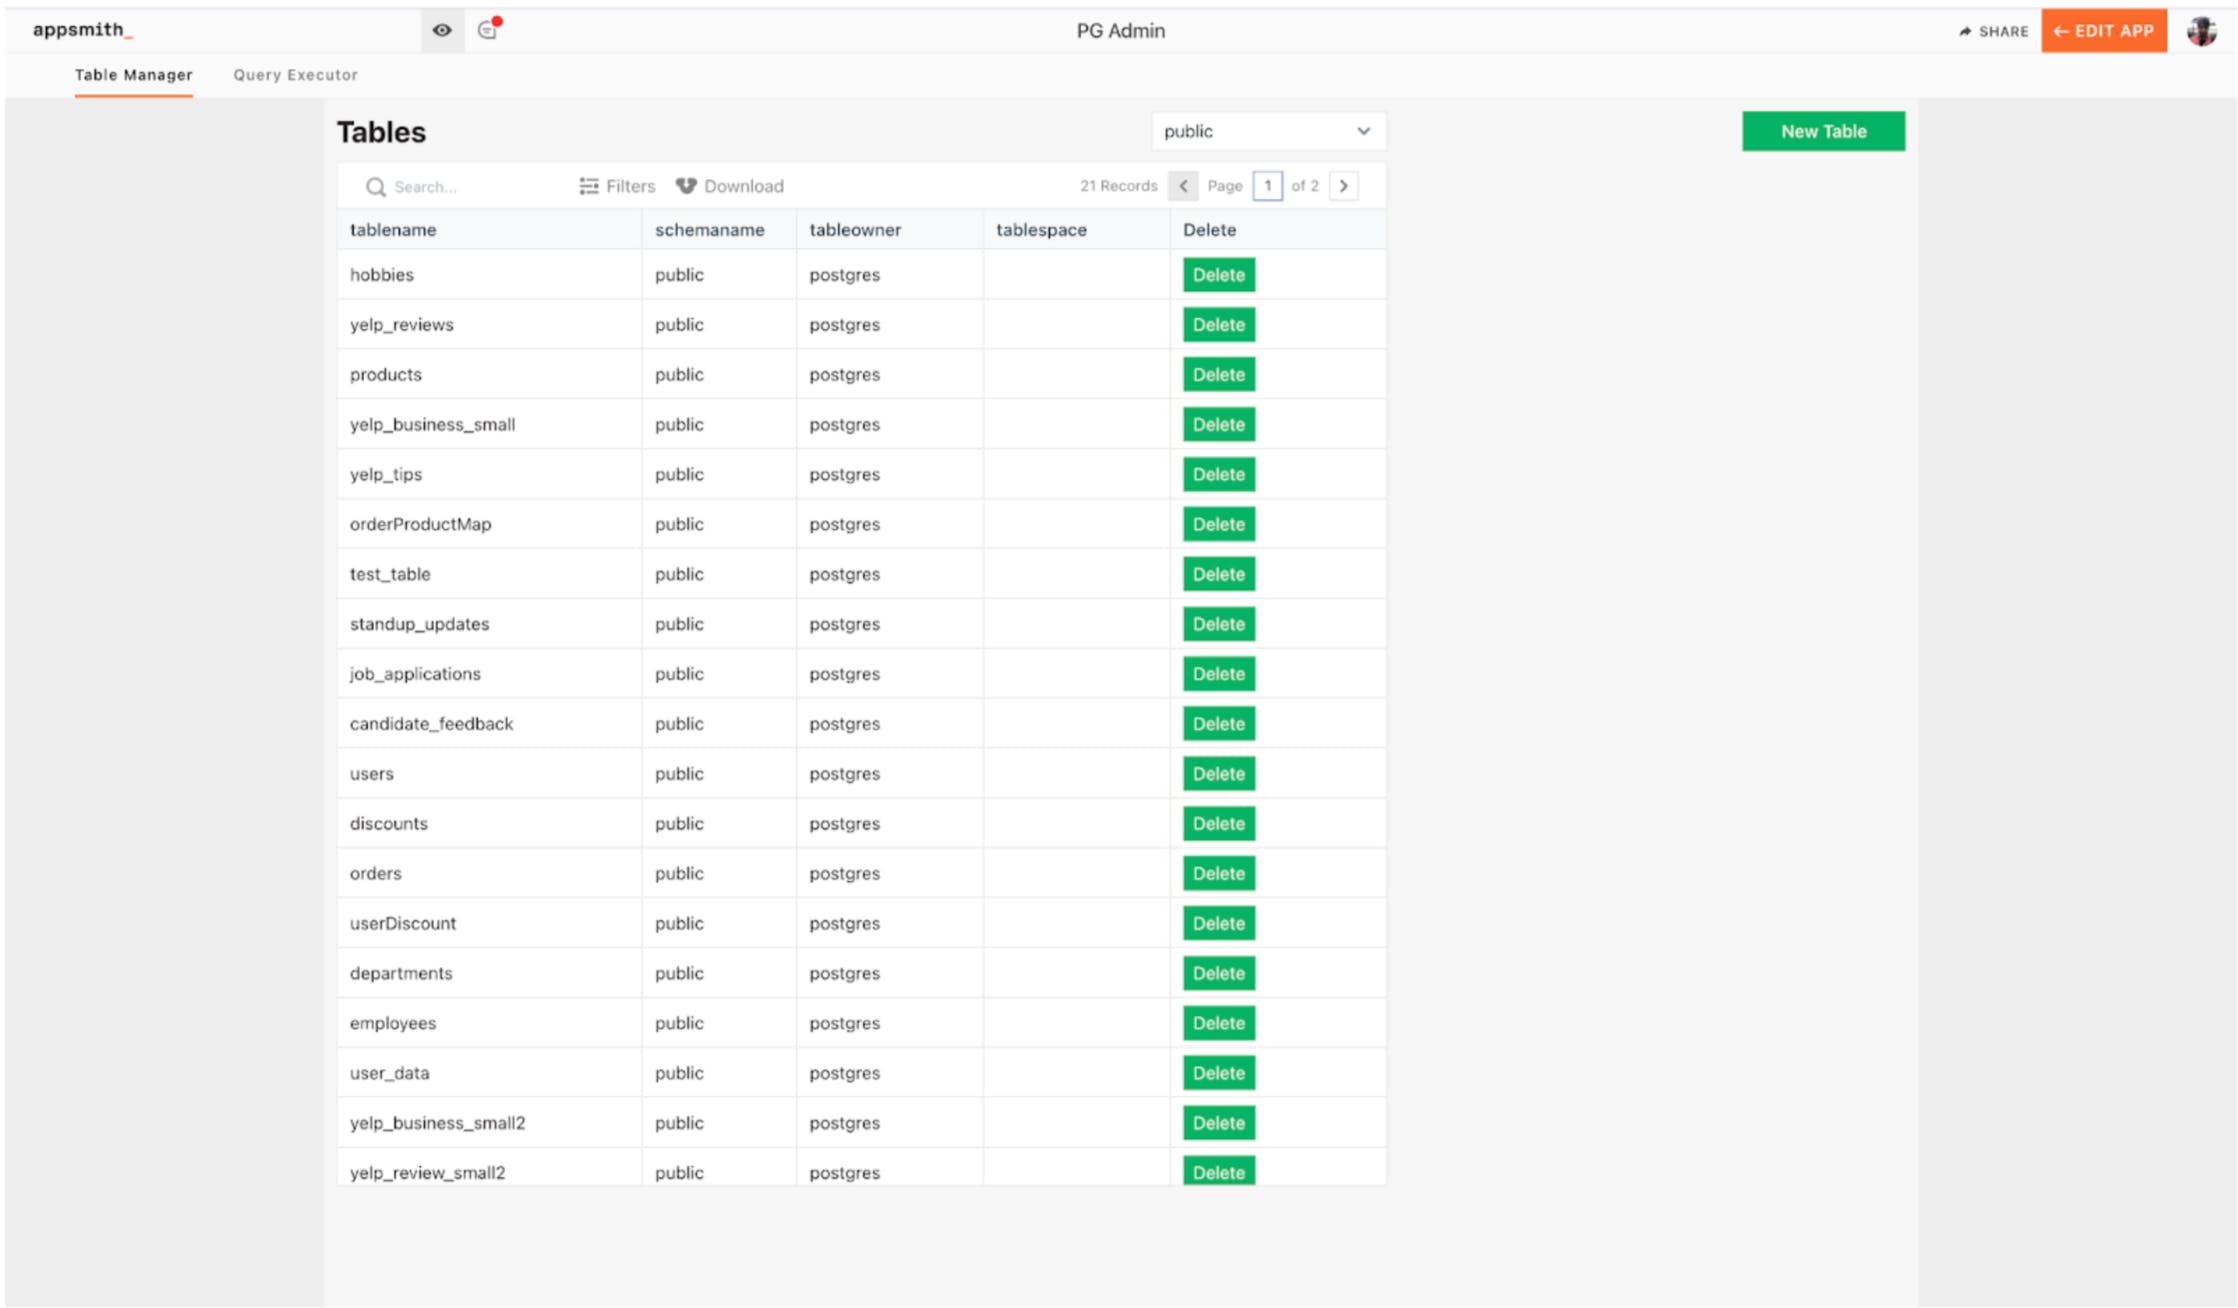
Managing Tables: When working with databases, we often need to configure names, schemas, on Appsmith PgAdmin. Doing this is super easy on Appsmith! As soon as you open the PgAdmin, you will see the list of all the tables on the table widget. To see their configuration, we can simply select any row, as soon as it’s selected, we’ll see a new container on the right, where we can configure the entire table details. Here’s a screenshot:
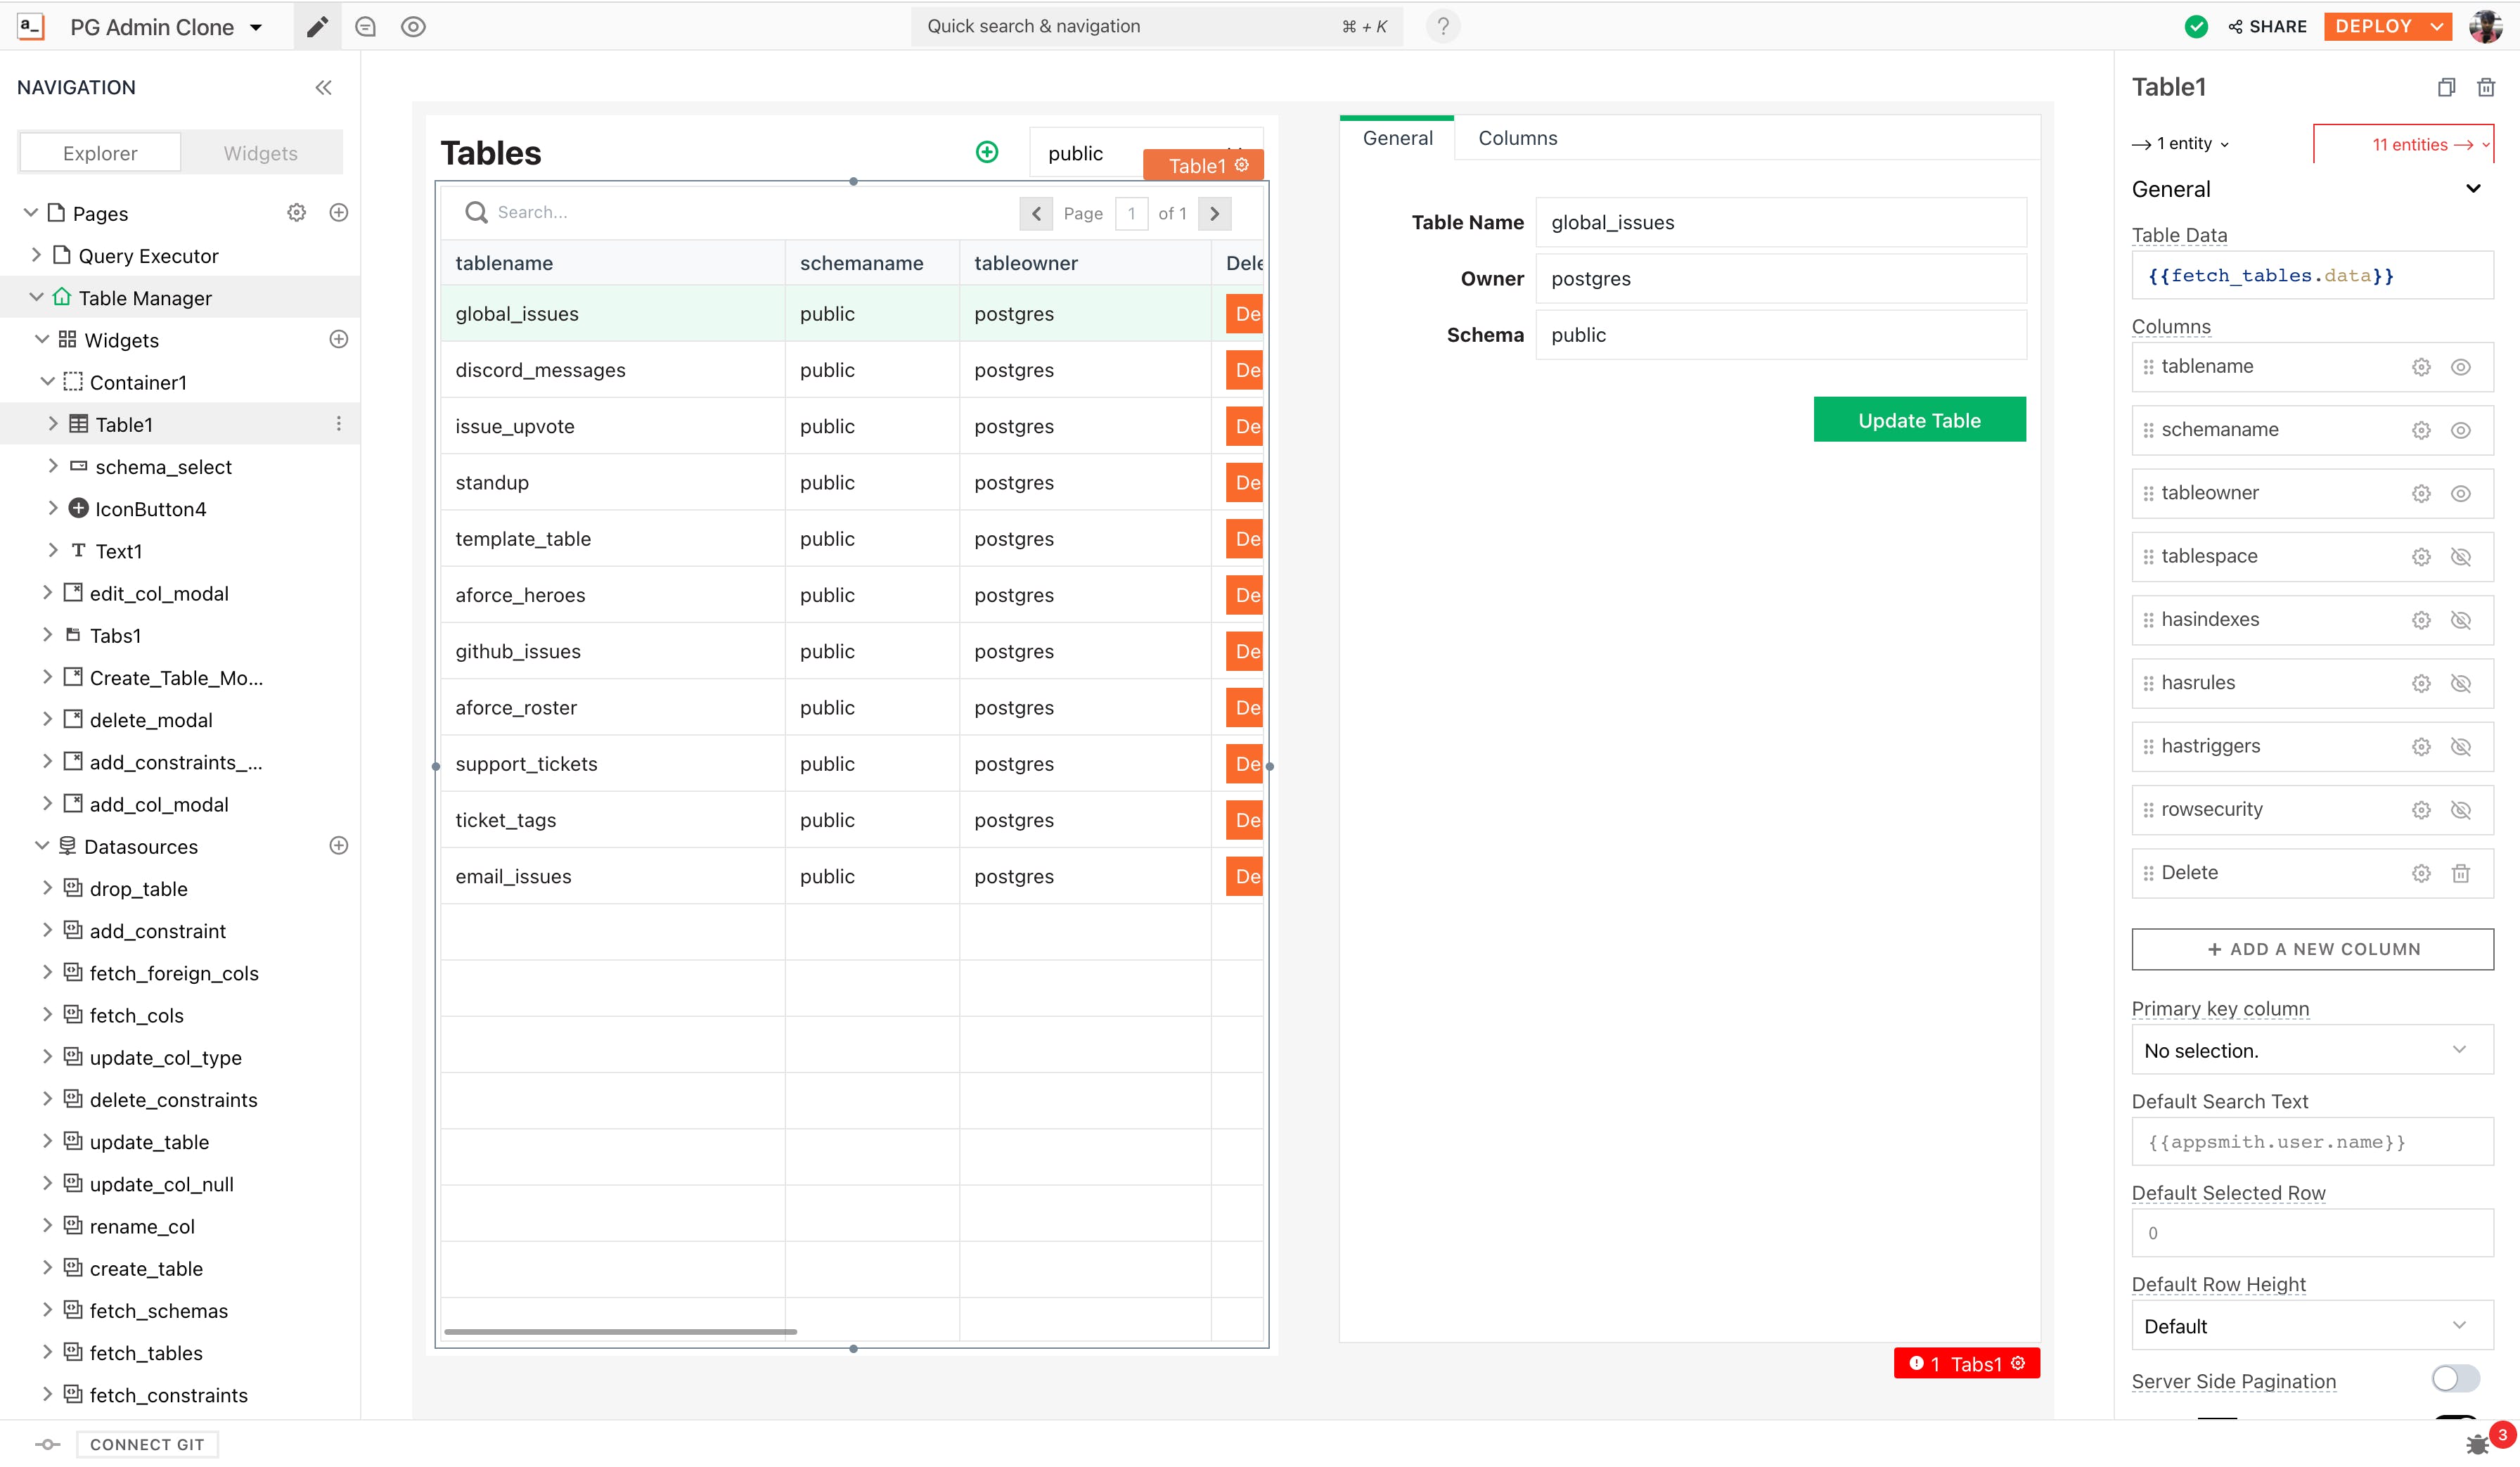
As we can see, on the right, when a table is selected, we can see all the details under the general tab. We can also delete a particular table by clicking on the delete button inside the table. This is done by adding a custom column on the table widget and setting the column type to a button. If you prefer modals, then you can configure tables to show modals where we can update the necessary details.
Configuring Columns in Table: To manage columns inside the table, select the table and navigate to the Columns tab inside the container on the right.
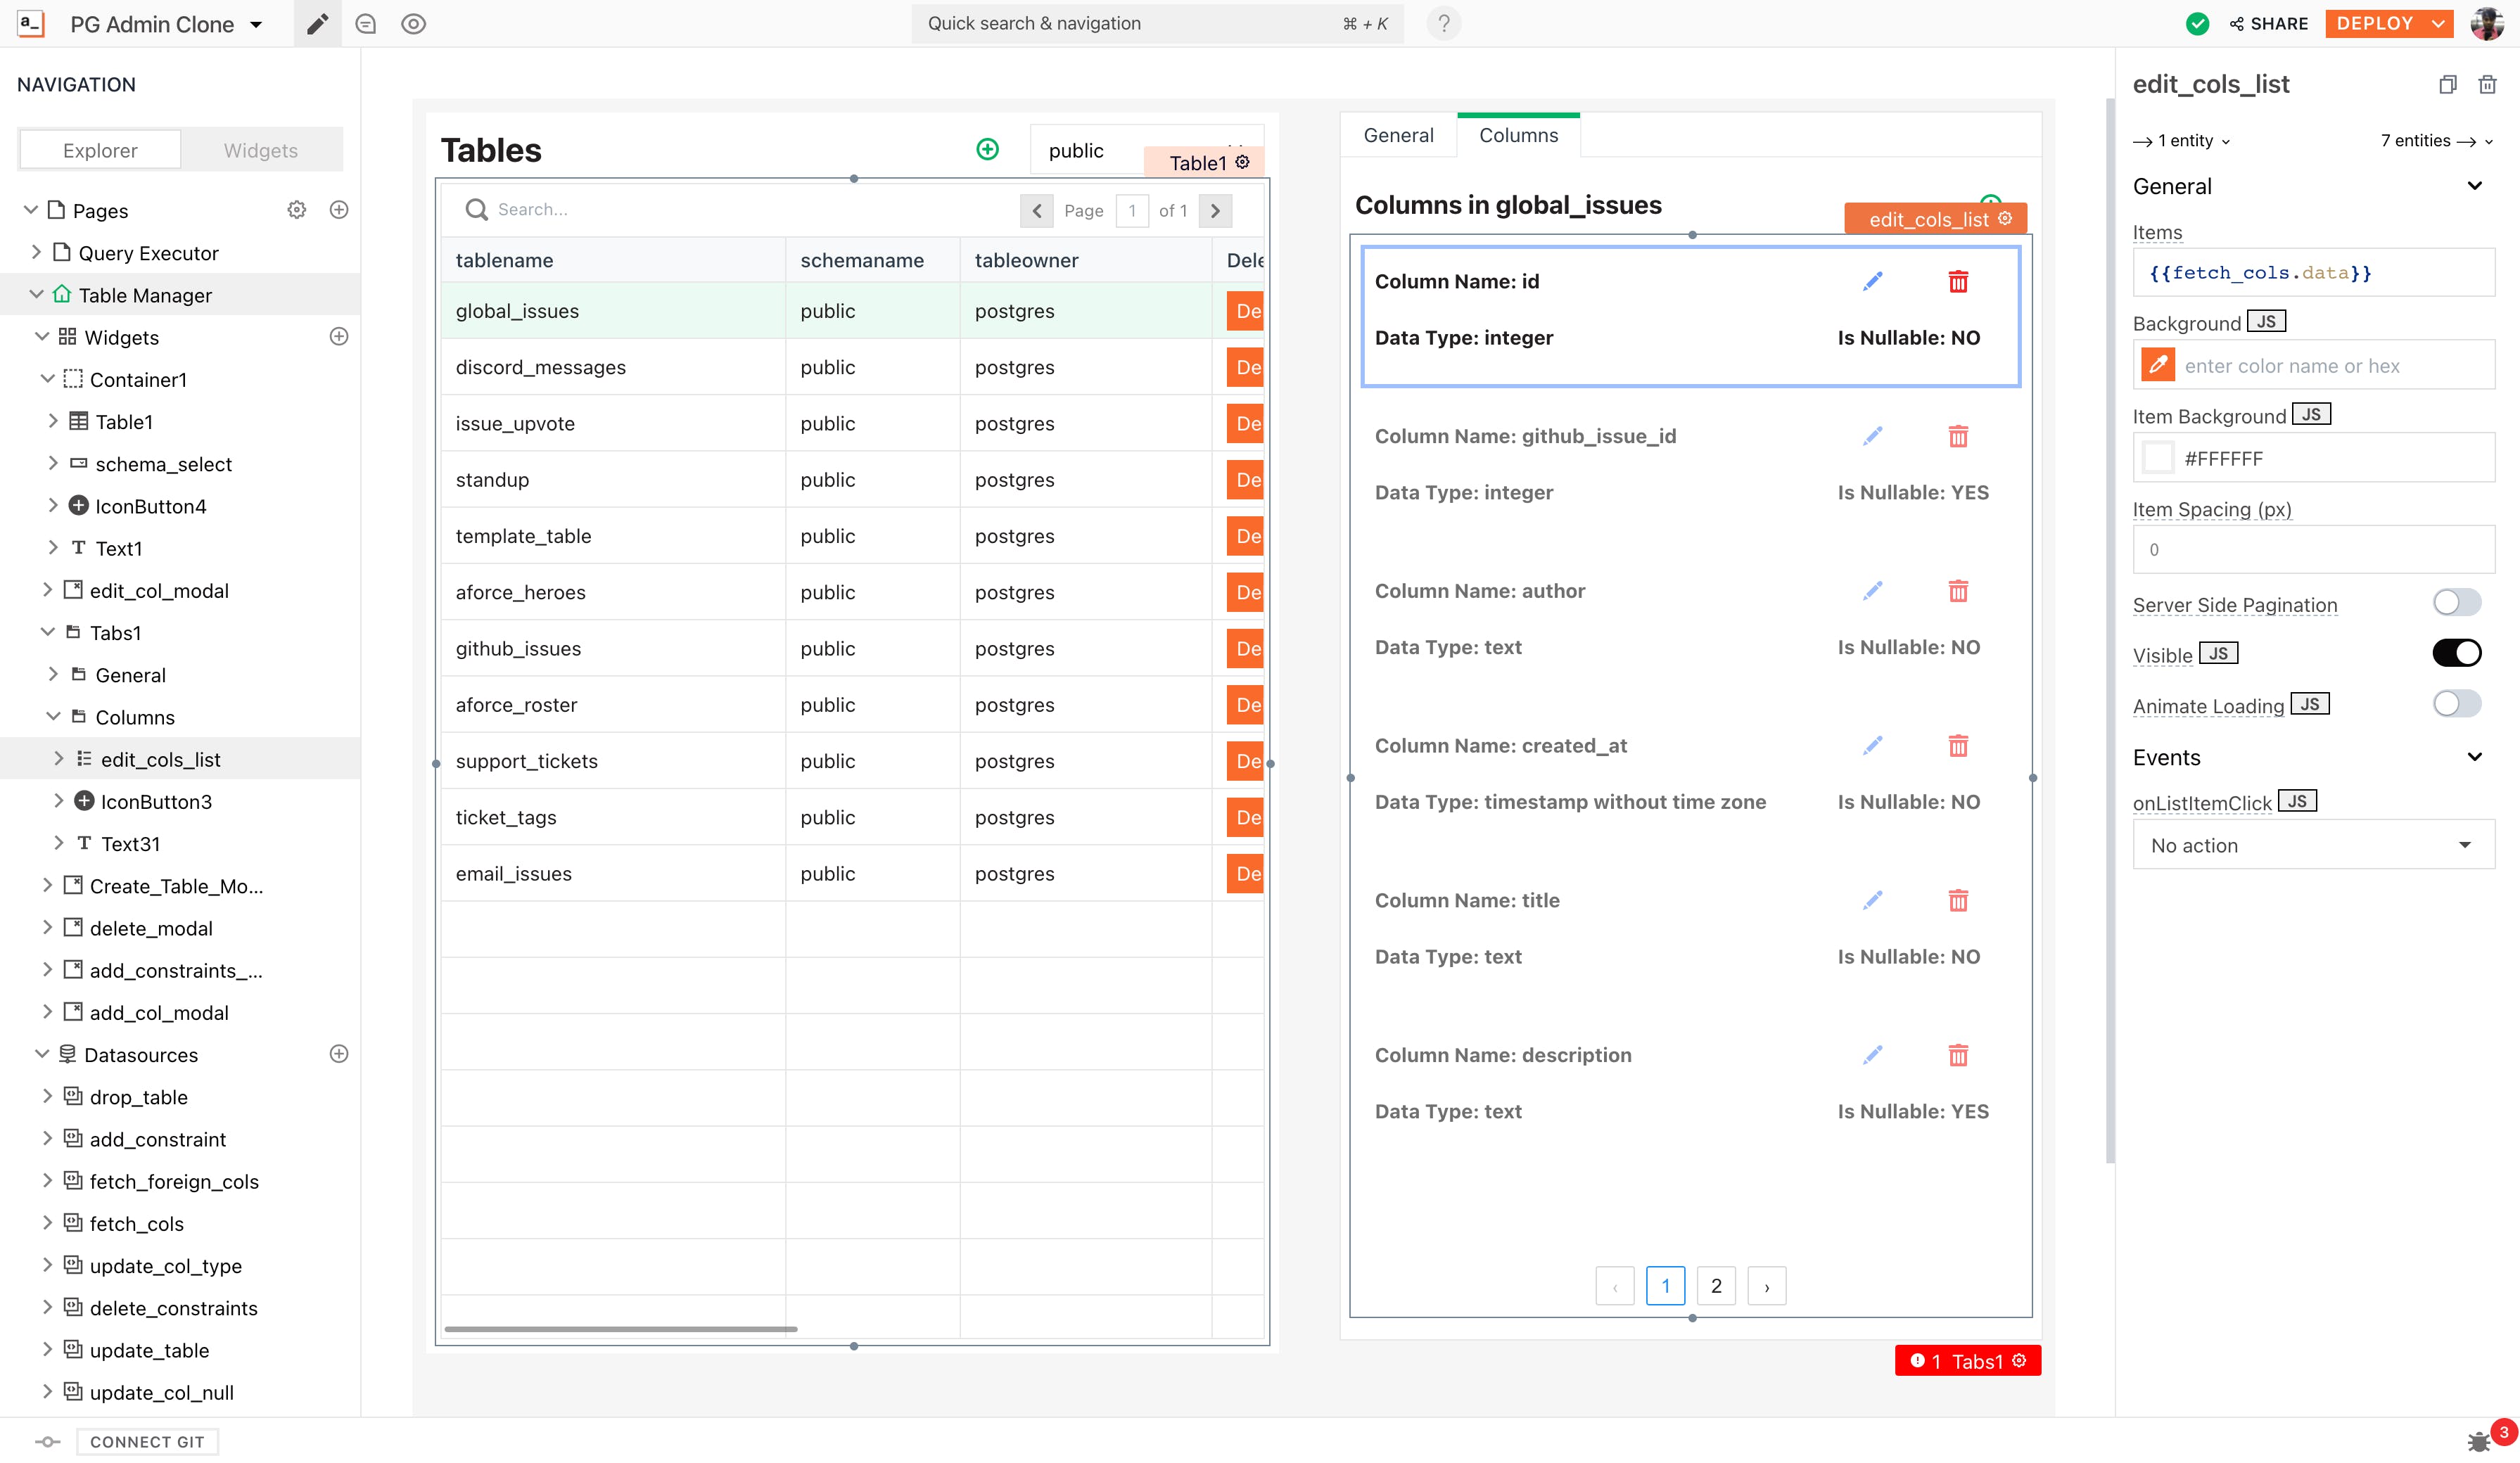
Here, we will see a list widget, which has all the details from the selected table. We can edit the data type and also the column names, using the interface that we’ve created on the list widget. In case, you want to delete a particular column you can use the delete button that’s present on the list item. Additionally, you can toggle the not-null option to set the ‘accept null values’ for individual attributes.
Here’s a GIF:
In the list above, we only see the data types from the table columns; to add constraints such as foreign keys, we can simply navigate to the constraints tab and add or configure the attributes.
With this, our custom PgAdmin is ready for use. We use this application for internal processes like managing our Postgres instances. We definitely find it faster than the native PgAdmin app, and it’s definitely nicer to look at!
If you want to build any admin panel, you can do it with Appsmith. We’ve got all the popular database integrations, and this list is growing! Do join our growing community on Discord for more tips, and tricks on how to make the most out of Appsmith.