Appsmith Basics: How to Query Databases and Bind Data to Widgets

Every application involves some level of CRUD operations, be it reading records from a database, creating or updating records, or deleting records. All of which is put together by well-designed application UI and logic.
In this article, I will show you how to build a task manager in Appsmith using Firestore as the database. By doing this, we will cover and solidify core concepts like connecting to databases, writing queries, infusing data to widgets, and writing custom functionality using JavaScript.
In this article, you will learn how to do the following:
Connecting to and querying Firestore
Binding data to widgets on Appsmith
Deploying the application you built
Let’s get started with the first.
1. Connecting to and querying Firestore
Before we go in-depth into using Firestore, you need to create an app. Signup for Appsmith cloud and click on the New button with orange. Now, we can connect the created app to the database.
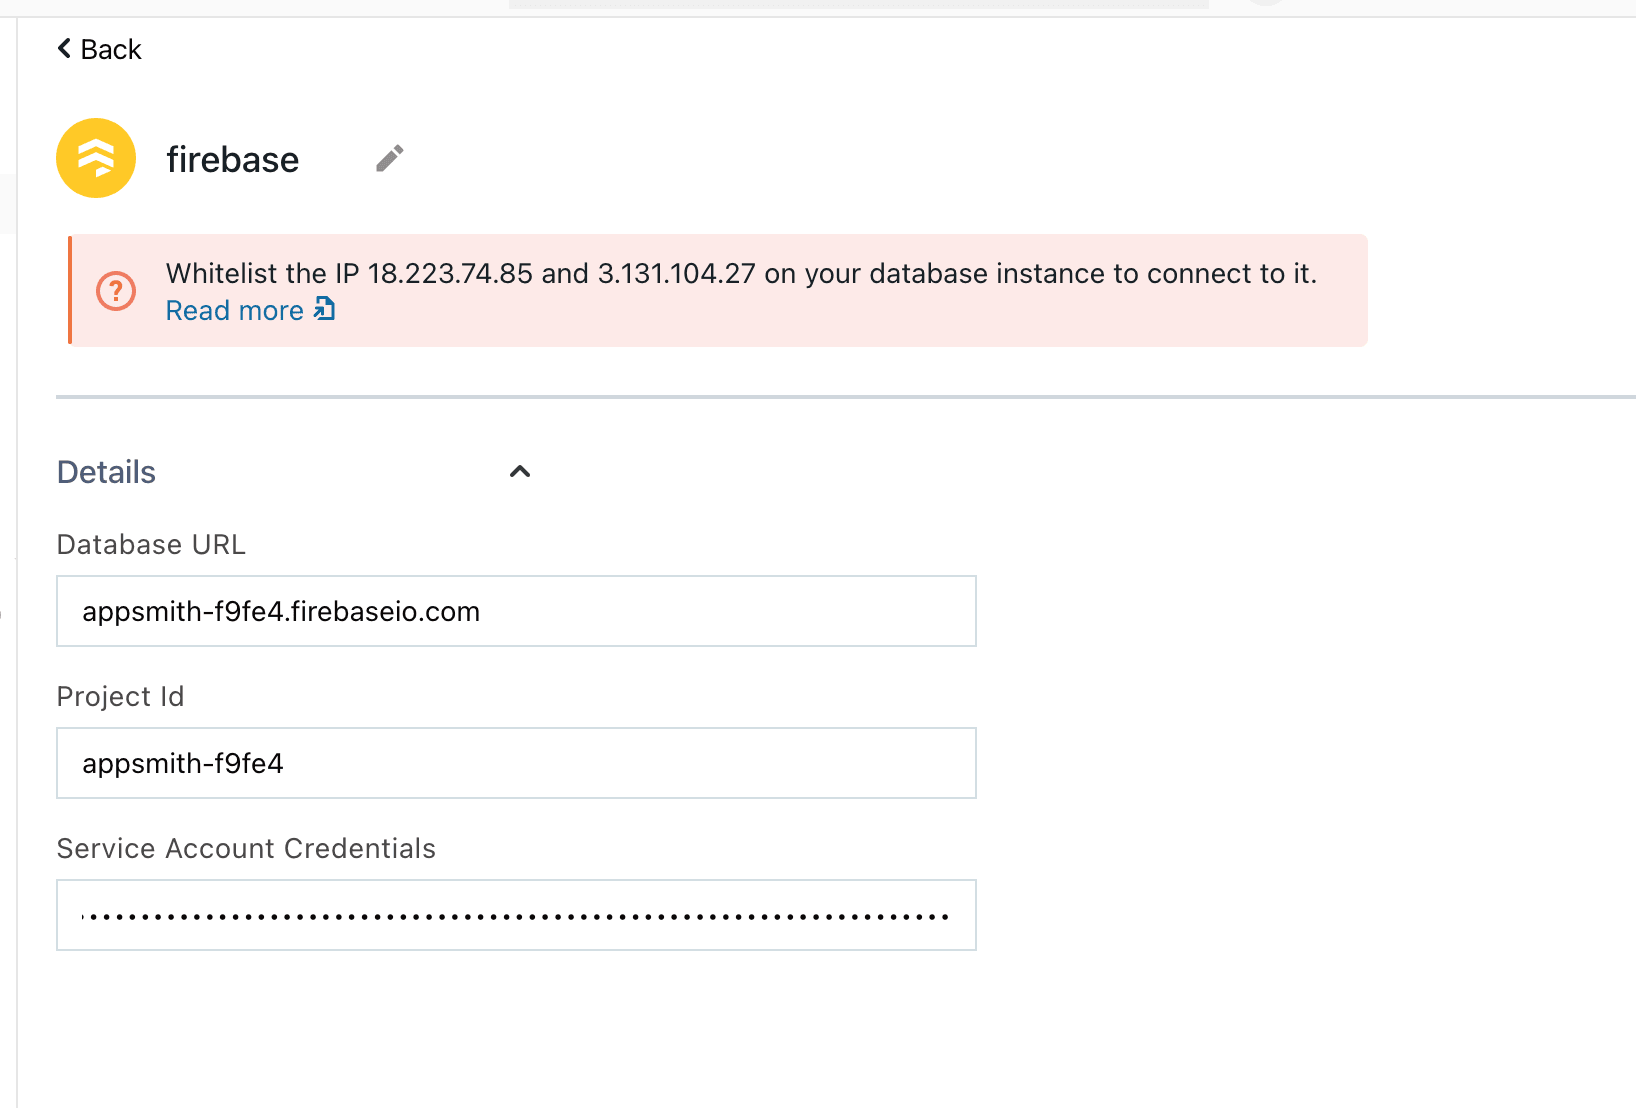
Click on Datasources > Create New and then Firestore. Fill in the credentials to connect to your firebase instance. To make sure all details are correct, click on the Test button, after which you can save the data source.
“”To get your Service Account Credentials, go to your project settings in Firebase and generate a new Nodejs private key that will be copy-pasted into your Appsmith app.
Here’s a snapshot of my setup:
Using the Firestore data source, we need to query for data. Let’s write a query to get tasks from the database. To display some data, I have a simple collection called asana that has some seeded data. A query to get tasks would look like this:
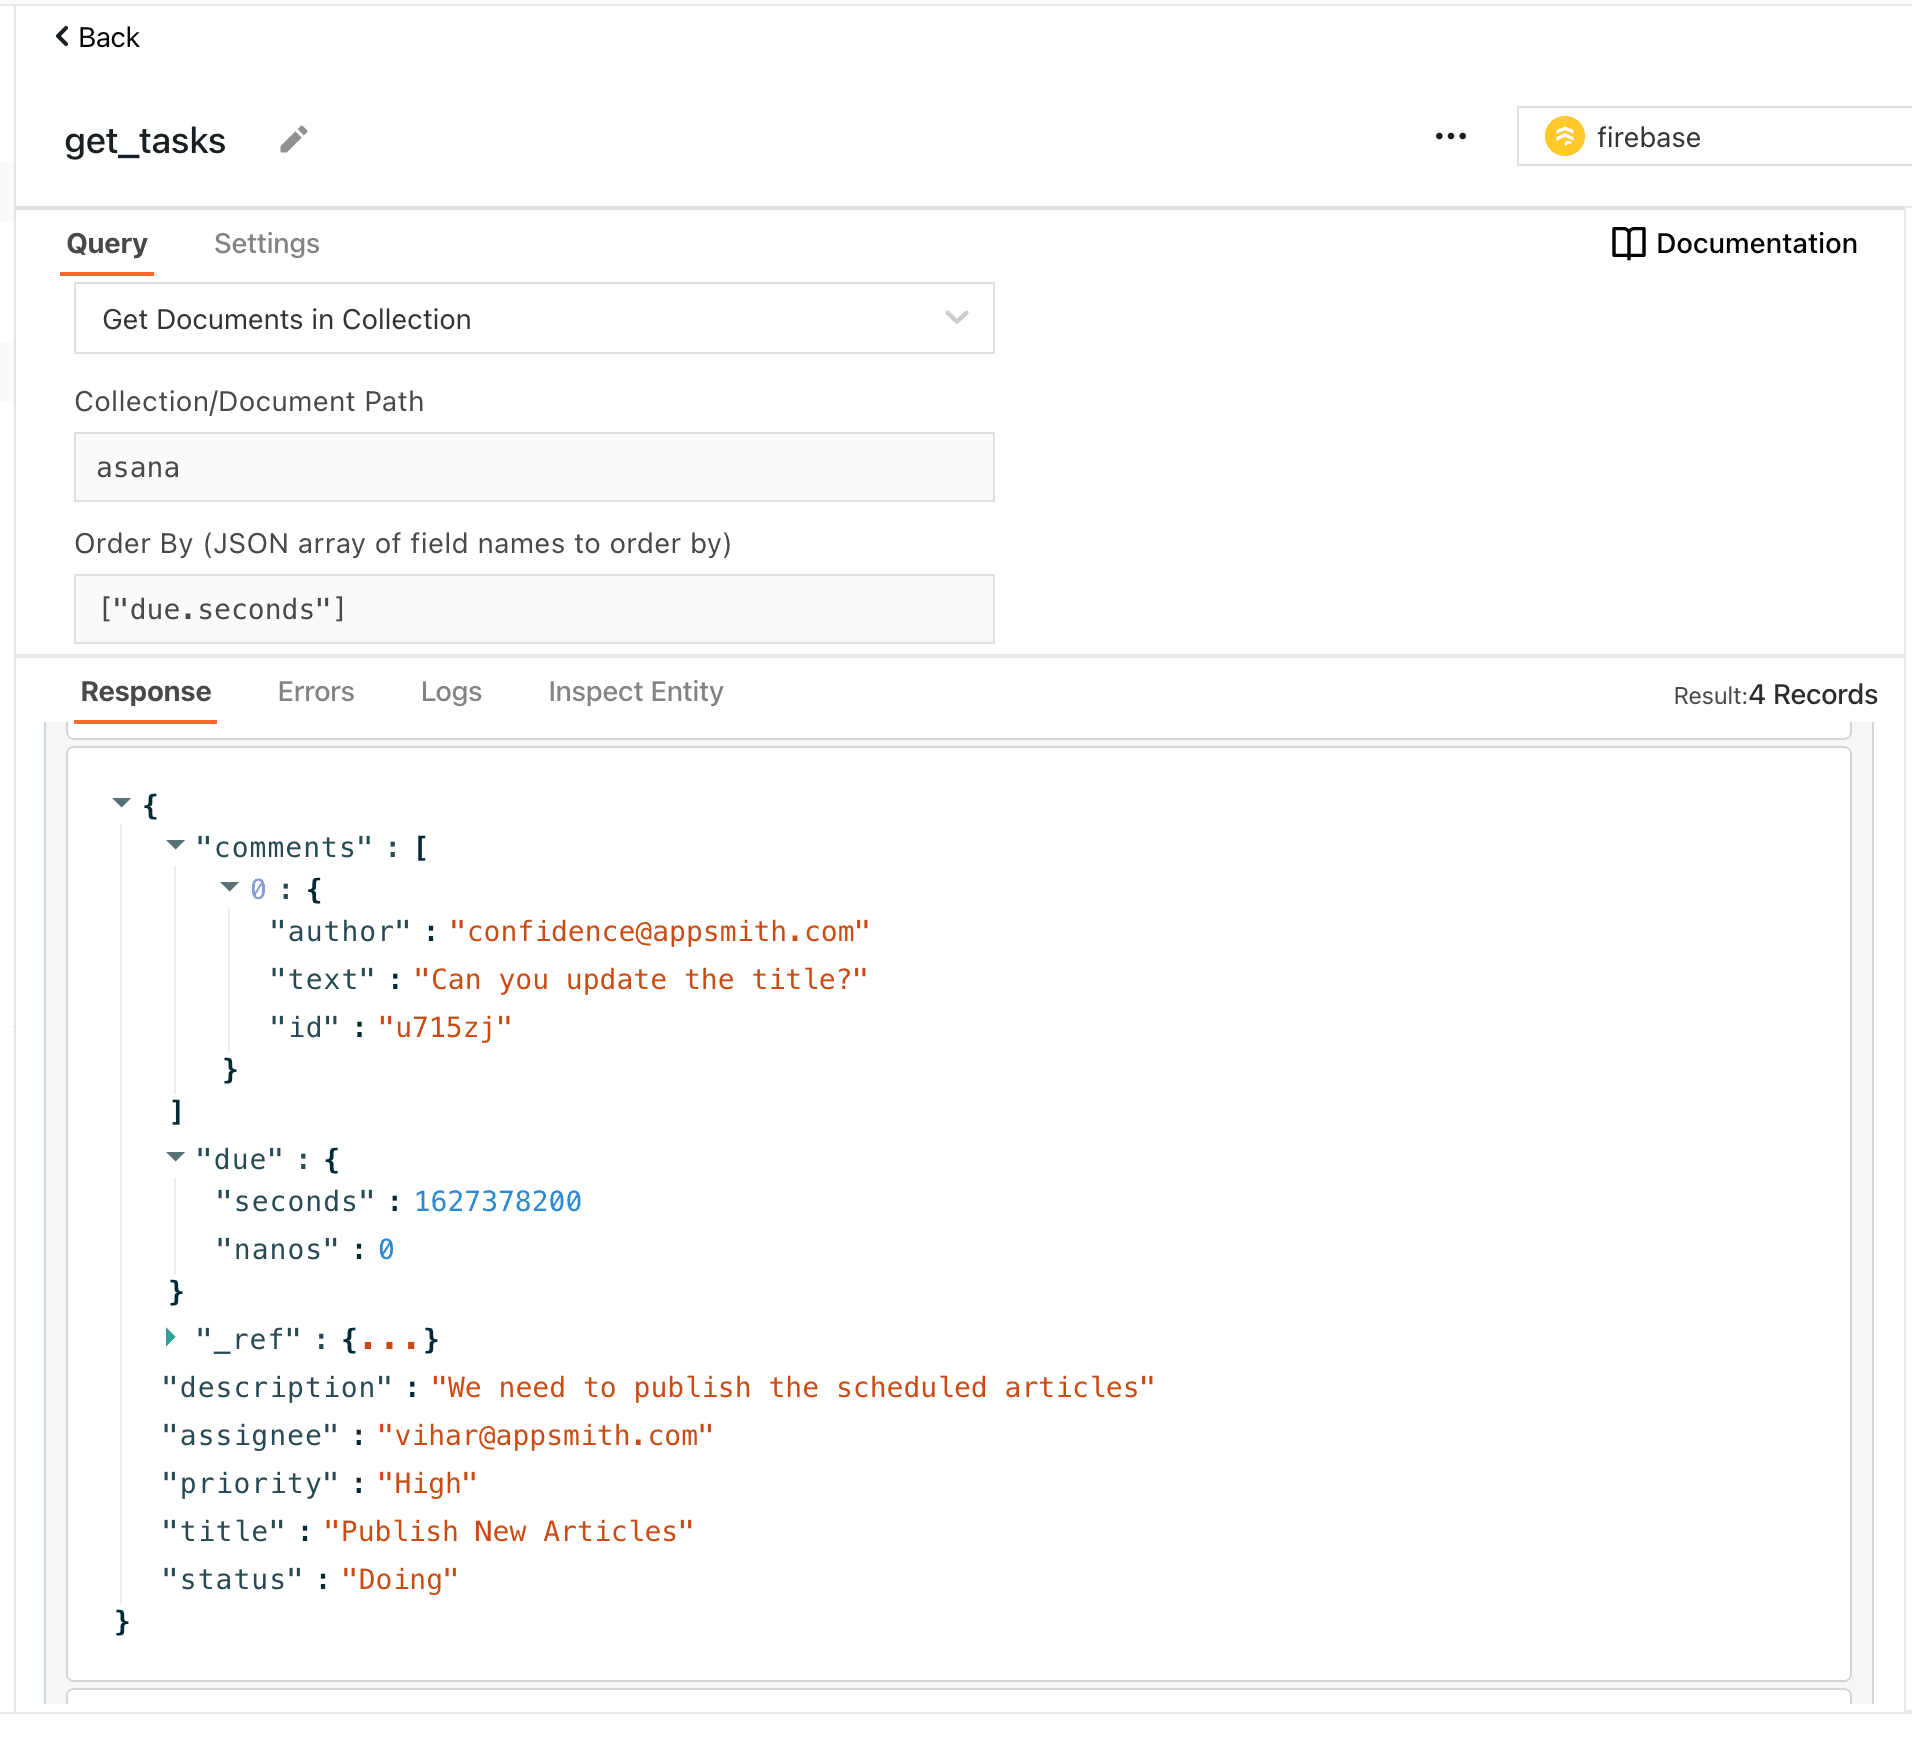
“”The response data in the snapshot above shows the shape of each entry in the database. This will be useful in seeding your database.
Now that we have linked to Firestore and have some data coming in, let’s display that data in the app using widgets.
2. Binding data to widgets
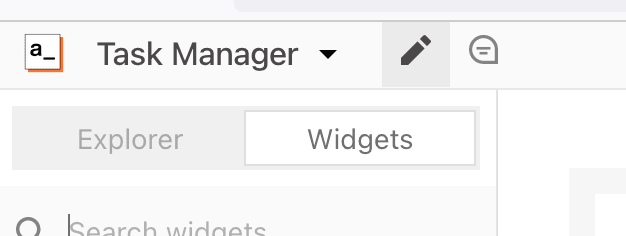
To display the data coming in, we’ll need a List widget. Switch to the widget tab in the sidebar and drag a List widget into the canvas. (The widgets tab is below the app name)
On the List widget, a simple binding can be written like this:
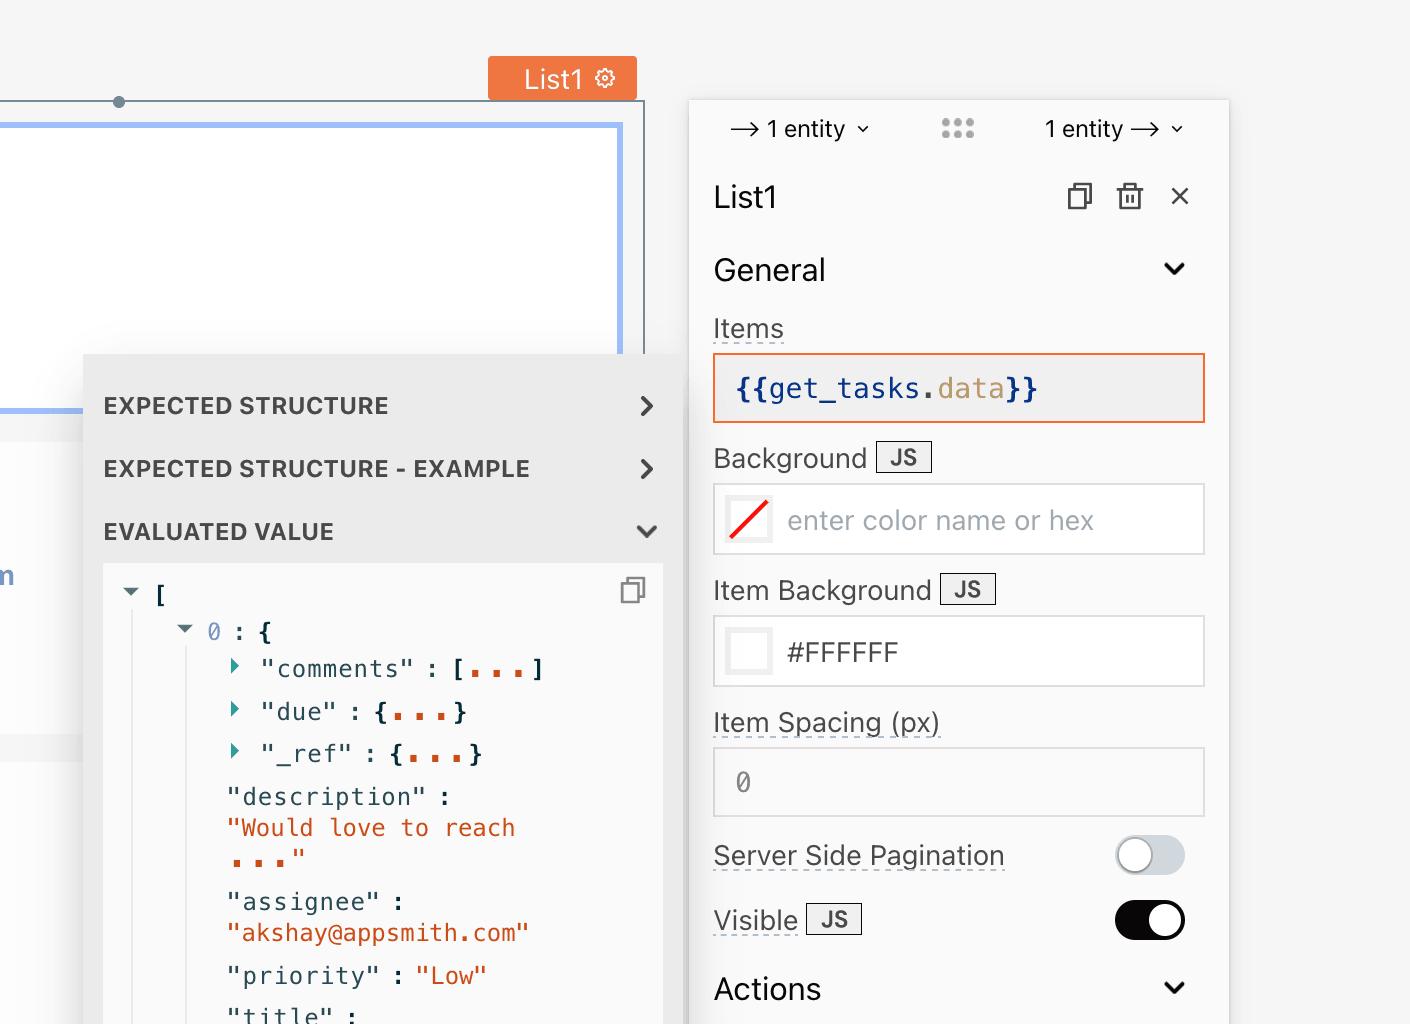
Similarly, we can display the data for each item in the List widget by bringing in Text widgets and writing their corresponding bindings.
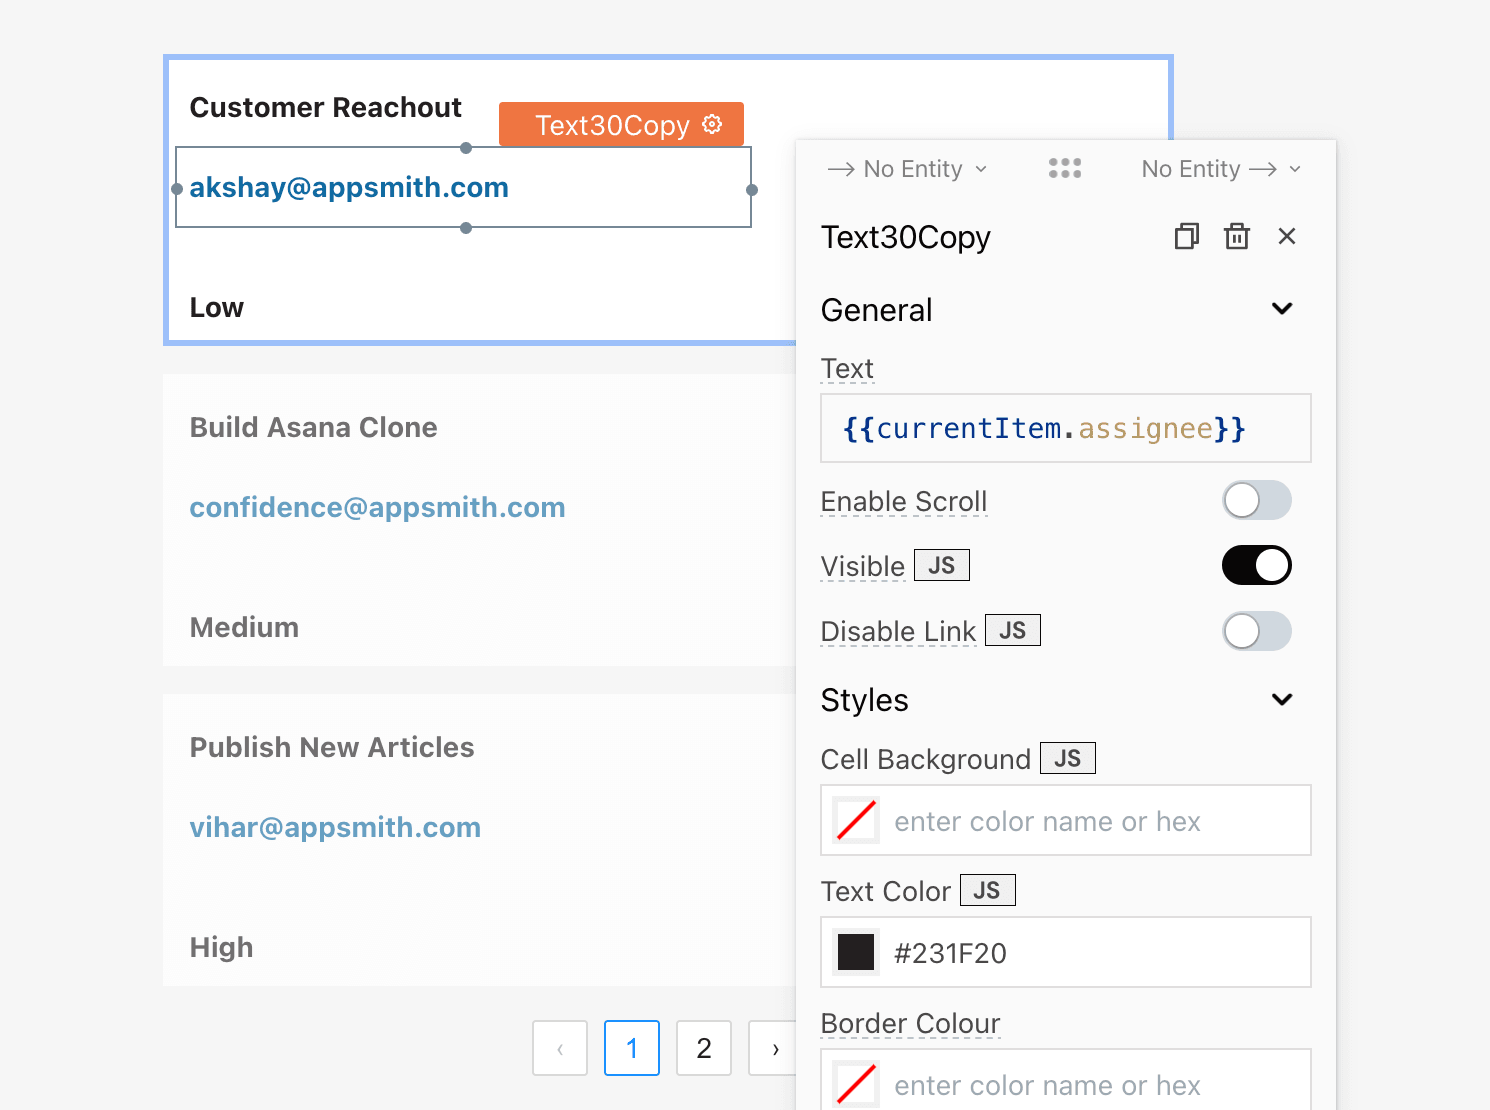
That’s all you need to know about binding data to widgets; write {{}}, and you’re good to go.
Before we move on to deploying the app, let’s spend a few minutes building a form that will allow us to update/delete tasks.
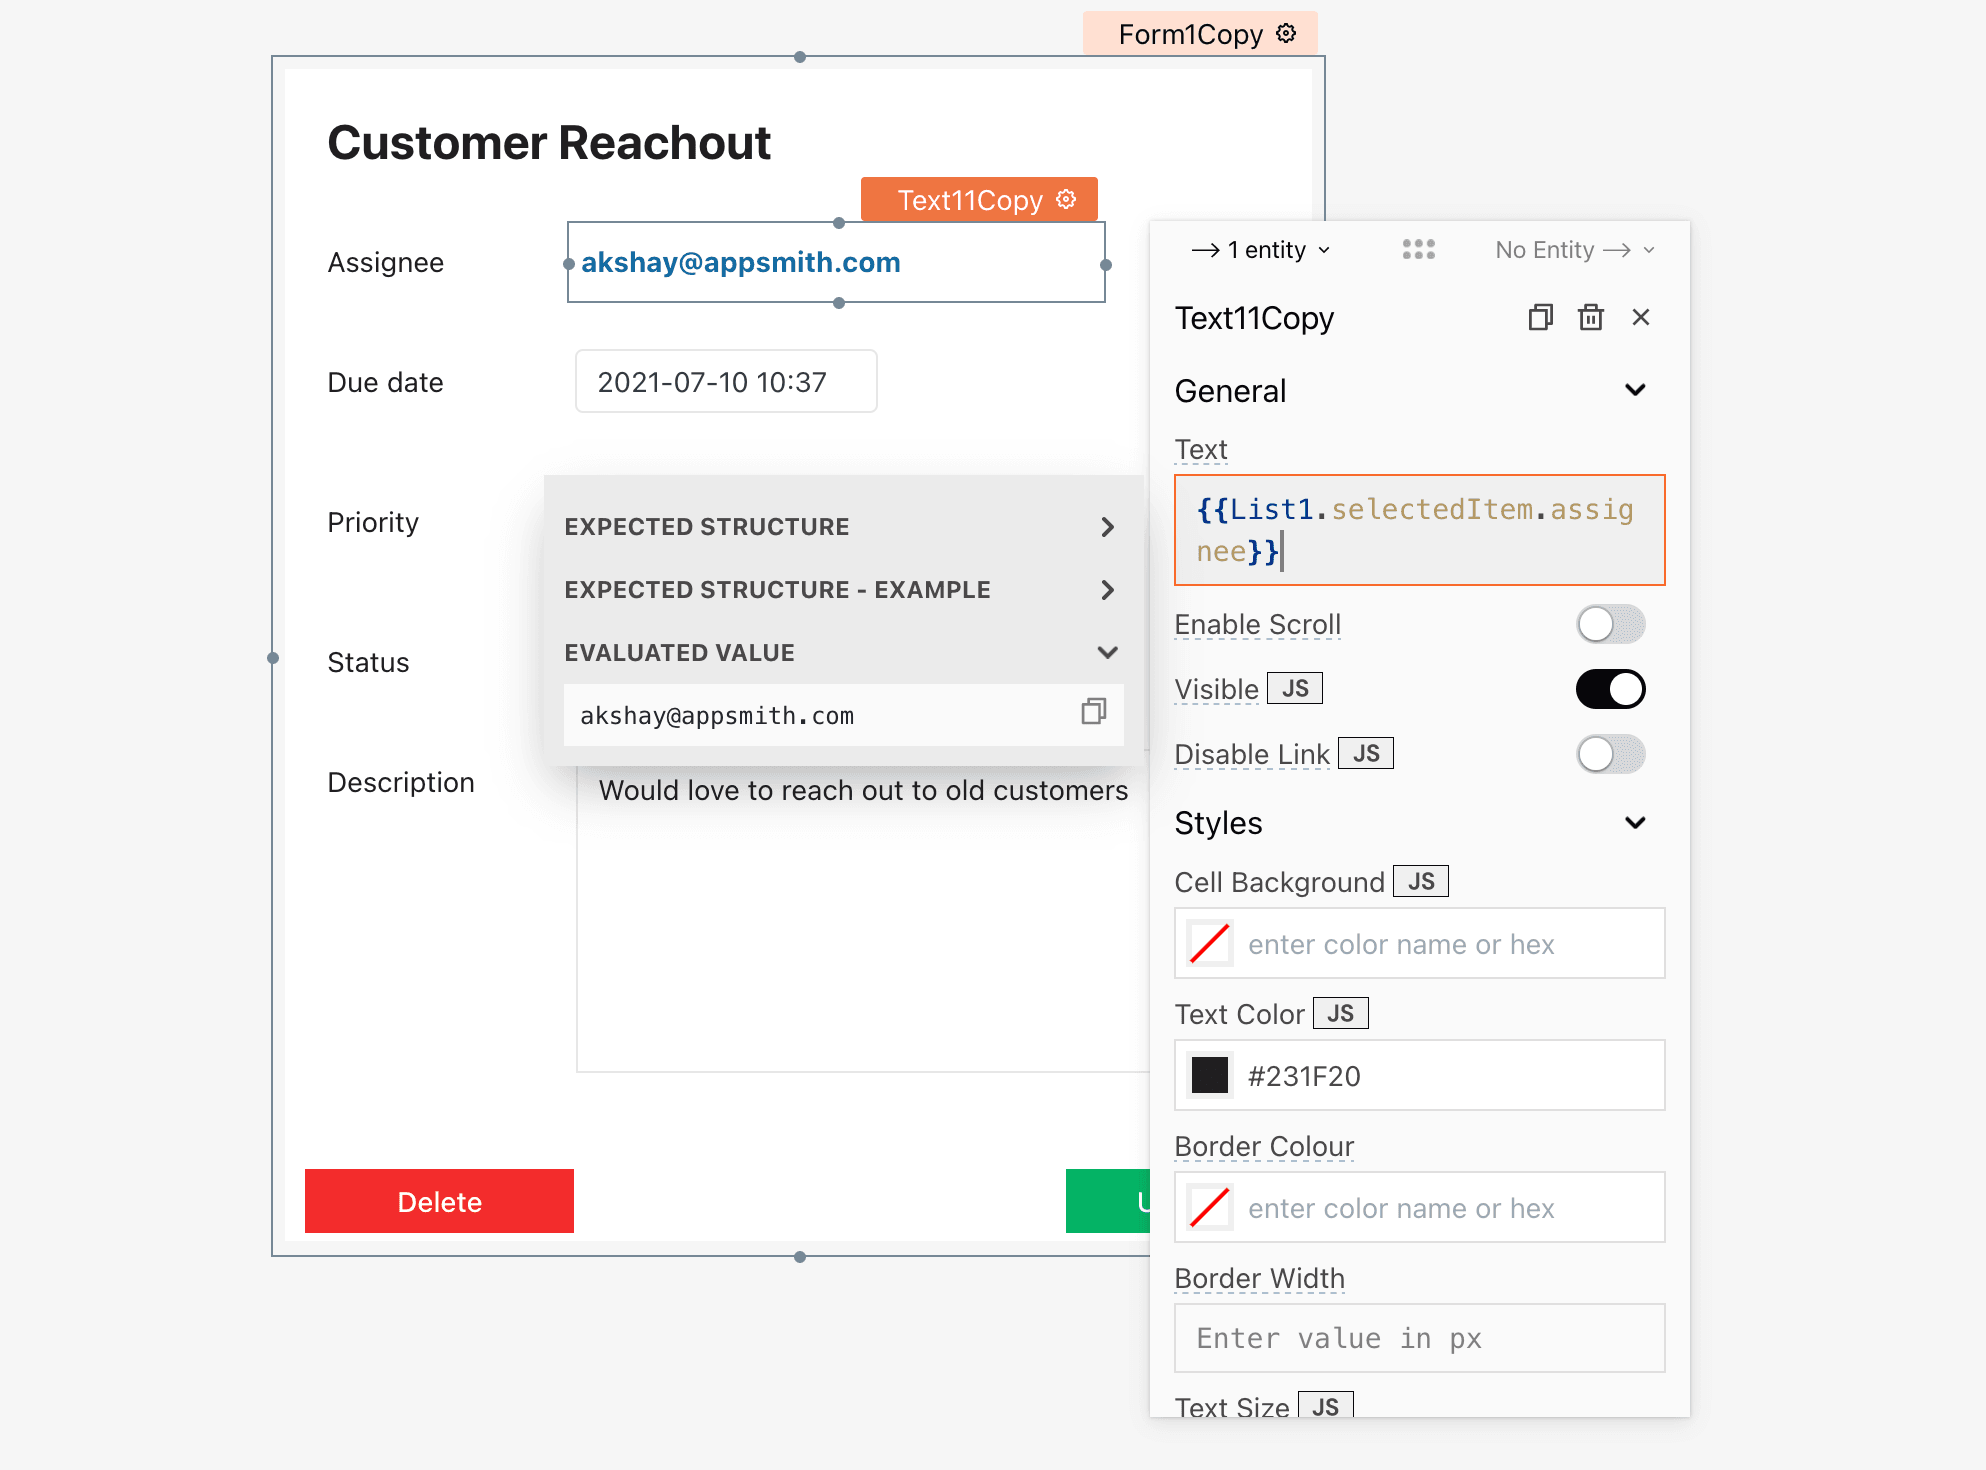
To do this, drag in a Form widget into the canvas, and use a couple of text widgets to display the information about the task selected from the List widget, such as clicking on a new item on the list will automatically update the form. Your binding should look like this:
You should also do the same for the Datepicker, Input, and Select widgets required to build the form. For example, you should configure the selected widget this way:
![select widget configuration] (res.cloudinary.com/confidenceappsmith/image..)
“”You should also rename your widget to something more descriptive as I did in the Select widget shown above
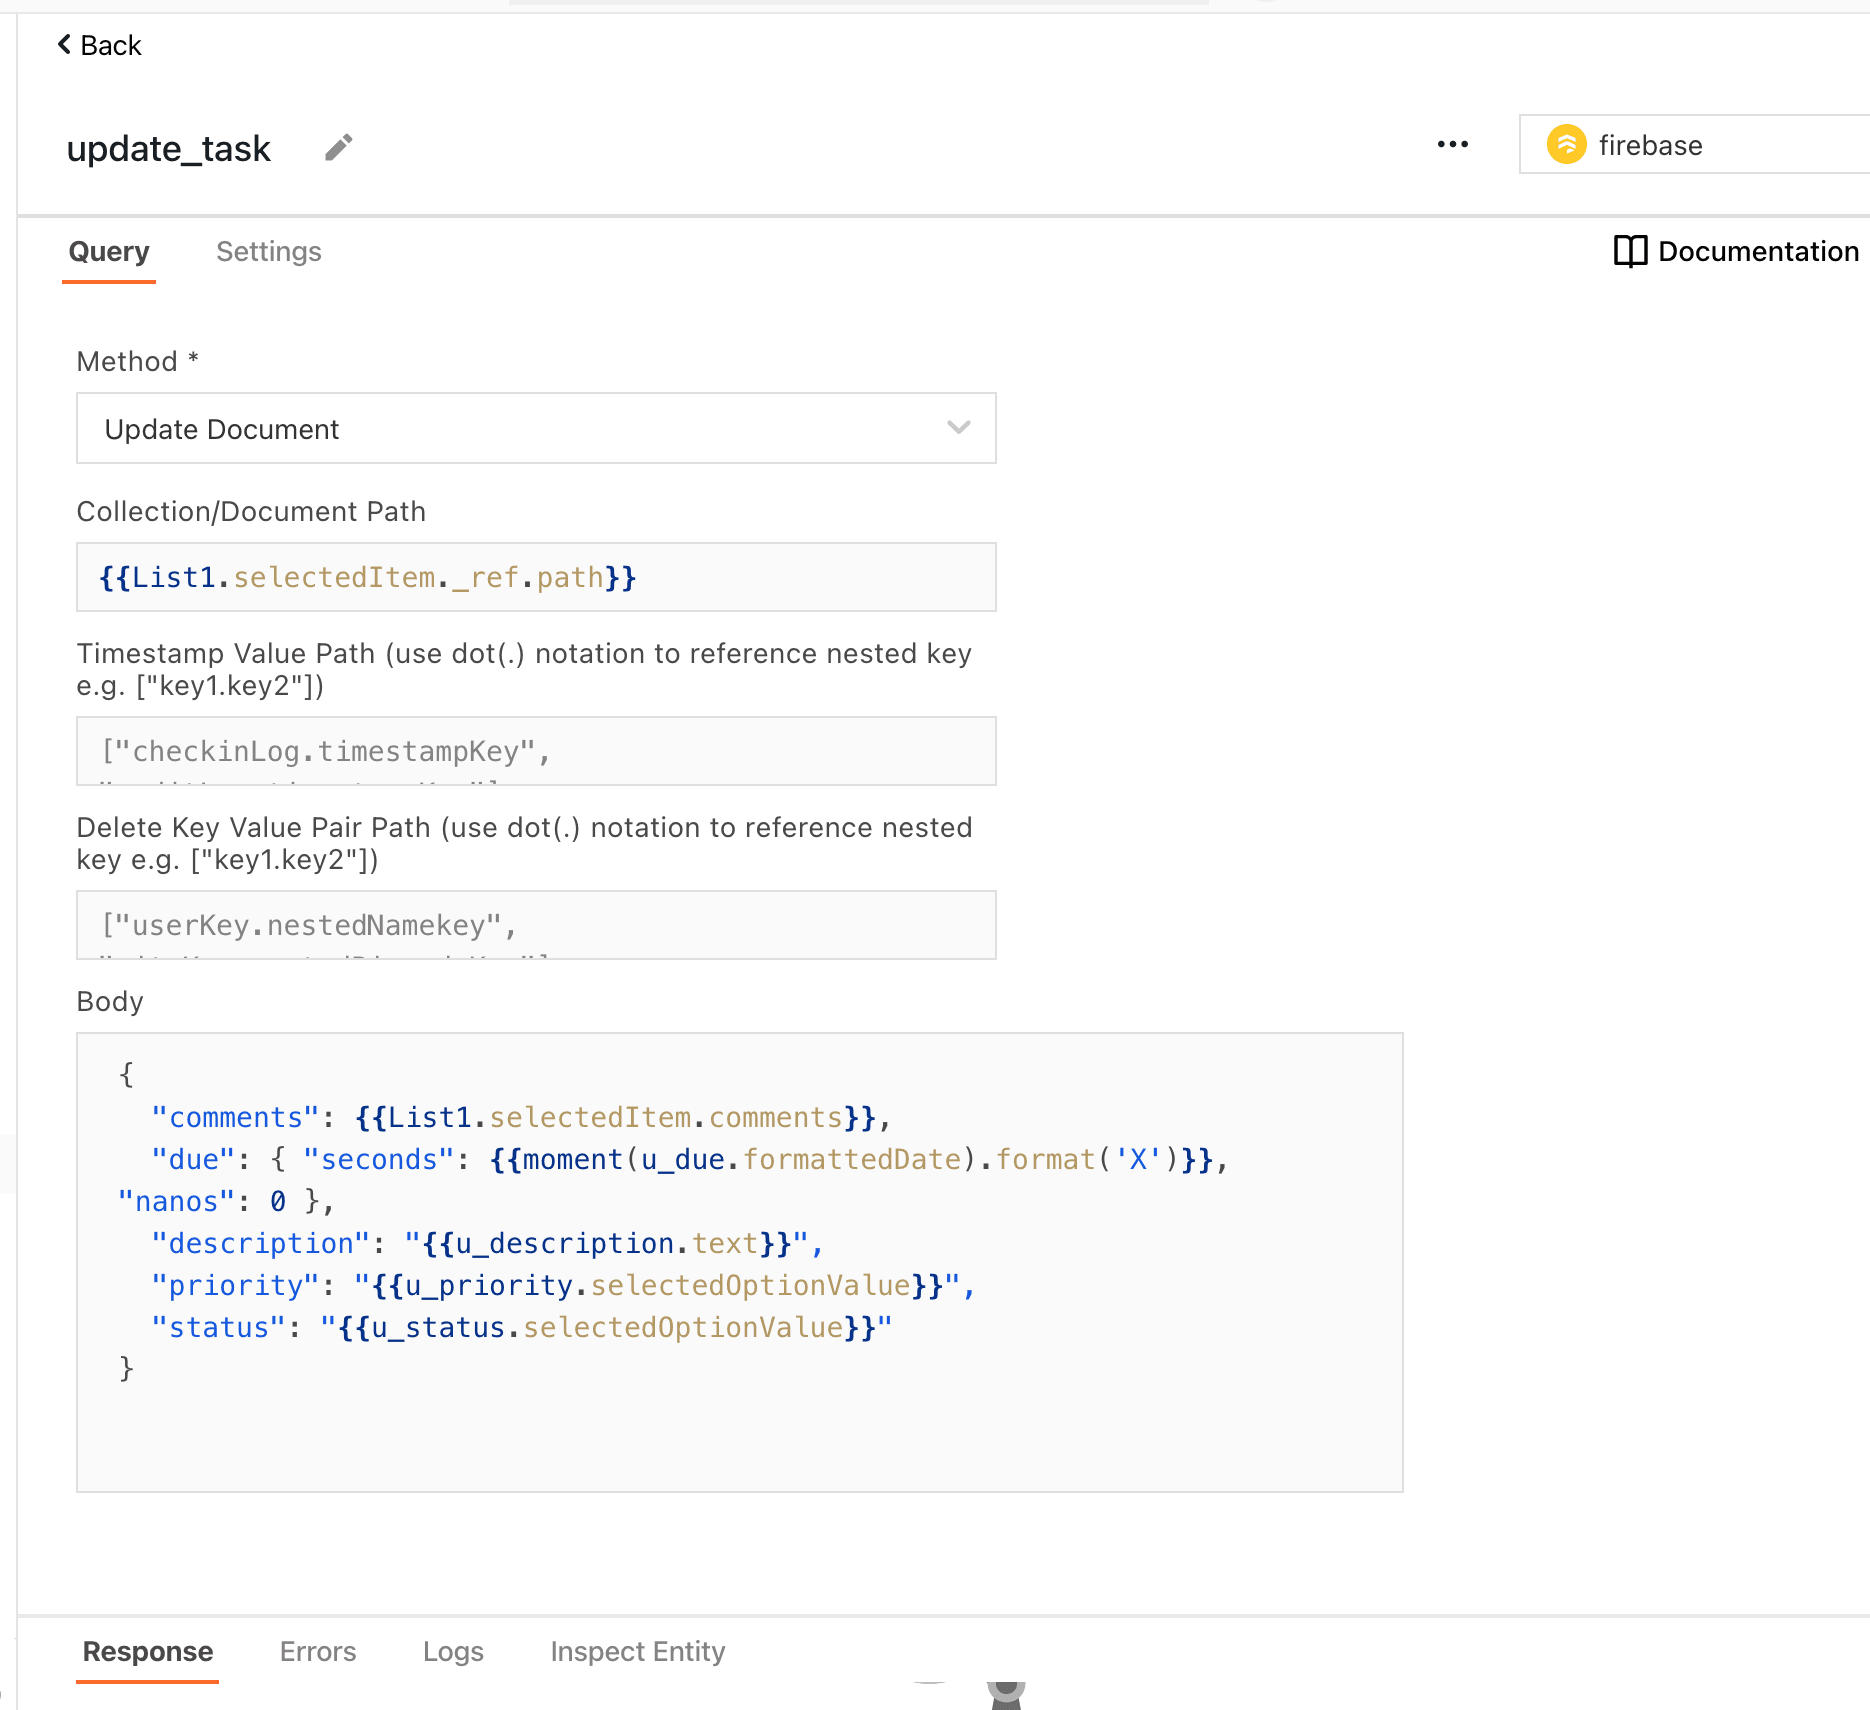
Now, using the Firestore datasource configured earlier, you can write an update query like this.
And then, configure the submit button on the form to call the update_task query when clicked.
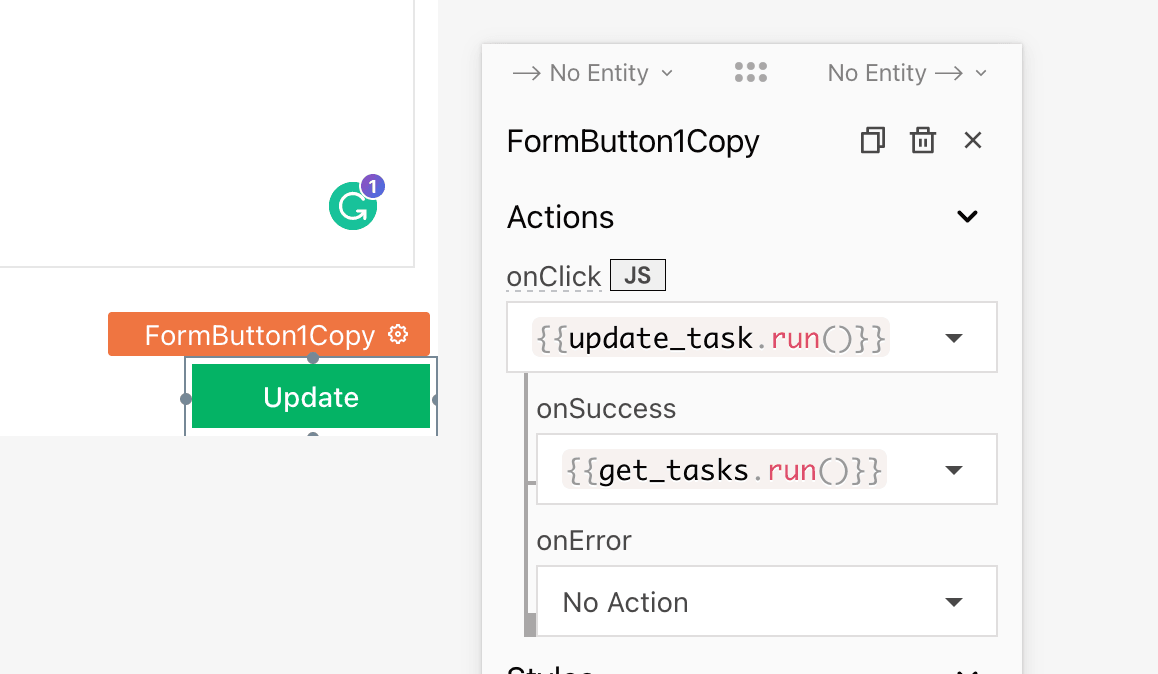
Wasn’t that was quite easy? Using the same principles, you can write a query to delete the task.
3. Deploying the application
This is by far the easiest step. To deploy an app, click on the Deploy button to the top right corner of the screen.
You may also invite others to use/develop the app or even make it publicly available. You can use the share button just beside the Deploy button. This brings up a modal:


You’ve made it! You’ve learned the core concepts of building apps with Appsmith, and I’m sure you’re ready to put this knowledge to use.
I’m going to leave a link to the app here with more features added to make it production ready. Click on this text to see the app.
Awesome! Go into the world and build! (Also consider giving us a star on GitHub)
If you have specific questions for me, just send me an email and I’ll be happy to help!


