Building an Admin Panel with Django Admin in 2026

Admin panels are at the core of every business operation: sales, analytics, user management, and many more. That said, it isn't easy to find the right tools to help you build robust and scalable systems.
Why use Django Admin to build a Django admin panel?
Django Admin has been the go-to solution for many developers over the years. It provides a fast, easy-to-use, and highly maintainable framework for building full-stack applications and admin dashboards. These reasons make it a great choice to build Django admin panels. To show you how to build admin panels with Django, we will build a dashboard for moderators to manage business reviews. All of this will be built on Postgres and the Public Yelp dataset. Here’s a sneak peek of what we’ll be building:
Awesome right? Let’s get started!
Setting up a project in Django
We start by setting up a project. A project is a collection of settings for an instance of Django, which includes a database and app configuration. A project may contain multiple apps, but we are only going to need just one.
To set up a project for our Yelp review dashboard, use your terminal and cd into a directory where you’d like to store the project and run the below command:
django-admin startproject yelpWhen that’s done, cd into the yelp directory that was created and start up the server by running the command below:
pythonmanage.pyrunserverThe server automatically watches the project for changes, so you don’t need to restart it manually
Creating an app in Django
In Django, you can have multiple apps inside a project. This means that apps are modular and can be used in multiple projects. Go ahead and create a reviews app that will hold the code for the dashboard by running the below command:
pythonmanage.pystartappreviewsYou’ll notice that a reviews directory has been created with a couple of files. This is where all the code will go.
Registering the app and database
Next, we’ll need to inform Django about the reviews app we just created. We do this by registering the app.
To register the app, open yelp/settings.py file and add reviews.apps.ReviewsConfig to the INSTALLED_APPS list. After adding this, INSTALLED_APPS should look like this:
INSTALLED_APPS = [
    'django.contrib.admin',
    'django.contrib.auth',
    'django.contrib.contenttypes',
    'django.contrib.sessions',
    'django.contrib.messages',
    'django.contrib.staticfiles',
    'reviews.apps.ReviewsConfig',
]
When that’s done, move on to configure your database connection in the DATABASES dictionary:
DATABASES = {
    'default': {
        'ENGINE': 'django.db.backends.postgresql',
        'NAME': 'your_database',
        'USER': 'your_database_user',
        'PASSWORD': 'your_database_password',
        'HOST': '127.0.0.1',
        'PORT': '5432',
    }
}
Save the changes and run the below command so that Django can set up tables in the database for the app in the INSTALLED_APPS list:
pythonmanage.pymigrateThe last thing that needs to be done here is to modify the path of the admin dashboard in the yelp/urls.py file so that it is mounted on the root path instead of /admin. Update the urlpatterns list to:
pythonmanage.pymigrateCreating models
With everything set up, we can continue with creating modes that describe the database layout. Models also show relationships between tables and can be used to specify validation and the widgets that Django will create for the dashboard UI. We will need three models: one for businesses, users, and reviews. To create these, head to reviews/models.py and paste the below code:
from django.db import models
# Model for BusinessesclassBusiness(models.Model):
    id = models.CharField(primary_key=True, max_length=100)
    name = models.CharField(max_length=100)
    address = models.CharField(max_length=100, null=True)
    city = models.CharField(max_length=100)
    state = models.CharField(max_length=100)
    stars = models.FloatField()
    categories = models.TextField(null=True)

    def__str__(self):return self.name

# Model for UsersclassUser(models.Model):
    id = models.CharField(primary_key=True, max_length=100)
    name = models.CharField(max_length=100)
    yelping_since = models.DateTimeField()

    def__str__(self):return self.name

# Options of the select widget on the UI
status_choice = (('approved', 'APPROVED'), ('pending',
                 'PENDING'), ('rejected', 'REJECTED'))

# Model for ReviewsclassReview(models.Model):
    id = models.CharField(primary_key=True, max_length=100)
    status = models.CharField(
        max_length=10, choices=status_choice, default='pending')
    user = models.ForeignKey(User, on_delete=models.CASCADE)
    business = models.ForeignKey(Business, on_delete=models.CASCADE)
    stars = models.IntegerField()
    text = models.TextField()
    date = models.DateTimeField()

    def__str__(self):return self.user.name
You’ll notice that each class represents a model of a table in the database. Each model has variables that represent the fields. The fields are annotated with their respective field types and validation/relationship where necessary. Now let’s create migrations for these models. Run the below command to do this:
Then apply the migrations
pythonmanage.pymigrateLooking at the database, you’ll notice that tables for reviews_business, reviews_user, and reviews_review have been created. At this point, you can import the yelp dataset.
“”Download the public Yelp dataset and import it into the reviews_business, reviews_user, and reviews_review tables respectively.
Taking the admin panel for a spin
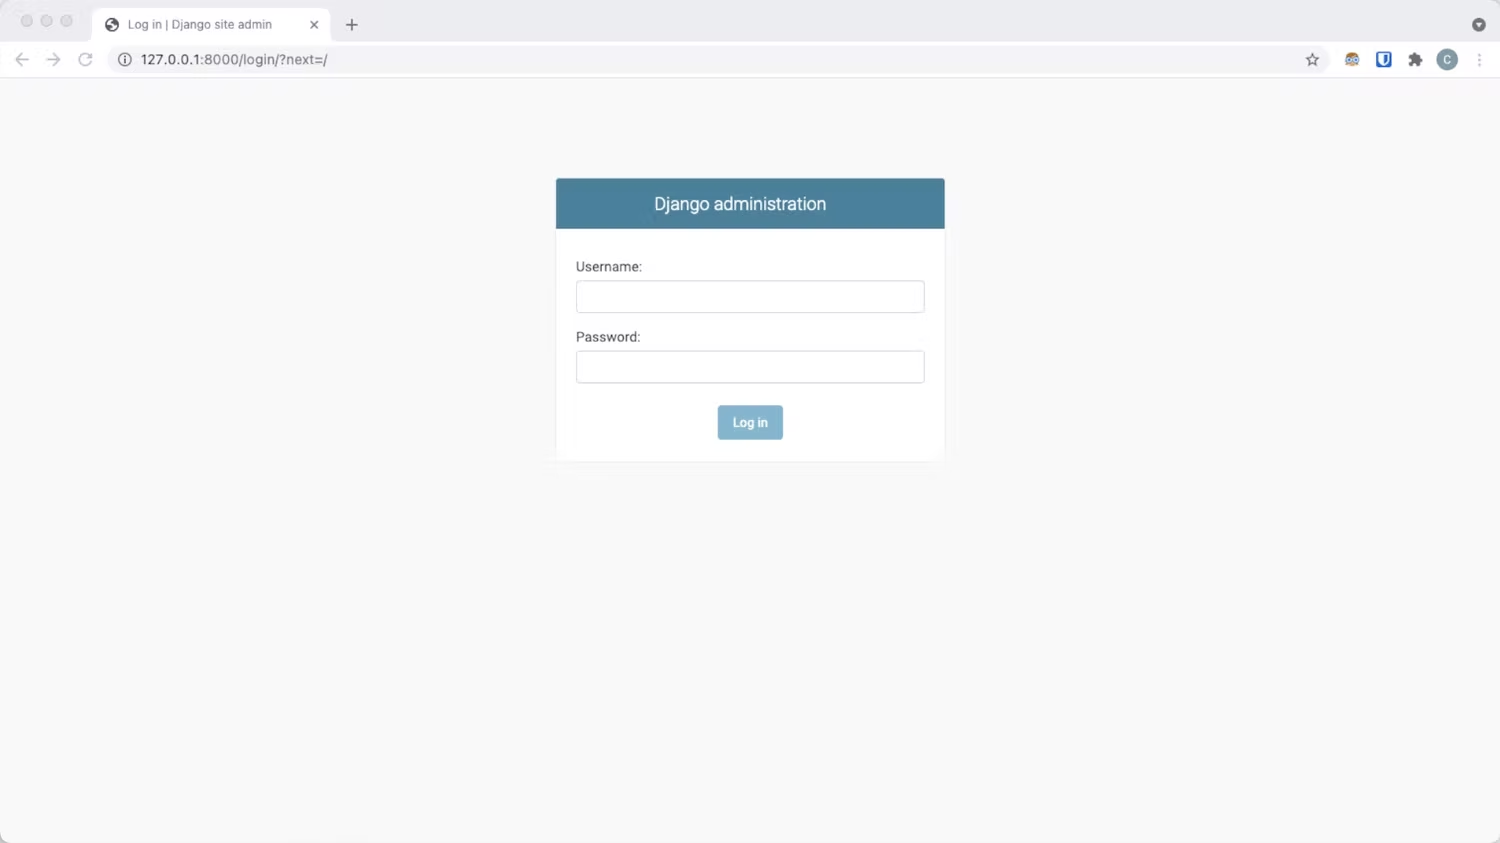
Are we ready to take the app for a spin? Not so fast. You’ll need to create an admin user to be able to view the site. To create an admin user, run the following command and answer the prompt:
pythonmanage.pycreatesuperuserOnce that’s done, start the server(if you previously closed it) and visit http://127.0.0.1:8000/:
pythonmanage.pyrunserver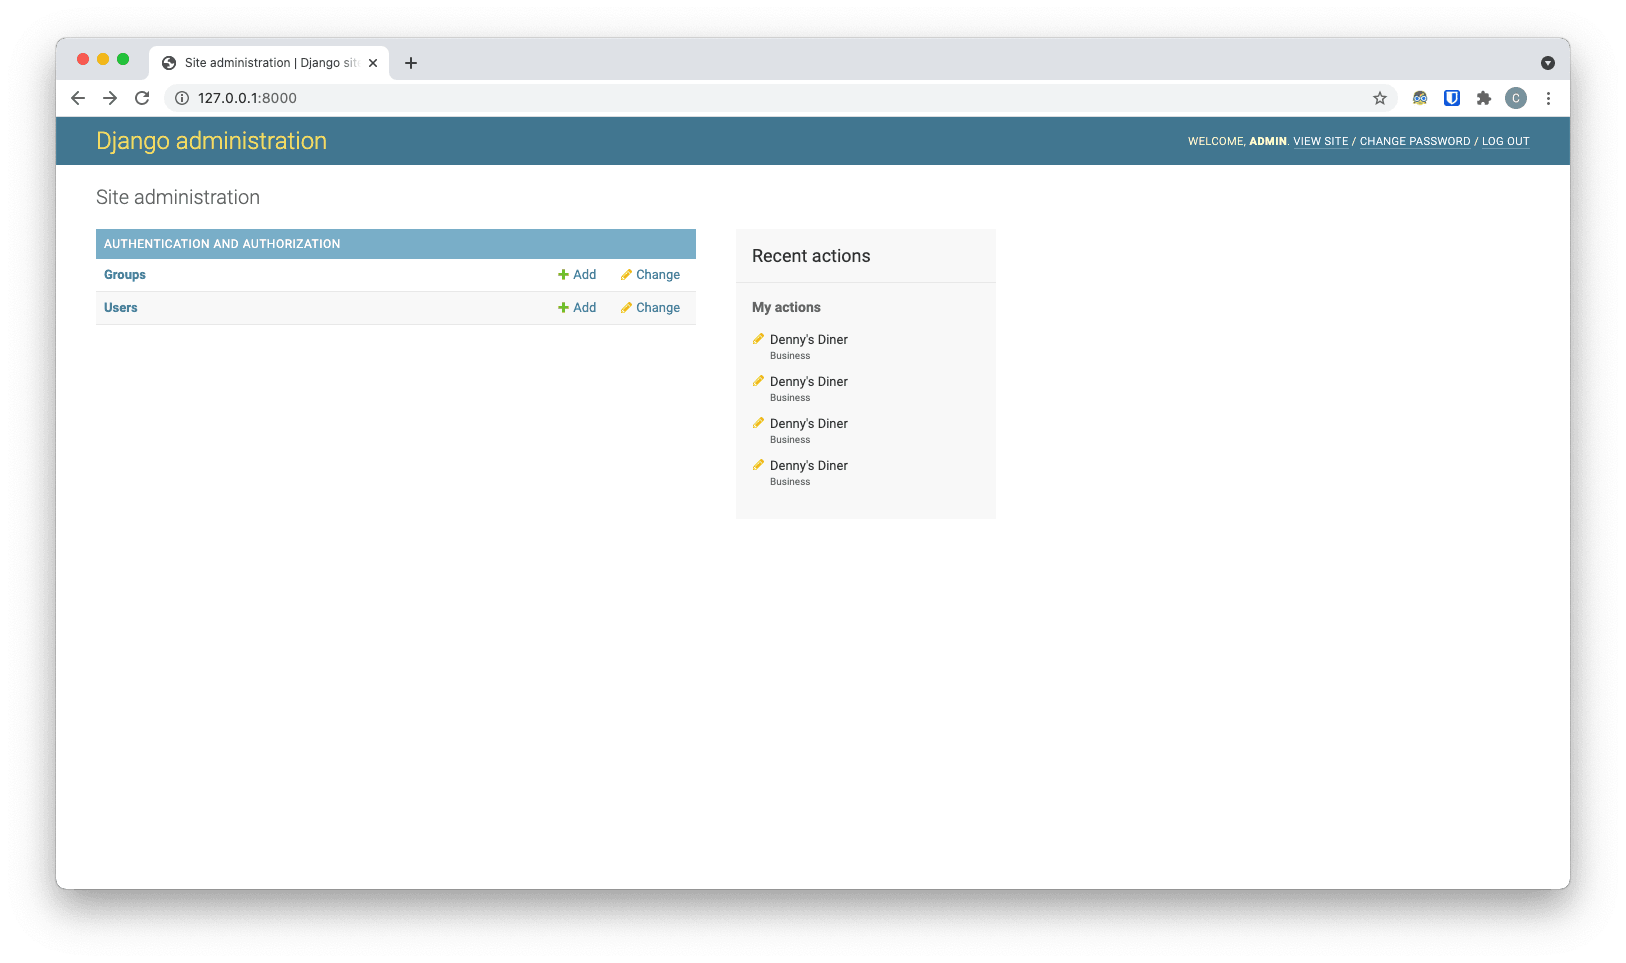
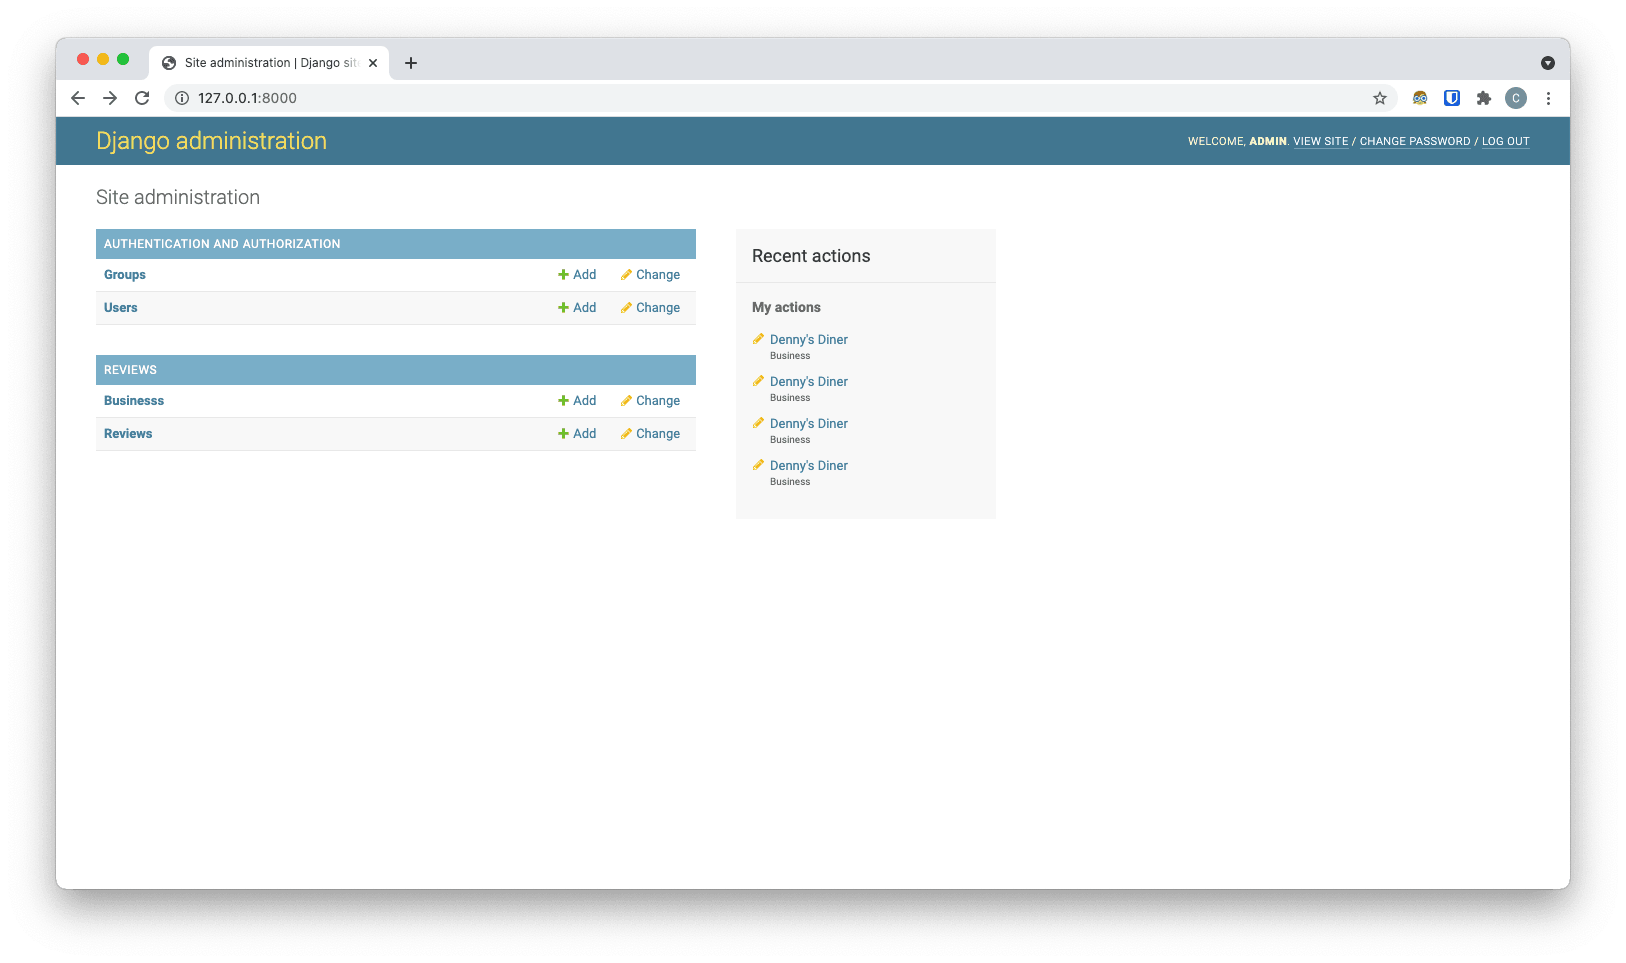
After logging in, you’ll notice that none of the models we created is showing up. Let’s fix this in the next section.
Displaying the reviews app
To make the models from the reviews app visible in the admin panel, you’ll need to register them in the reviews/admin.py file. This is quite easy to do. Add the below code to your reviews/admin.py file:
fromdjango.contribimportadminfrom.modelsimportBusiness, Reviewadmin.site.register(Review)
admin.site.register(Business)
Save the file and head back to the browser. Upon reloading, you should now see Business under the Review app.
Easy as pie, right? Play around with the dashboard to see the power of Django. But you’ll notice that the way data is displayed a little off, and we can’t see reviews for each business. Django gives us the room to improve user experience, so let’s do that.
Customizing the dashboard
We can make the reviews dashboard much better by adding some customization options. Head to the reviews/admin.py and replace its content with the below code:
from django.contrib import admin
from .models import Business, Review
# A class that displays Reviews in a table formclassReviewInline(admin.TabularInline):
model = Review
# Don't add any extra blank form for new Reviews
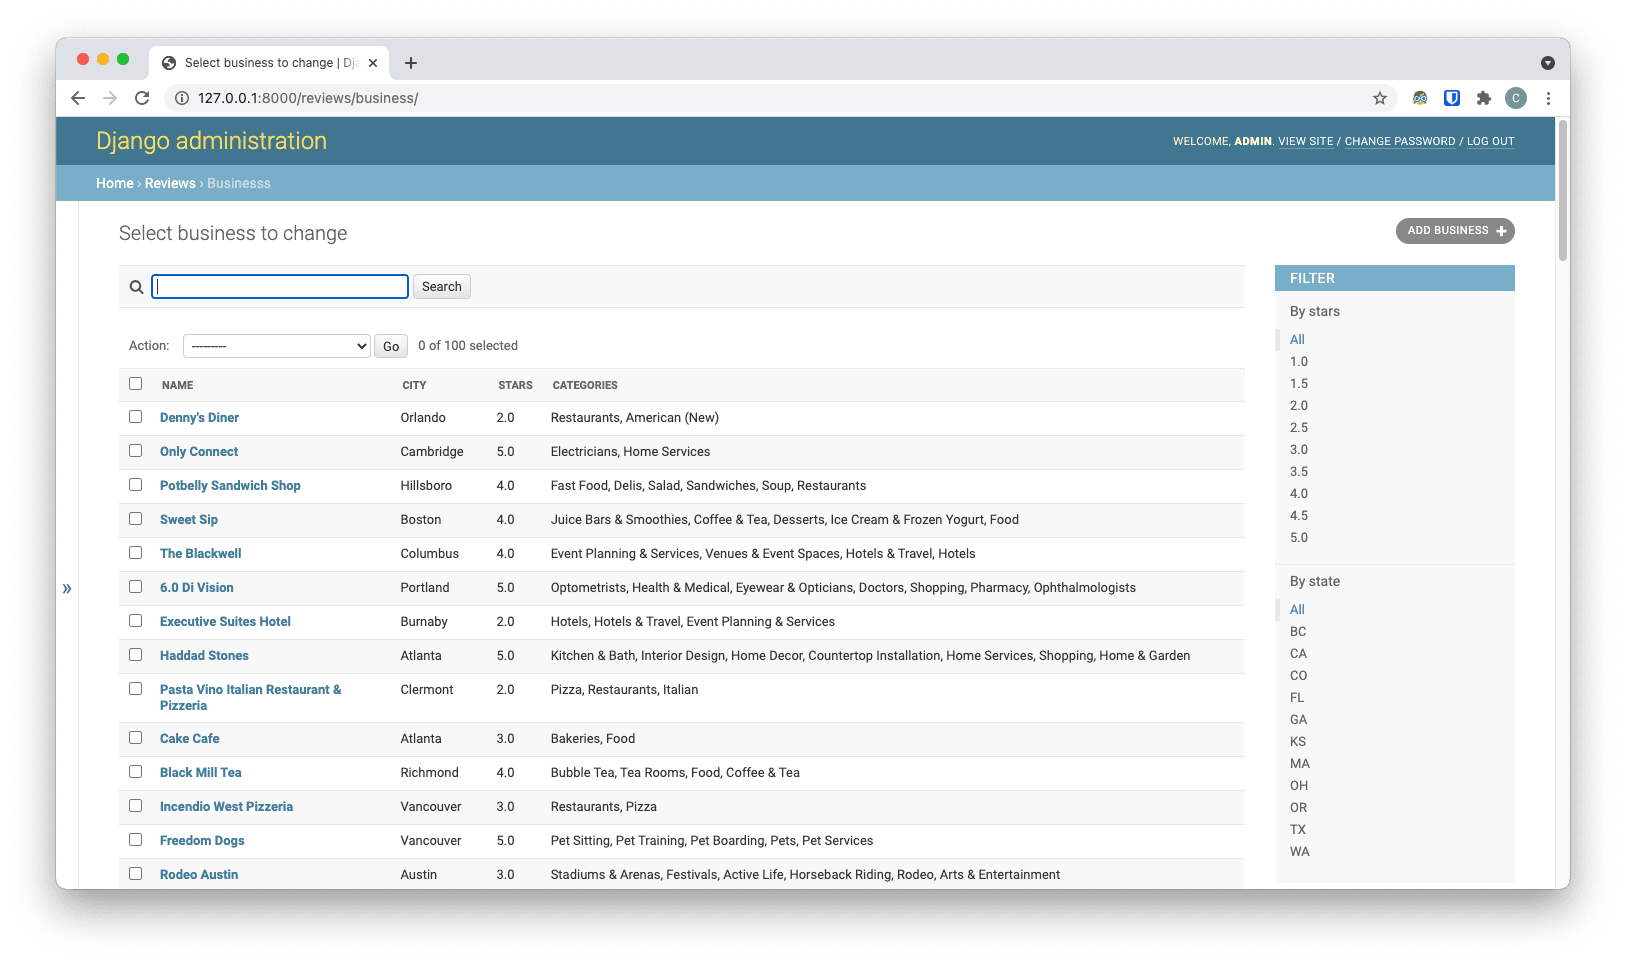
extra = 0# A class that lets us customize the Business listclassBusinessAdmin(admin.ModelAdmin):# Embed reviews in related businesses
inlines = [ReviewInline]
# Show the below properties in the Business list
list_display = ('name', 'city', 'stars', 'categories')
# Add filters for state and stars
list_filter = ['stars', 'state']
# Make the Business list searchable by name
search_fields = ['name']
# We don't want ids showing up
exclude = ('id',)
admin.site.register(Business, BusinessAdmin)Save the file and head to your browser. You’ll immediately notice that you have a much better dashboard experience.
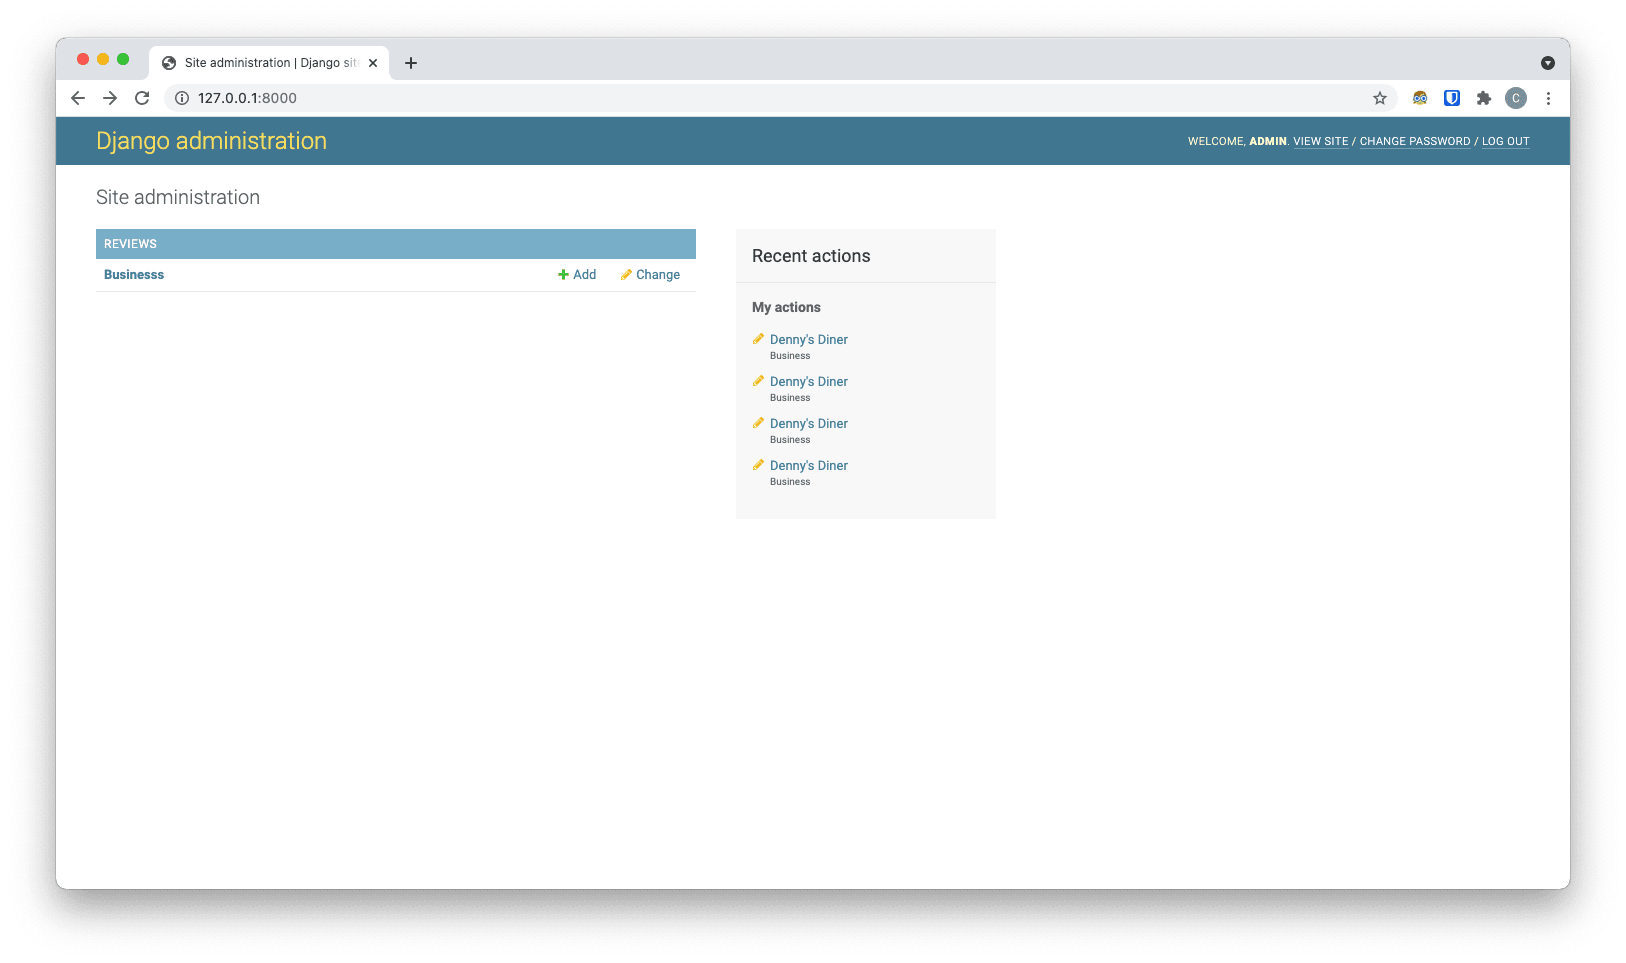
We can make the dashboard cleaner by removing the annoying AUTHENTICATION AND AUTHORIZATION app that shows up by default. To do this, add these lines to your reviews/admin.py file:
# Add this to the top of your filefrom django.contrib.auth.models import Group, User

# …previous code goes here# Add this to the bottom of your file
admin.site.unregister(User)
admin.site.unregister(Group)
Save the file and reload your browser. Now we have a super clean functional Django reviews dashboard.
Conclusion: The admin panel is just a start
Now that the application is fully built, you can play around with it. This dashboard makes it easy for moderators to search for a business and approve reviews made by users. Here’s everything in action:
And that’s a wrap! If you found this article helpful, please leave a like and check out our awesome product for building internal tools appsmith.com
Related Blog Posts