How to build a Baserow CRUD app in Appsmith

Imagine you're the CTO of a fast-growing, bootstrapped startup in the fitech or healthcare industry, where data is sensitive and tightly controlled. Your company needs a quick solution for tracking HR processes, customer onboarding, inventory, etc. that can be self-hosted in the secure company network, not in the cloud. There’s no time to build each app from the ground up with a full stack approach and no budget to buy a prebuilt solution. Oh, and it has to support version control, and branches so multiple devs can build out the various apps. And you need it ASAP!
Sound impossible? Actually, all you need is two open-source tools: Appsmith + Baserow. Both can be self-hosted for free and together, you can build and securely host all the apps and data needed for your entire organization, complete with version control and branches for collaborative development.
This post will cover how to enable the Baserow API, create a new datasource connection in Appsmith, and then build a simple CRUD app. From there, your team will have all the tools necessary to start building a full suite of internal tools using Appsmith’s 45 pre-built UI components and Baserow for data and file storage.
See the docs for details on how to get started with self-hosting Appsmith or Baserow, or follow along using the free cloud hosted versions.
Why Baserow + Appsmith?
Appsmith is an open source low-code platform for developing custom web apps with any REST/GraphQL API or database, with powerful features like importing JS libraries and version control with GitHub or GitLab. It, and can also be self-hosted for free.
Baserow is similar to Airtable in that it offers a complete solution for data and file storage, but it has the additional advantage of being open-source and easy to self-host for free. Baserow also ships with a library of templates containing mock data to use as starting points when building your apps.
By integrating these two platforms, we can create an entire suite of apps for any startup. Team members can collaborate on development, control feature releases and testing, and everything can easily be self-hosted for free with just a few Docker commands.
Getting down to business
In this post, we will provide a step-by-step guide on how to integrate Baserow with Appsmith, enabling users to create a basic CRUD app using the Baserow API datasource. We will begin by explaining how to enable the Baserow API followed by a guide on creating a basic CRUD app using the Baserow API as a datasource.
Baserow API
The Baserow API is easy to enable and offers granular permissions that are specific to each table. Just open the Settings, then click Database tokens, then create a token and set the CRUD permissions as needed for your application.
Creating a database token
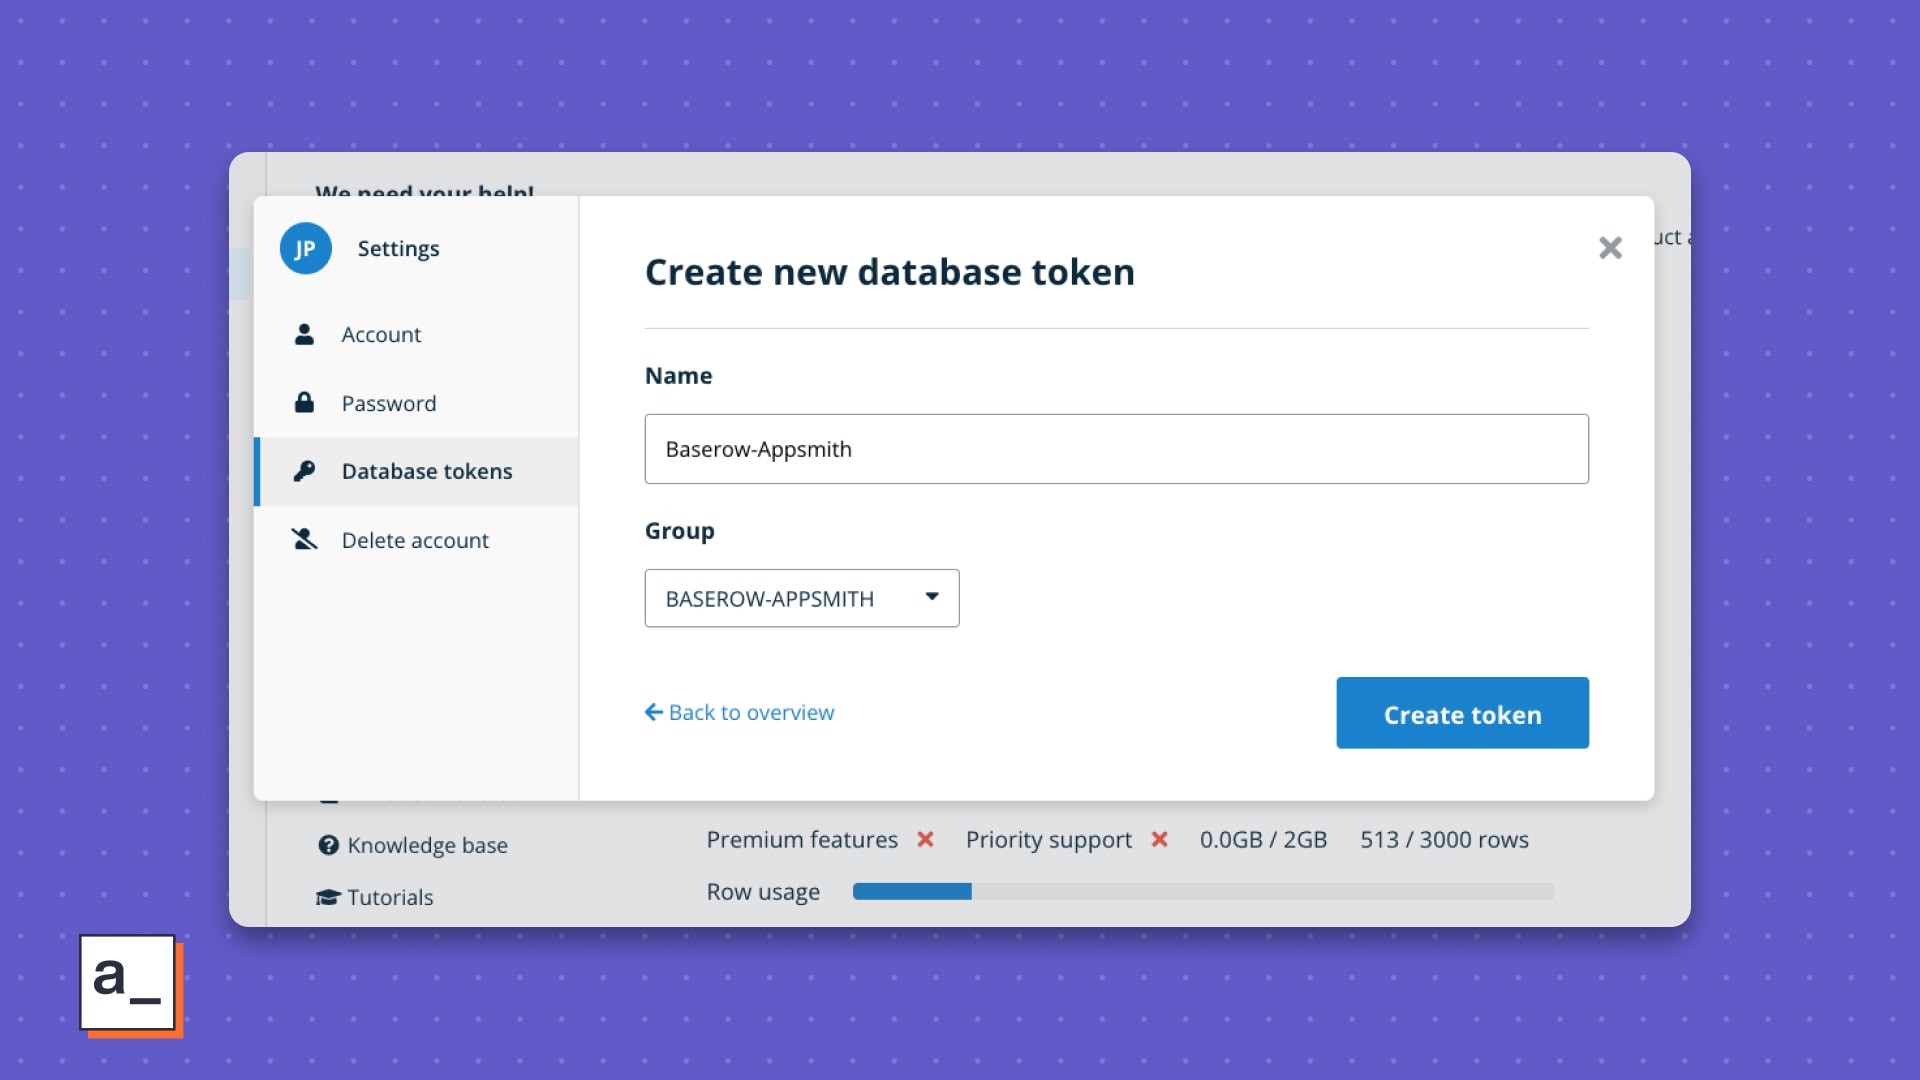
From the Baserow Settings, Click Database tokens, then Create token +
Enter a name, and select the group with the table you want to connect
Click Create token
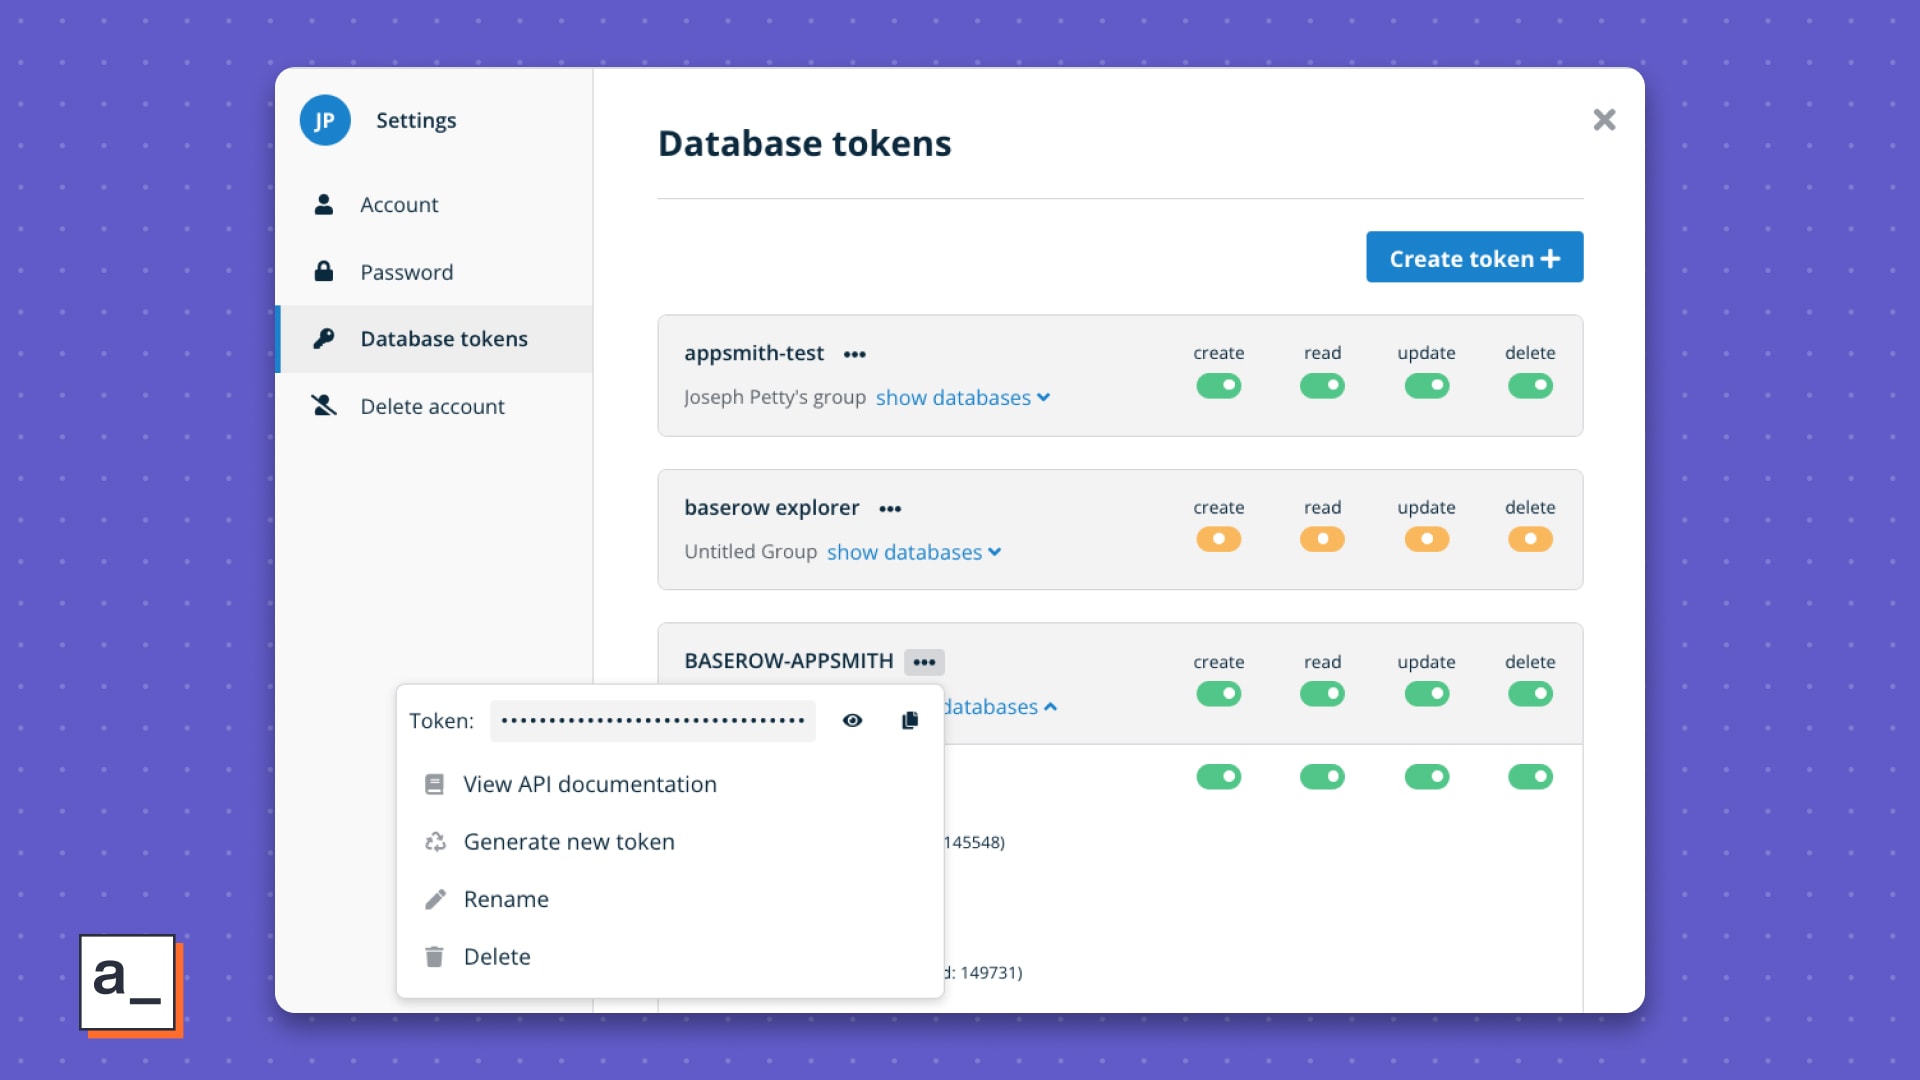
Ok, now that the API is enabled, you can connect from Appsmith and start building the frontend. Keep this page open so you can copy the token shortly.
Building a basic CRUD app in Appsmith
In this section, you will learn how to create a basic CRUD (Create, Read, Update, Delete) app in Appsmith using the Baserow API datasource. We’ll cover how to add, edit, and delete rows and files by connecting APIs with widgets like the Table and FilePicker widgets.
Start out by creating a new app in Appsmith. You may want to create it in a new workspace if you want to separate the Baserow datasource from other apps or users in your Appsmith account.
Reading Baserow records (GET)
First, create the GET request to read data from your Baserow table. We’ll use the curl importer to speed things up.
Copy this value to the clipboard:
curl \
-X GET \
-H "Authorization: Token YOUR_DATABASE_TOKEN" \
"https://api.baserow.io/api/database/rows/table/TABLE_ID/?user_field_names=true"
Then click the (+) to add a new Query/JS and choose curl import
Paste in the curl and then click Import
Rename the API to "getRows"
Update the Authorization header to use your token from Baserow
Update the URL with the
TABLE_IDfrom your table (found in URL in Baserow)Run the API

You should get back a response with the rows from your Baserow table. Next, just click the Table widget on the right side pane under Connections > Add new widget. Or to add one manually:
Setting up the Table widget
Drag a Table widget onto the canvas
In the widget properties, set the source data to:
getRecords.dataCongratulate yourself on connecting your first widget!
Create an API datasource in Appsmith
Okay, before we create the next API, let’s save this one as an Authenticated API datasource. This will save the token on the server, instead of keeping it exposed in the editor (client-side).
Click SAVE AS DATASOURCE (top right, under the RUN button)
For Authentication Type, select API Key
Set the Key to Authorization, and paste the token in the Value
Set the Add To field to Header
Delete the old Authentication header
Save the datasource
Retest the GET API
Nice! Now the token is safely stored on the server, and we can re-use it in multiple queries. This lets you share the app with anyone in your team without exposing the token itself.
Security Note: Queries get routed through the Appsmith server, then the credentials are appended to the request before sending. However, the response is returned directly to the client, so your query responses never pass through the Appsmith server.
Creating Baserow records (POST)
Now we’ll add a new row, using the Add new row feature of the table widget!
In the Table widget properties, enable Allow adding a row
Set at least one column to be editable
Create a new API under the Baserow Datasource (left sidebar)
Set the method to POST
Use the same URL as the GET API
Go back to the Table widget and click Add new row from the toolbar at the top of the table
Enter data for at least one of the editable fields, to populate the table’s newRow object (but don’t save it)
Go back to the POST API, and set the body to
Table1.newRowRun the API
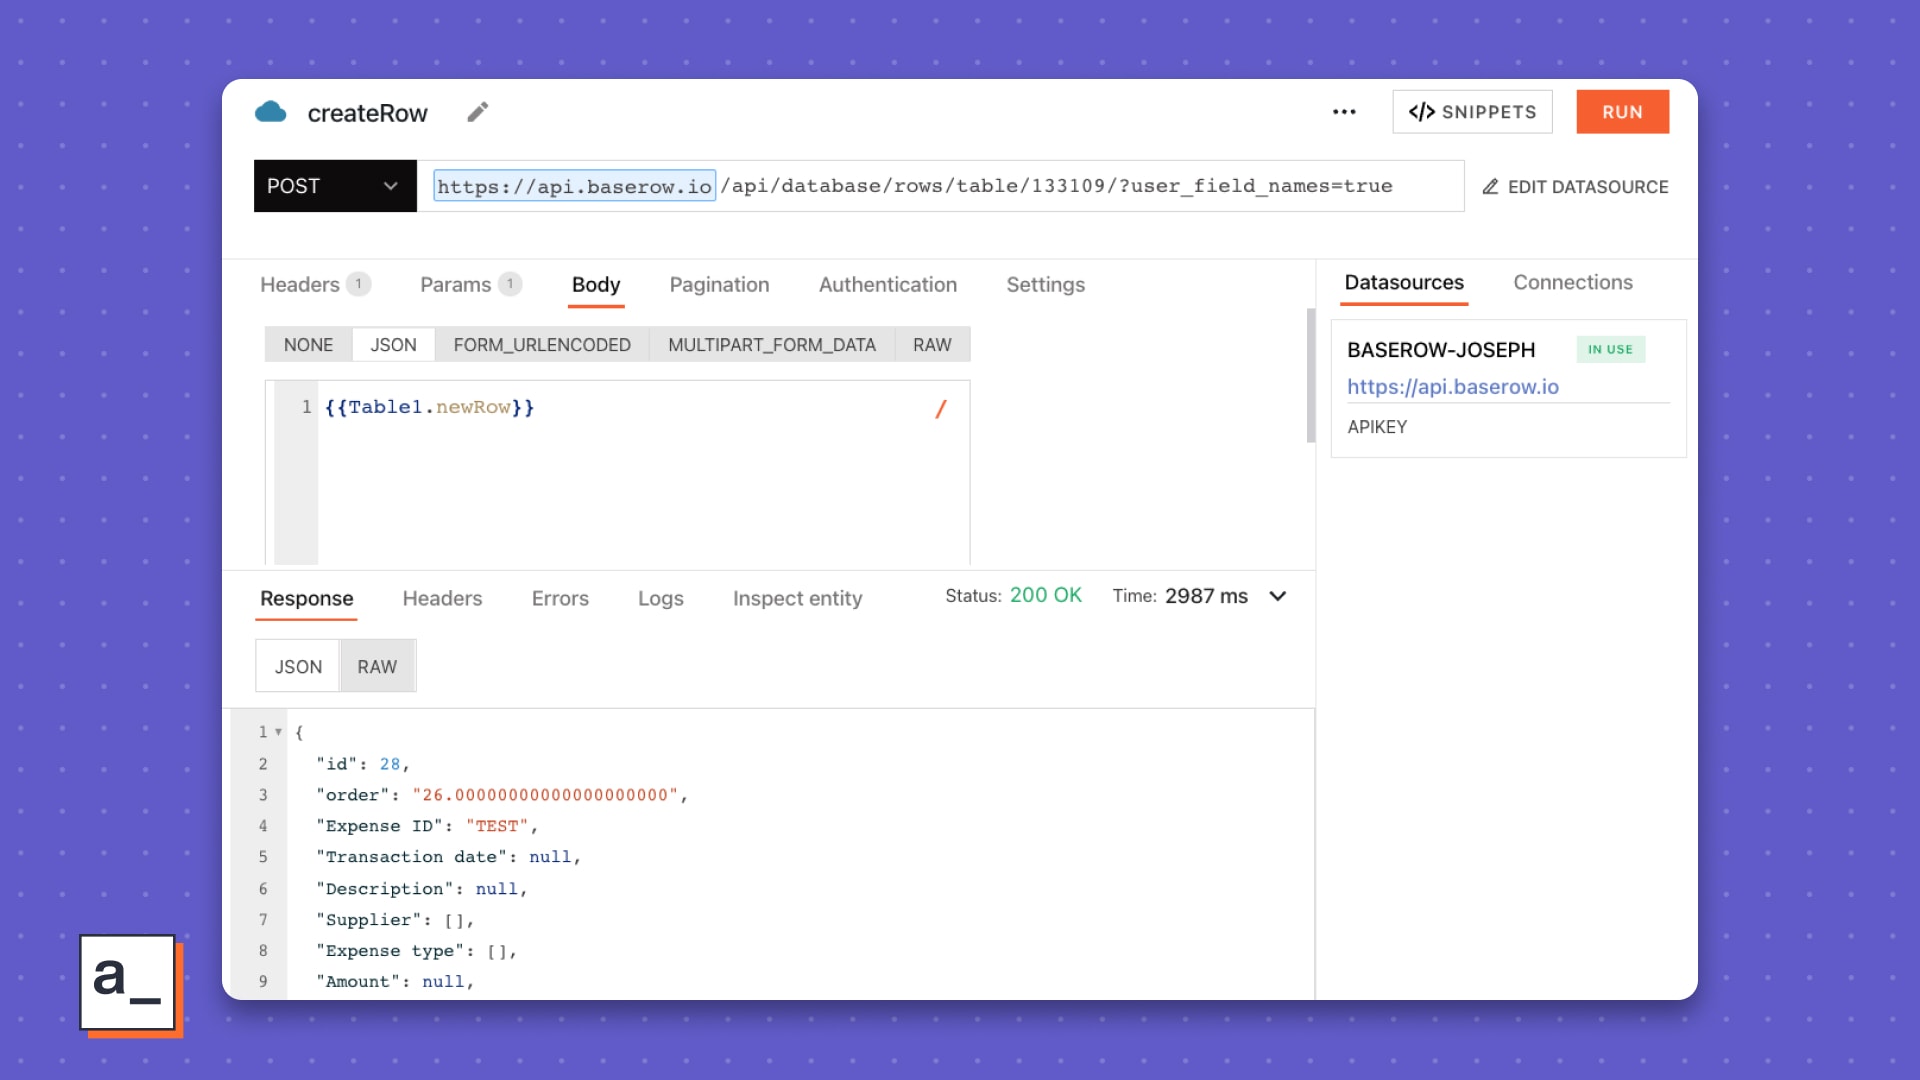
You should get back a 200 response, showing that the row was created. But the table didn’t update to show the new row! To show the new value, the GET request has to be called, right after the POST. Don’t worry, the Table widget has that covered.
In the Table properties, under Adding a Row, set the OnSave action to run the POST API
Set the onSuccess to run the GET API to refresh the table
Test adding a new row again, using the Table widget’s Add a row feature
Ok, now let’s update a row. Again we can use the Table widget, with the Row editing feature.
Updating Baserow records (PUT)
Create a new API under the Baserow datasource
Set the method to PUT
Use the same URL as before
Make a draft edit to an existing row, to populate the
Table1.updatedRowobjectSet the PUT API body to
{{Table1.updatedRow}}Back in the widget properties, set the onRowUpdate to run the PUT API
Set the onSuccess action to run the GET API
You should now be able to update a row though the table widget, save it, and see the table refresh to confirm the edits.
Deleting Baserow records (DELETE)
Did you know you can add buttons to the table widget? We can add a delete button at the row level and pass in the row data to the DELETE API to tell it what row to delete. We’ll use the Table widget’s triggeredRow property to find the correct row (not to be confused with Table1.selectedRow).
Create a new API under the Baserow datasource
Set the method to DELETE
Go to the settings tab and enable ‘ask for confirmation before running’
Set the URL to:
https://api.baserow.io/api/database/rows/table/TABLE_ID/{{Table1.triggeredRow.id}}/In the Table widget properties, click Add Column
Set the type to Button
Set the name and label to Delete
Set the onClick action to run the DELETE API
Set the onSuccess to run the GET API
Test the new Delete button from the Table widget

Alright, we’ve covered create, read, update and delete for everything in Baserow… except files! Sorry, Table widget, we’re gonna finally have to call in backup. Enter the FilePicker widget.
Uploading files
Now for uploading files. Before a file can be added to a row in Baserow, it has to be uploaded to the Files endpoint. The API will return a unique identifier for the new file, which can then be inserted into an existing row.
We’ll use Appsmith’s FilePicker widget to select a local file, then upload it to the Baserow API.
Add a FilePicker widget, and set the file type to Binary
Refresh the page to ensure new files are loaded as binary (Default is Base64, but the Baserow API expects Binary)
Select a file, so the FilePicker is populated with data
Add a new PATCH API:
https://api.baserow.io/api/database/rows/table/TABLE_ID/{{Table1.selectedRow.id}}/?user_field_names=trueSet the body to MULTIPART_FORM_DATA
Set the first part to:
Key: file
Type: File
Value: {{FilePicker1.files[0]}}
Run the API
The response should look something like this:
{
  "size": 24090,
  "mime_type": "image/png",
  "is_image": false,
  "image_width": null,
  "image_height": null,
  "uploaded_at": "2023-03-23T11:38:03.019581Z",
  "url": "https://baserow-media.ams3.digitaloceanspaces.com/user_files/f4Z1z0dENpMs0SGM9HsAyZG4Srb7BwyQ_8b920ab1c1cc96384661558018db921d296e268670478aa4d1a4c5d1d1926b98.png",
  "thumbnails": null,
  "name": "f4Z1z0dENpMs0SGM9HsAyZG4Srb7BwyQ_8b920ab1c1cc96384661558018db921d296e268670478aa4d1a4c5d1d1926b98.png",
  "original_name": "appsmith.png"
}
Note how the name value is actually the unique ID and there is a separate original_name field. This name value is what you’ll need to include when linking a file to a row.
Adding files to a row
Now that the file has been uploaded to Baserow, it can be linked to an existing row of your table. Just send a PATCH request with the name of the File-type field (“Receipt”, in this case) with an array of file objects that have a name property.
{
    "Receipt": [
        {
            "name": {{uploadFile.data.name}}
        }
    ]
}
Ok, let’s tie this altogether now. After the FilePicker is loaded with a file, we want the file name to be saved to an existing row, then we need to refresh the dataset again to see the change. We’ll use the selectedRow of the Table widget this time, and the trigger will be from the FilePicker’s upload button.
Link a file to a row (PATCH)
Create a new Baserow API and set the method to PATCH
Set the body-type to JSON and paste in the above template
Update the field name to your file-field if needed
Set the URL to:
https://api.baserow.io/api/database/rows/table/TABLE_ID/{{Table1.selectedRow.id}}}/?user_field_names=trueCreate a new JS Object
Paste this code, and update the query names to match yours if needed:
export default {
	fileUploader: async () => {
		await uploadFile.run();
		await linkFile.run();
		getRows.run()
	}
}
In the FilePicker, set the onFilesSelected action to run the new
fileUploader()function from JSObject1Test uploading a file from the FilePicker widget.
Did it upload the file? 🫣
Did it link it to the selected row?! 🥹
Did it refresh the table?!! 😲
YES! Yes it did.

We have everything we need now to build full CRUD apps, complete with file storage and Git versioning, all on our own self-hosted stack!
Conclusion
As you can see, integrating Baserow with Appsmith is a great way to create powerful web applications quickly and easily, especially when you need to host the data yourself. From here you can start building your own CRUD app from scratch, or use one of Baserow’s template datasets or Appsmith’s template apps to get started even faster.


