Improve Customer Experience, Enable Sales Inquiries with Twilio and Appsmith


Twilio provides programmable communication tools for making and receiving phone calls, sending and receiving text messages, and performing other communication functions using its web service APIs. In this tutorial, we will show you how to build a customer messaging platform using Twilio and Appsmith.
This tool can help organizations communicate with users about a new feature launch, sales inquiries, support queries, and welcome messages.
You can also access this tool as a forkable template. Use this link to follow along or make your changes.
With this app, you can:
Select a set of customers from the table of customers.
Select a message from a list of messages that can be sent to a customer.
Customize the message that is to be sent to a customer.
Send an SMS or a WhatsApp message to the selected customers via the Twilio integration.
Manage customer contacts
Getting Started
Setting up Appsmith
Head onto appsmith.com to sign up for a new account or log in to an existing account.
Create a new application in your preferred organization, and you’ll now see an editor where you can drag and drop UI widgets to build UI.
Set up UI for your app
Select a theme you enjoy!
Now, add the following widgets for the UI:
A container for the app's header that includes an icon button and a text widget.
A container with a table of customers and a text widget for the headline.
A container for the message form that has two button widgets, a rich text editor, a text widget, and a select field.
That concludes the UI. In only four easy steps, you build up the UI for your app🎉 Here's how it looks:

Connecting with data sources and customizing the UI
For building this app, we use the following tables:
Customer table: This table contains the details of the customer. The attributes of this table are customer ID, full name, SMS contact number, and WhatsApp number.
Sample Messages table: This table contains sample messages for the organization to choose, customize, and send to the customer. The attributes of this table are Message type and Message text.
To customize the UI:
Title the container on the left with ‘Customers’
Bind the data of the customer table on the table widget.
Write a selectQuery in a new query to see the customer's table.
select * from customers
CodTo bind the data from the selectQuery, write {{selectQuery.data}} in the Table Data field on the property pane of the Table widget.
Enable multi-row selection for the table from the property pane.
Bind the sample messages on the select widget as labels and value and display the messages in the rich text editor widget.
The query {{Table1.selectedRows}} gives us a JSON with all selected customer fields. To only get the names of the selected customers, write a new JSObject.
getCustomernames: () => {
  const namesArray = Table1.selectedRows.map((row) => row.name);
  const names = namesArray.toString();
  return names;
};
For the container on the right, title the container with Contact {{JSObject1.getCustomernames()}}. This would show the names of the selected customers in the title.
Control the visibility of the container in right by entering {{!Table1.selectedRowIndices.length==0}} in the visibility field on the property pane.
Label the select widget as a Message template and change the placeholder to ‘select a template.’
Label the two buttons as WhatsApp and SMS, respectively.
Using the Twilio integration for contacting the customer
With Appsmith’s native Twilio integration, you can easily connect Twilio to your app and send messages within minutes. To do so:
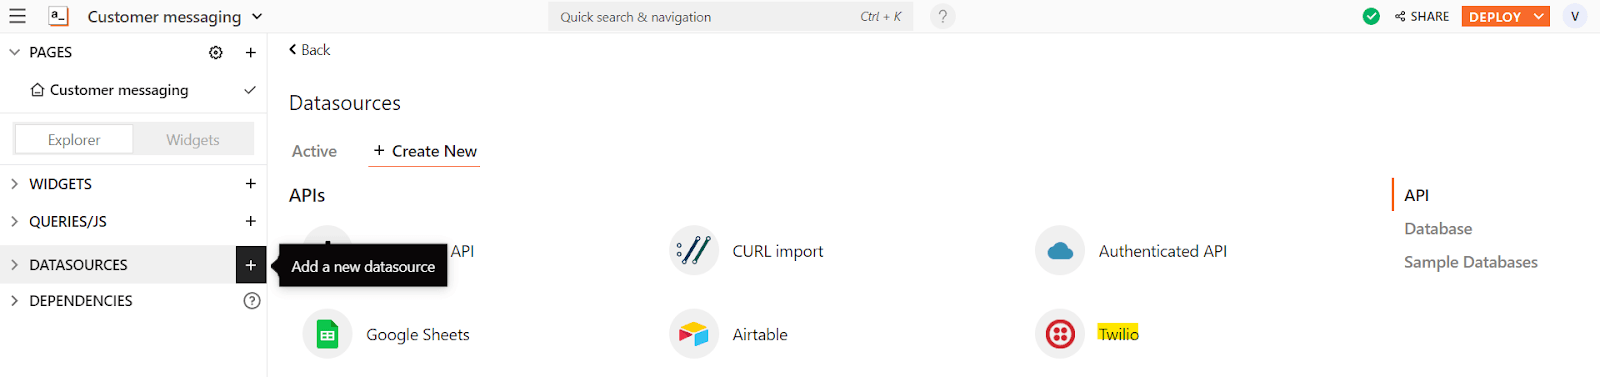
Add a new Twilio Datasource from the Datasources section.
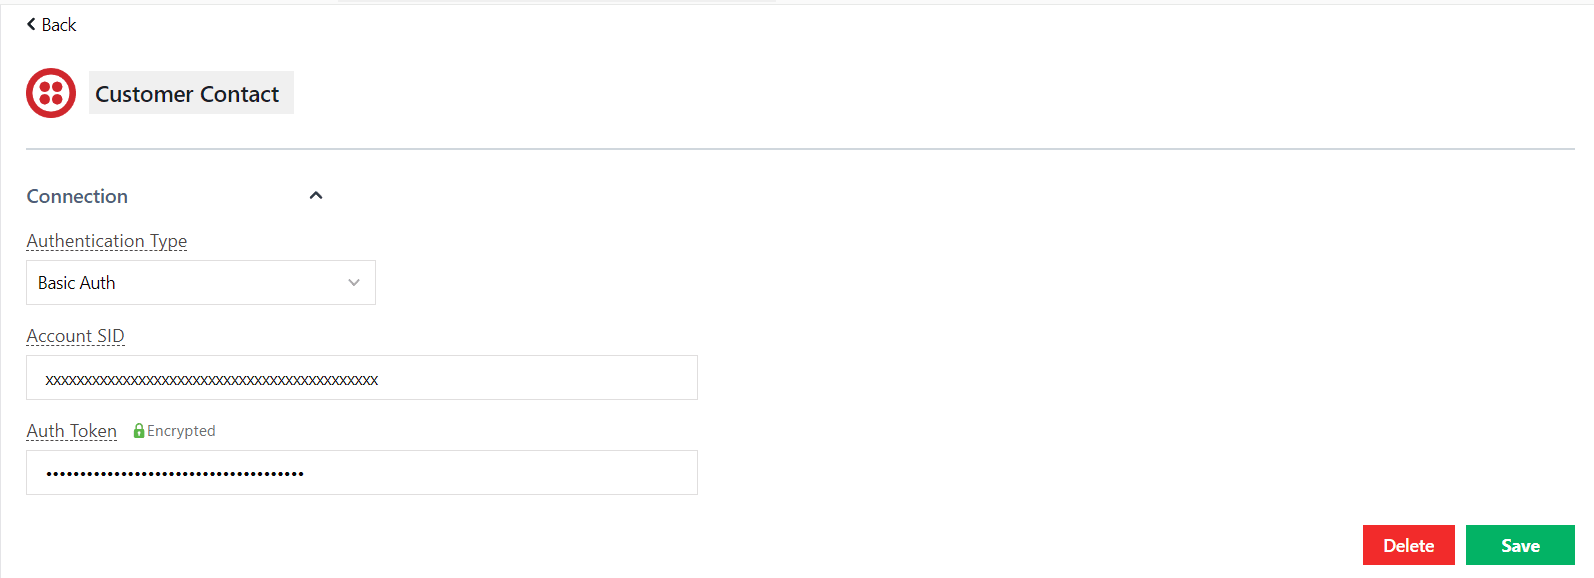
Rename the datasource based on your choice, and configure it withBasic Auth for the Authentication type. Enter your Account SID and Auth Token in the input fields and hit Save.
> Note: You can find your Account SID on your account's dashboard. Check out Twilio’s Authentication docs for more information.
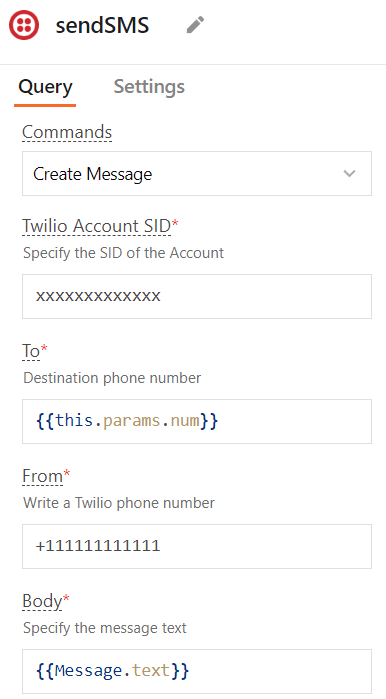
Create a new query on the Twilio datasource you just created. Name it sendSMS. Set the Commands to Create Message, and enter your Account SID and Twilio From your phone number. For the body, bind the text in the rich text editor widget on the canvas.
To send messages to multiple users at once, you would have to iterate over the array of contact numbers of the selected customers.
To do this, follow the below steps:
Write a JSObject that iterates over the array and runs the function to send the SMS repeatedly.
sendSMSFunc: async () => {
		const selectedNums = Table1?.selectedRows?.map((row) => row?.sms_number);
		selectedNums.forEach((num) => {
		sendSMS.run({num});		});
},
This method passes params to run. Check out more about it in Appsmith’s docs.
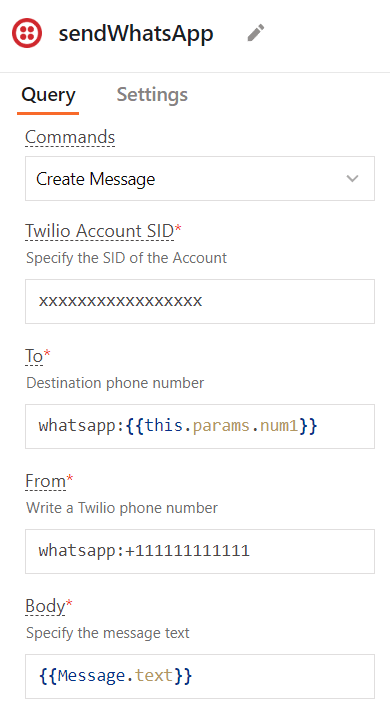
Similarly, write a similar JSObject and query for WhatsApp messaging. The only change would be to add WhatsApp: before the number.
sendWhatsAppFunc: async () => {
		const selectedNums = Table1?.selectedRows?.map((row) => row?.whatsapp_number);
		selectedNums.forEach((num1) => {
		sendWhatsApp.run({num1});		});
}
Bind these
JSObjectsononClickfunction of the buttons:{{JSObject1.sendWhatsAppFunc()}}and{{JSObject1.sendSMSFunc()}}

Voila! Run your consumer messaging tool through its paces!
URL for the screen capture: https://www.loom.com/share/8f4ab7a445a24ce4a2264f3dbd73a514
We have a template that will help you get started in no time; check it out here.
Please use this form to contact us if you have any template requests for internal tools that you need, and we will get to work!
If you have any questions, contact us on Discord. You can also keep up with us on Twitter and YouTube.


