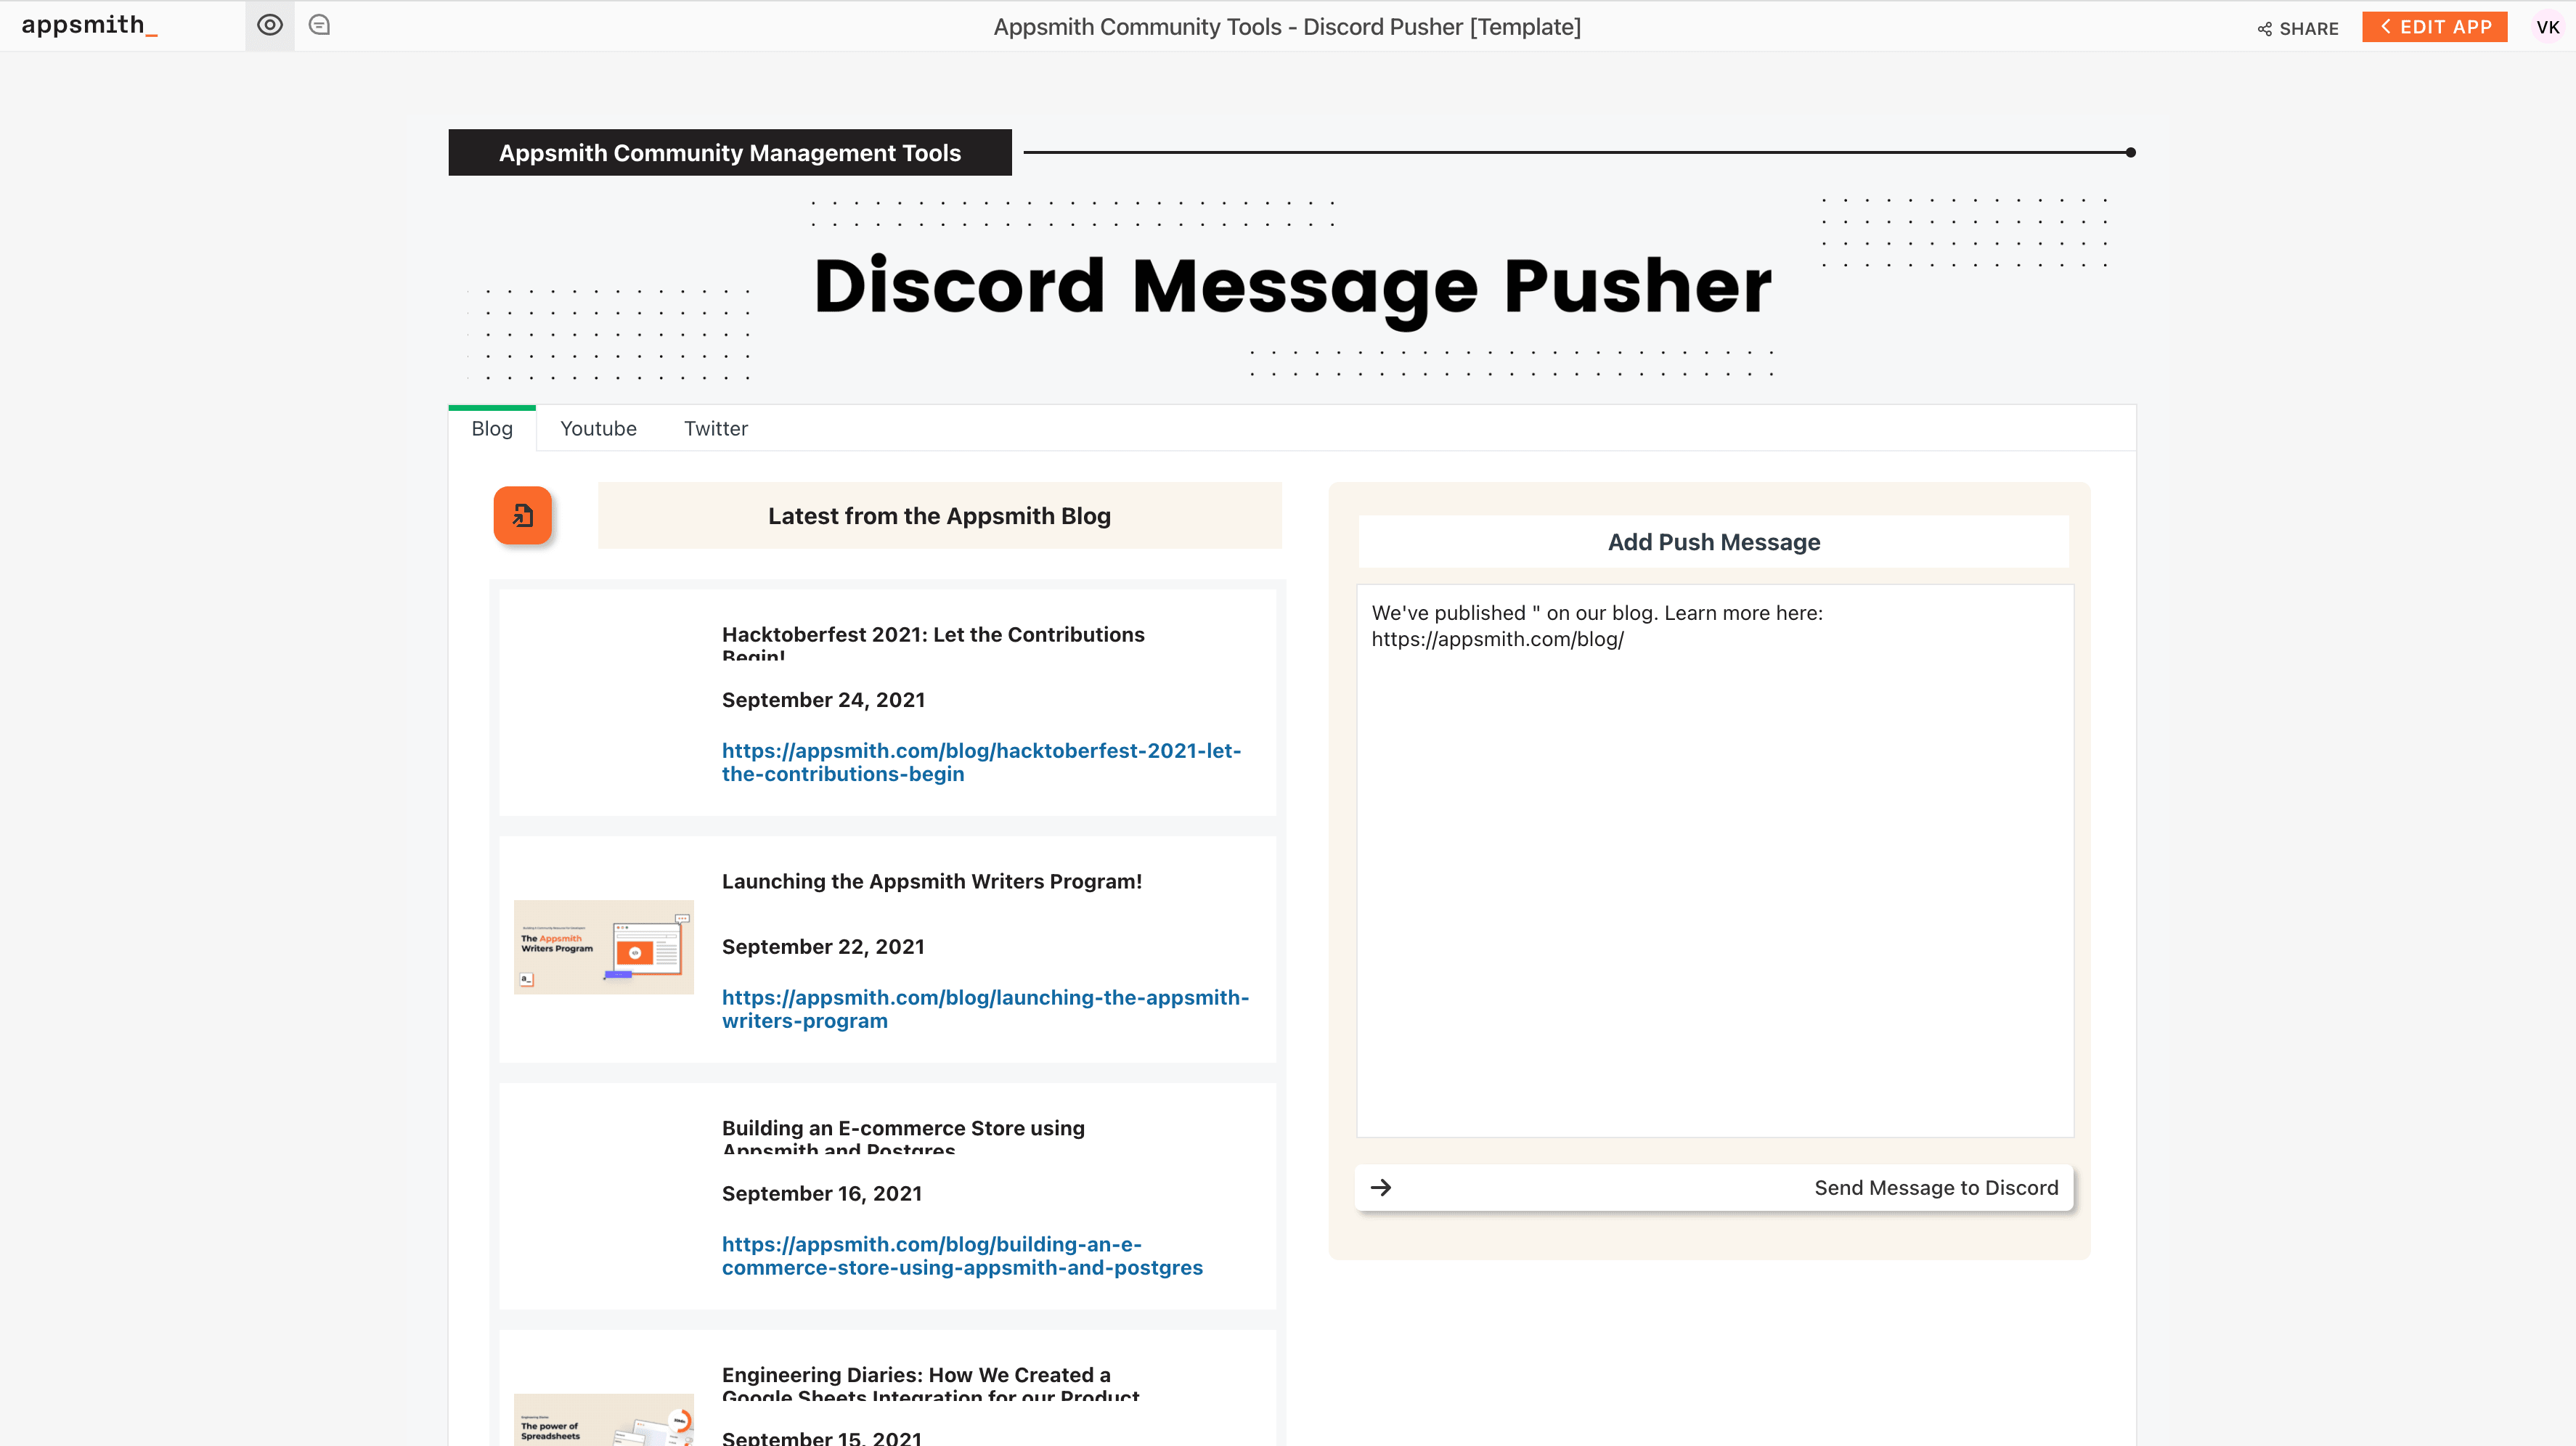
Learn How to Push Content from Multiple Sources to Discord in One Go

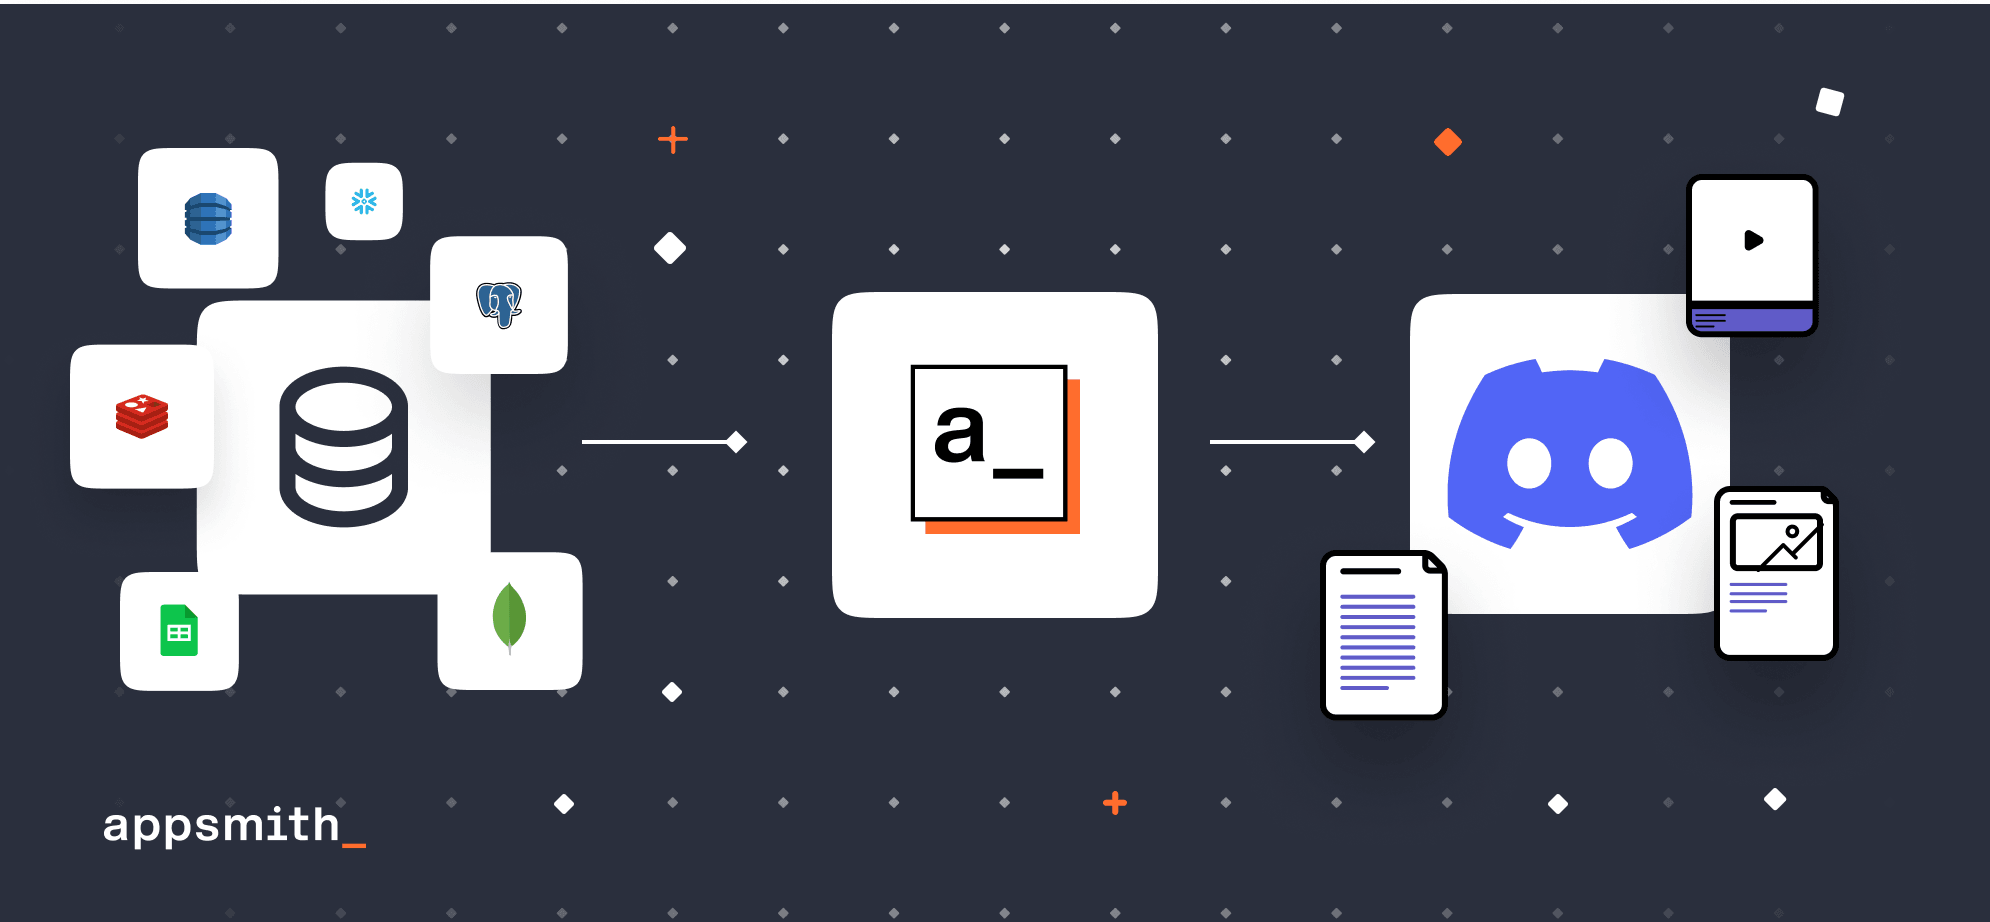
Every job has a set of critical and essential tasks that can feel mundane to execute. As a developer advocate, I love talking to developers and new users and helping them out on their journey with Appsmith. While I am busy doing this work, some tasks often slip into the basket of “I’ll get to it soon.” These tasks often include pushing out information about our new content in specific channels on Discord. This is crucial work and helps us, but it gets deprioritized when there are many other things to do. For social media, a tool like Hootsuite has been a game-changer for us. We also built our custom social media scheduler with Appsmith and automated it using n8n. We also wanted to solve this for our community on Discord. And that’s when we came up with our comprehensive push messaging system, which automatically pulls up content from various channels like our blogs, Twitter handle, and Luma events. We can just share it with users on our Discord server in just one click! The Discord Message Pusher has been an excellent internal tool for us; the entire content and marketing team uses it, and guess what? No more pending tasks on our to-do lists! In this blog, I am going to discuss the steps involved in building this application on Appsmith. And hopefully, like me, you can make a customizable internal tool for your content team.
Let’s start!
Connecting Data Sources (APIs) on Appsmith
In the first step, we will be creating a new application on Appsmith and integrating it with different data sources like Twitter, Youtube (YT), and Webflow. We’ll be using APIs to fetch all the information and render them on the Appsmith widgets. First, let’s set up a new application to get started!
Create a new account on Appsmith (it’s free!), if you are an existing user, log in to your Appsmith account.
Create a new application by clicking on the Create New button under the Appsmith dashboard.
We’ll now see a new Appsmith app with an empty canvas and a sidebar with two directories: Datasources and Widgets. This is where we can connect to data sources and find all the widgets.
Fantastic, the app is now set up, now let’s fetch all the information from a particular YT channel and render them onto a list widget.
Setting up Youtube <> Discord Push Messaging System
In this step, we’ll be connecting to YouTube using APIs. Appsmith provides an easy-to-use IDE-based environment to connect to APIs and configure them. Now follow the below steps to fetch all the Youtube video links and their information.
Click on the + icon next to the data sources section and choose the Create New under the APIs section.
Paste the following URL:
https://www.googleapis.com/youtube/v3/search?key=APIKEYHERE&channelId=UCMYwzPG2txS8nR5ZbNY6T5g&part=snippet,id&order=date&maxResults=20This API will allow you to fetch all the videos from a particular channel using its ID. We’ll need to create an API key from the Google Console account to put it in use.
Rename the API to getYTData by double-clicking on the existing one.
Additionally, Appsmith automatically parses the URL and adds them into the parameters tab, where you can update the ID and the API key. Following is the screenshot of how it looks like:
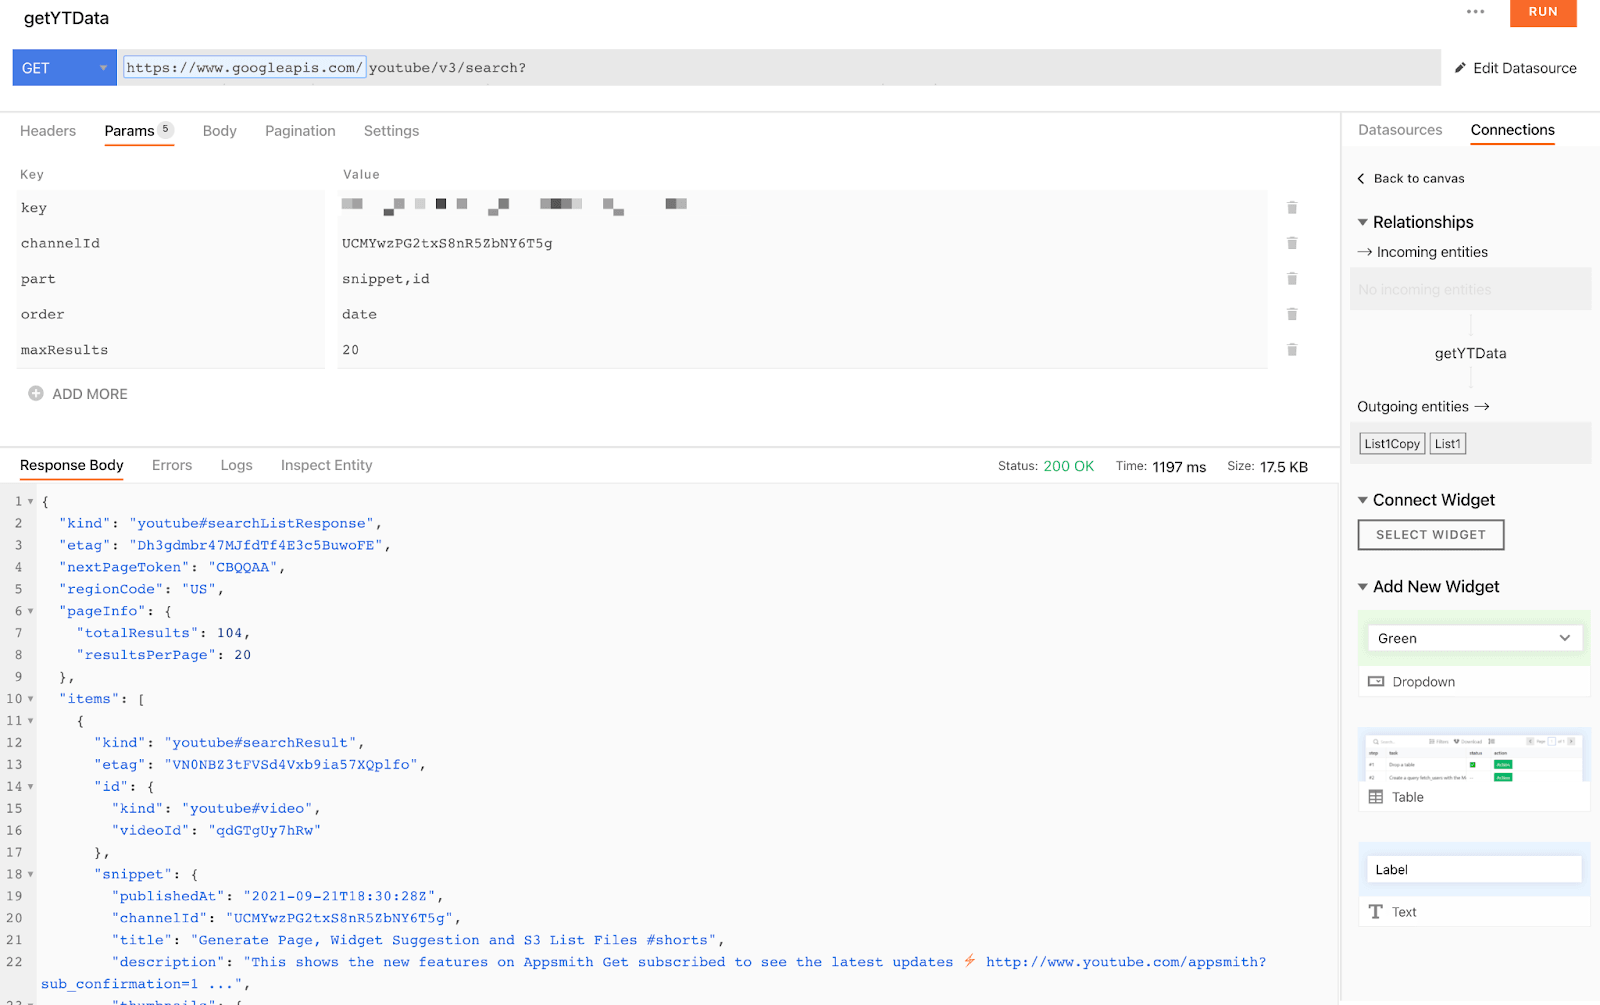
Here, we can configure all the settings for this API. Additionally, we can turn on pagination settings if we’re working with massive sets of data.
We now have all the videos on Appsmith Youtube Channel (Appsmith YT ID: UCMYwzPG2txS8nR5ZbNY6T5g). Now, let’s use this query to render all the information on the application by following the below steps:
Click on the + icon next to the Widgets section, here we’ll find the list of all the widgets that we can use for building the application.
Now find the Tabs widget, drag, and drop it onto the Canvas.
> The tabs widget allows us to create different navigation tabs. We’re using this as it’s more suitable for adding navigation between social platforms.
Next, open the property pane of the tabs widget by clicking on the cog icon on the top-right corner of the device. This is where we can configure the entire widget.
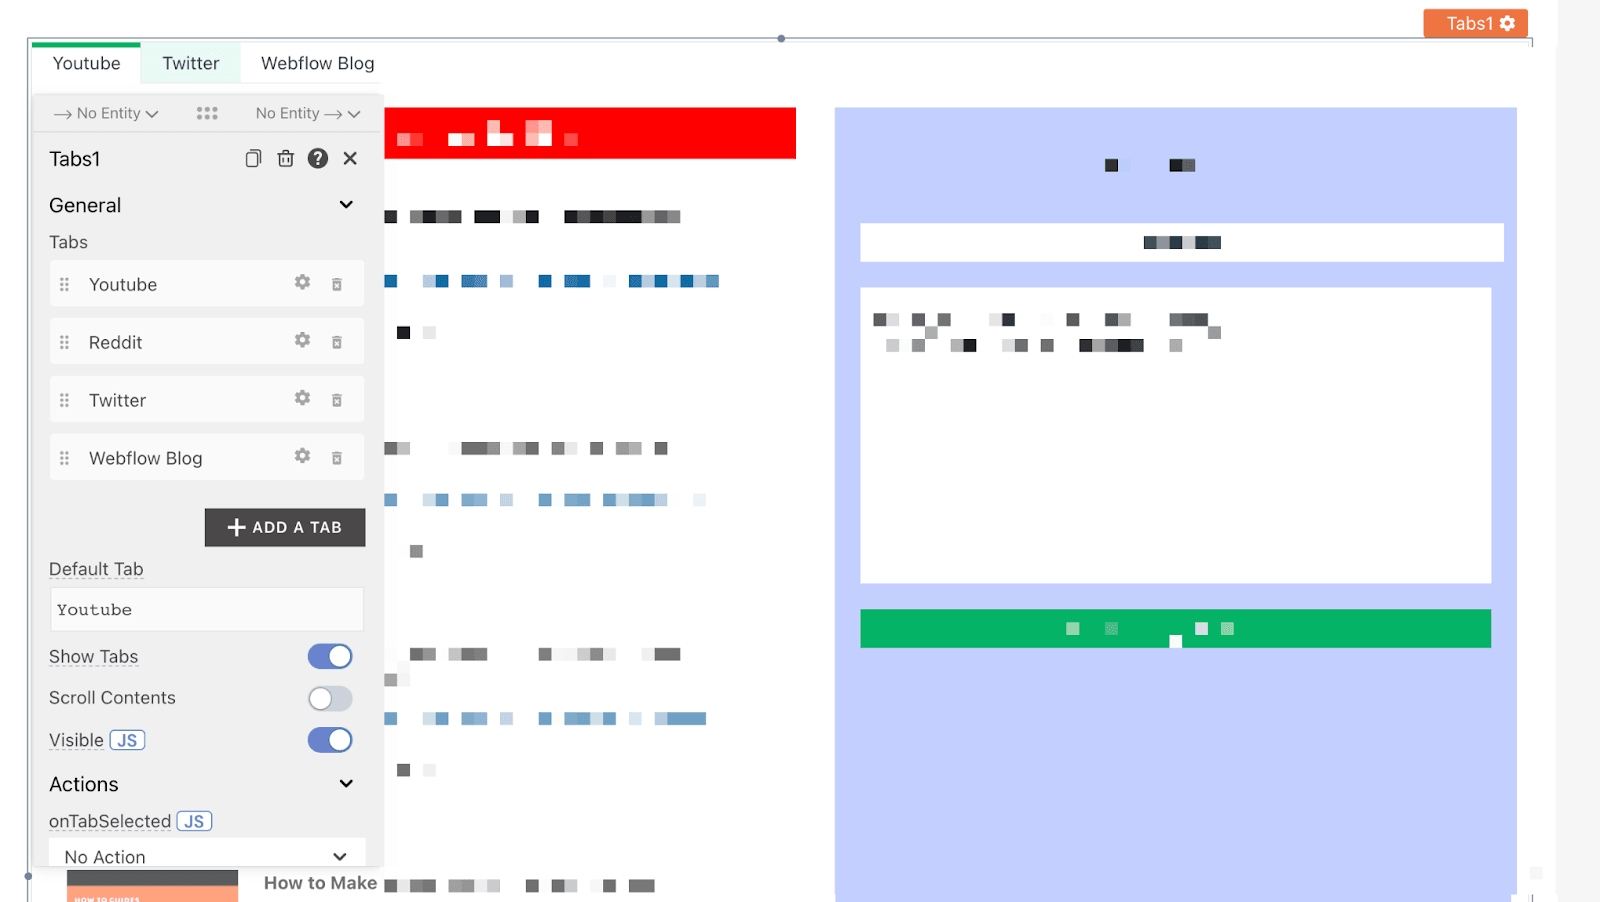
Here, under Tabs property, we’ve added found different tabs to navigate between our social contents. Also, the Default Tab property is set to Youtube.
Listing all the Youtube Information to List Widget
We have our tabs ready. We’ll display all the videos from the Appsmith channel to the List Widget under the Youtube tab. Follow the below steps:
Drag and drop a new list widget inside the Youtube tab, adjust the width to half so that the other half can be used to write the messages to push them on Discord.
Open the List widget property pane and set the List Items property to:
{{getYTData.data.items}}Initially, we see the list widget already populated with pokemon data. To make changes to them, we just need to edit the first item, and the others automatically get populated.
Delete all the widgets on the first item on the list widget, and add one image widget and three text widgets. Now set the following properties to these widgets:
Image Widget Value : {{currentItem.snippet.thumbnails.high.url}}
Text Widget 1 Value: {{currentItem.snippet.title}}
Text Widget 2 Value: {{moment(currentItem.snippet.publishedAt).format("LL")}}
Text Widget 3 Value:
https://www.youtube.com/watch?v={{currentItem.id.videoId}}Here, we’re accessing the currentItem, which evaluates the element in the list values. On the first text widget, we’re displaying the Title of the Youtube Video; the second widget corresponds to the time it was published. On Appsmith, we can use moment to display the DateTime field in the necessary format. Cool right? Lastly, we display the YT video URL and add the id to the end of the URL.
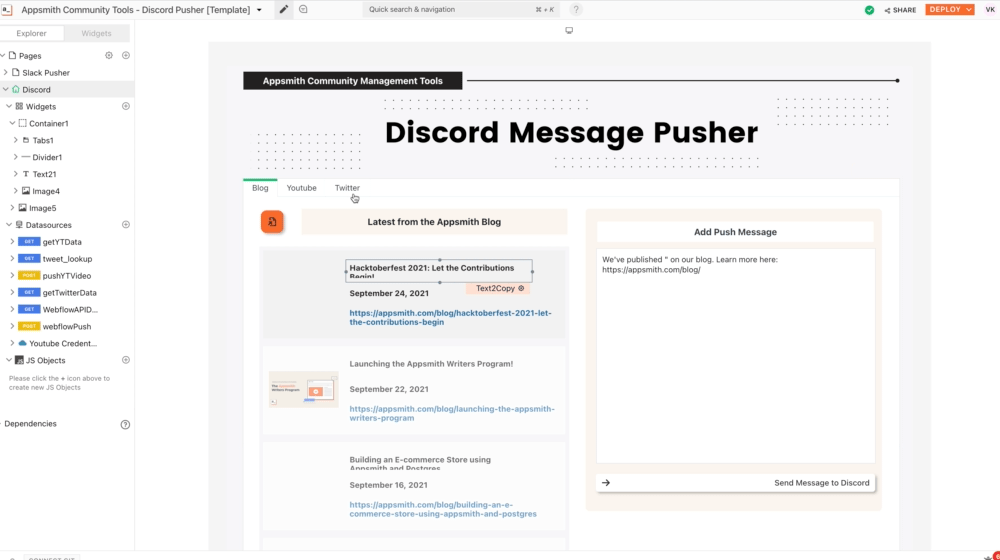
Here's how the list widget looks like:
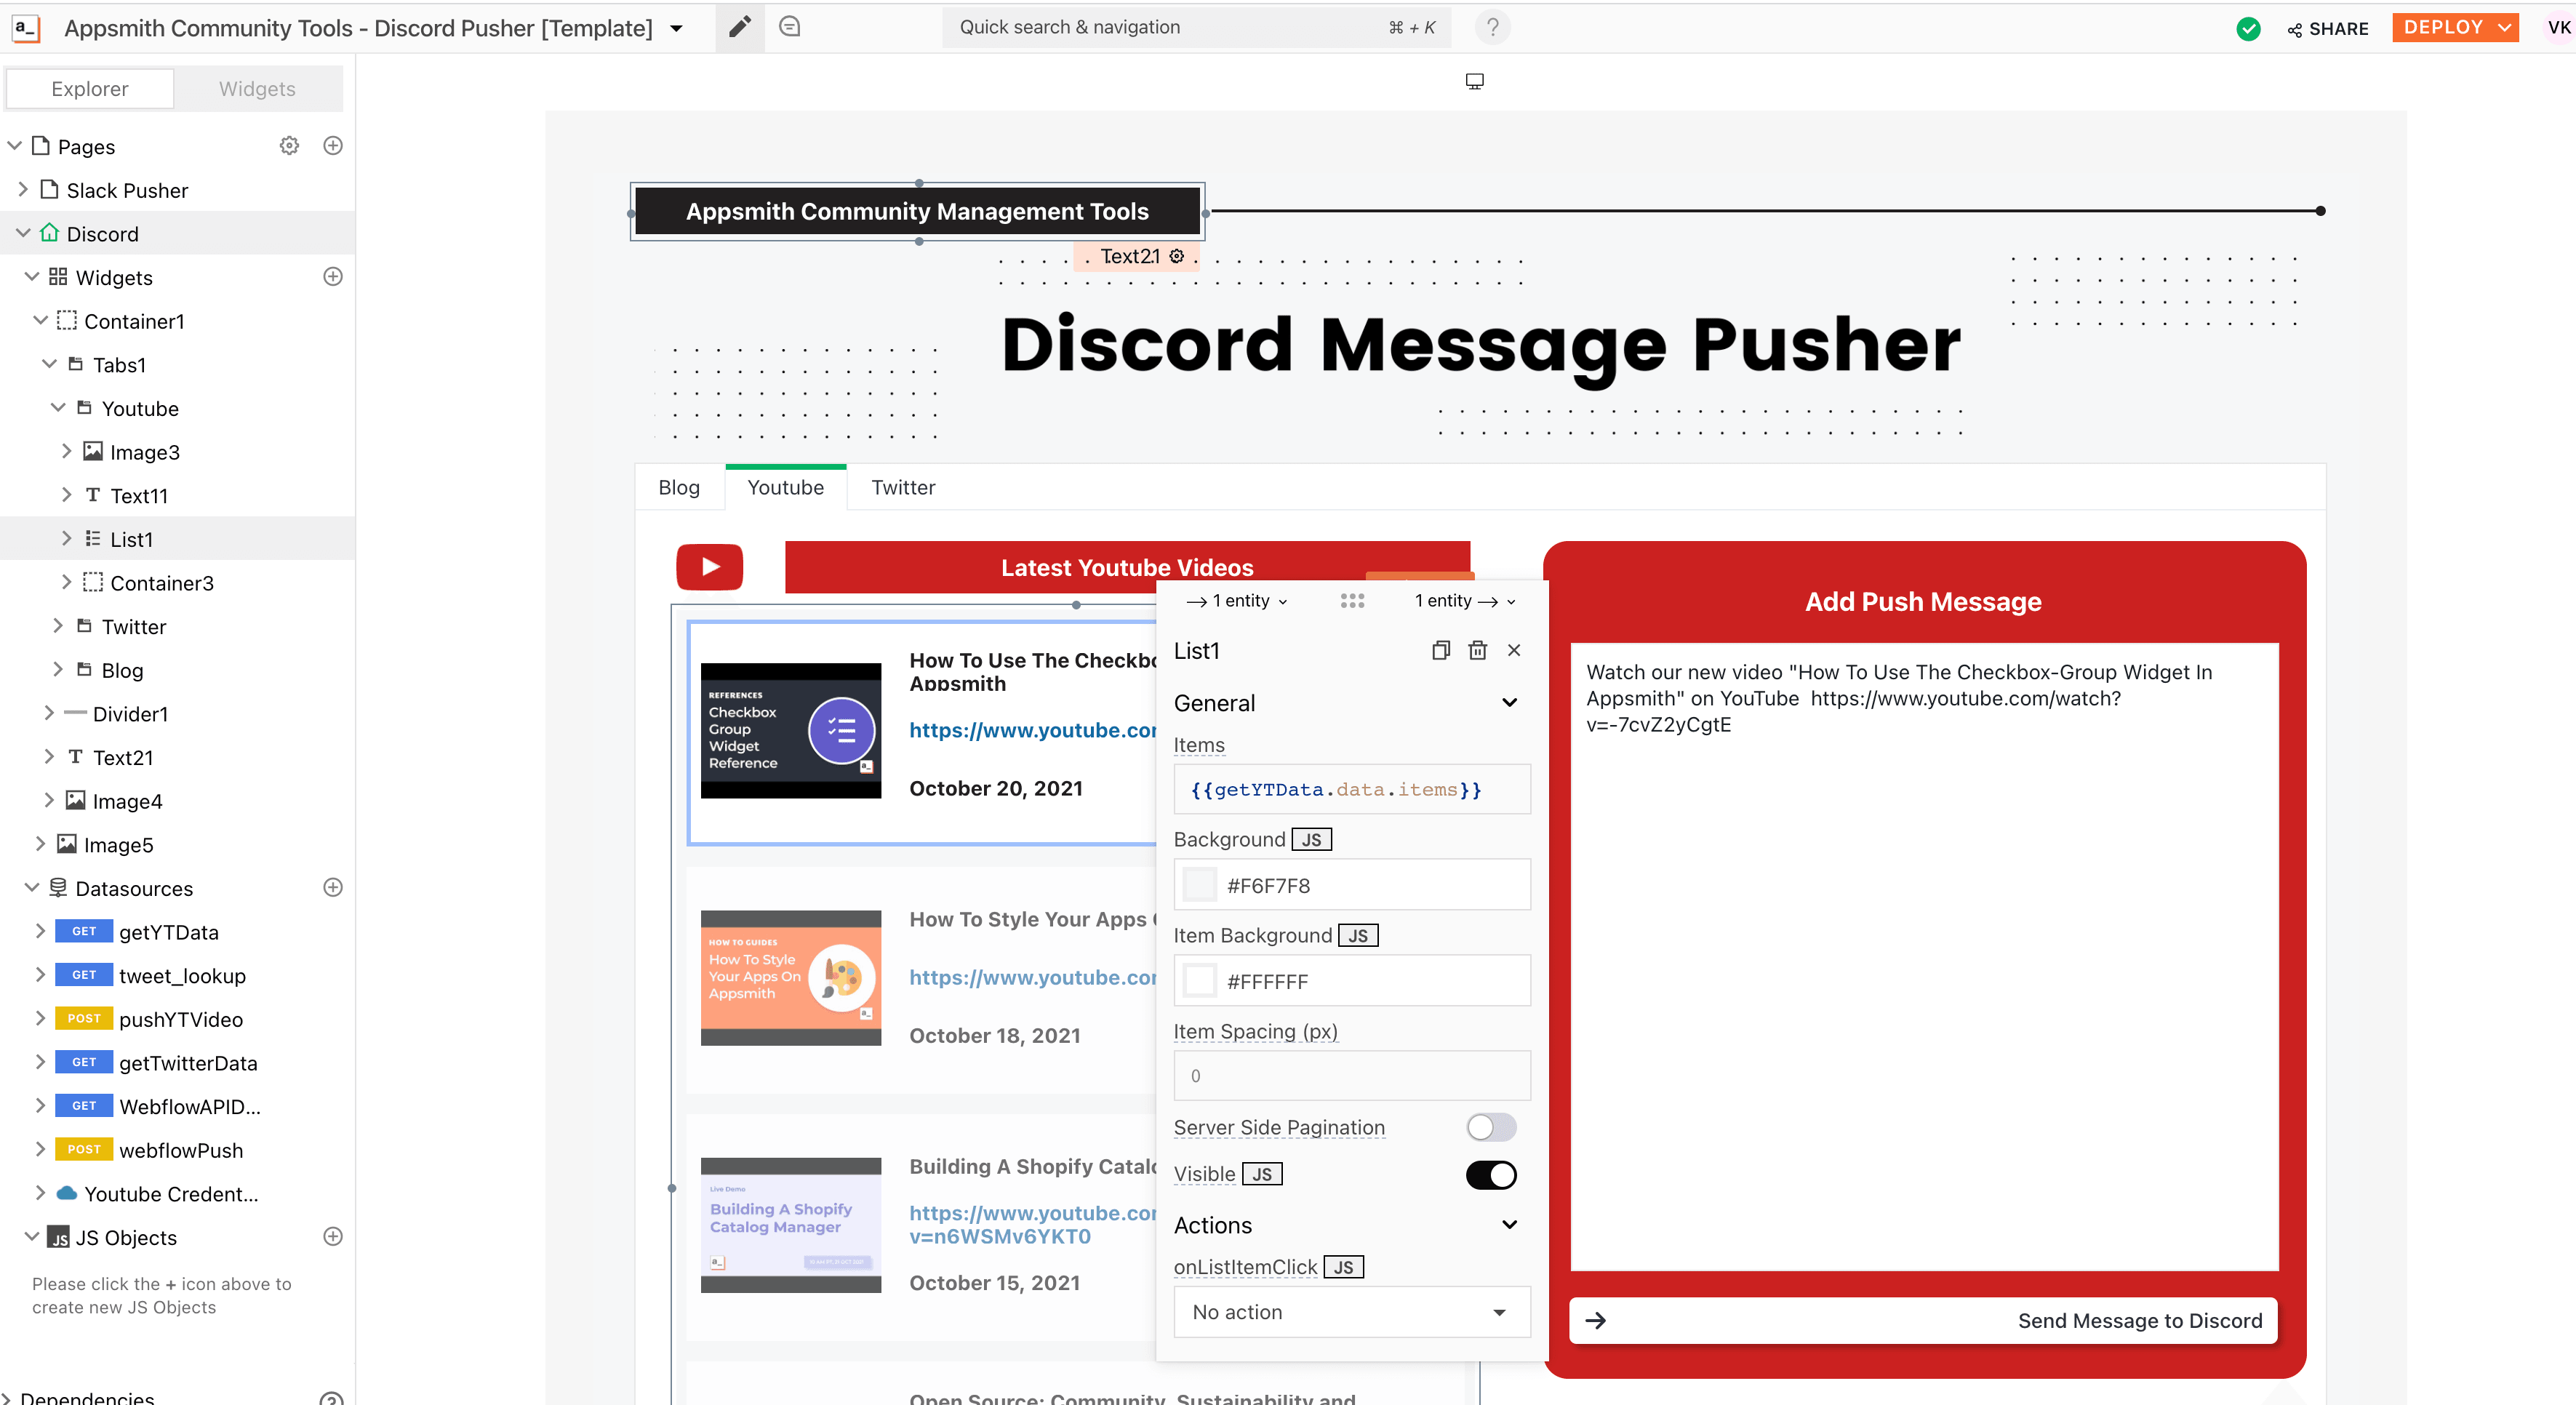
Excellent, next. Let’s learn how to push messages from Appsmith to Discord. Follow these steps:
Drag and drop the container widget next to the list widget. Add Input widget and a button widget. Additionally, we can also add some Text widgets to customize and style the UI of the application accordingly.
Now set the default value of the Input widget to the following:
Here, in the code snippet, we have a default message; this will help us push it directly to Discord. Also, we’re accessing the title and youtube video id from the list widget. Therefore whenever a new list item is clicked; the message automatically gets an update for you.
Let’s now use a Webhook to push these messages on a discord channel. For this, you’ll need a discord server and a dedicated channel.
Now follow these steps:
Navigate to the channel on Discord and click the cog icon next to it.
Click on Integration and choose webhooks, and copy the given URL.
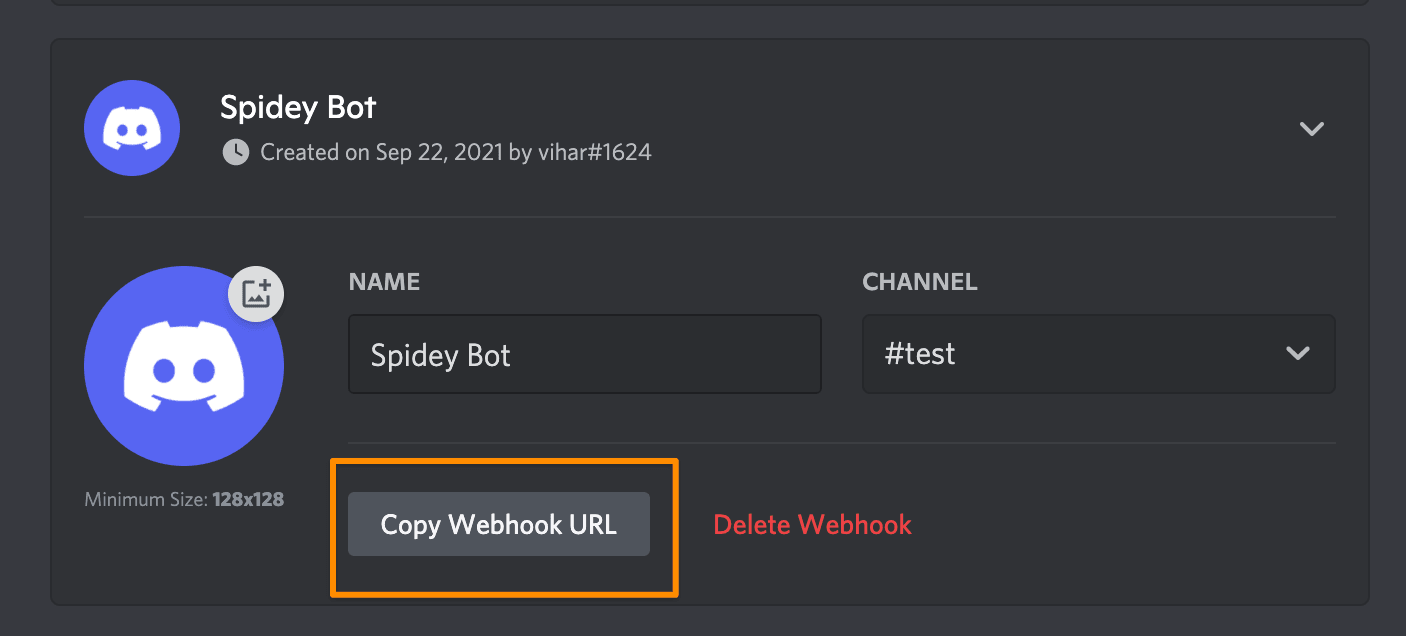
Click on the + icon next to data sources and click create new. Add the copied URL and set the request method to post. Now open the Body tab under the API configuration and paste the following:
{"content":"{{Input1.text}}"}Here, we’re sending the contents from the Input widget to this particular request. Now, as soon the API is called, the data is to the Webhook, and the contents will be posted on this specific Discord channel.
Rename this API to pushYTVideo
Lastly, let’s go back to the page and configure the button onClick to call this API. Open the button widget property pane and set the onClick property to call a query, and choose pushYTVideo
Awesome! When you choose or select a video from the list widget, the message automatically updates from the default value and will be pushed to the discord channel.
Setting up Twitter <> Push Messaging System
This part is almost similar to how we’ve listed all the videos from Youtube and drafted a custom message; the only thing that changes is the data source. Instead of YouTube, we’ll be using the Twitter API.
Now, let’s copy-paste all the widgets from the YouTube tab to the Twitter tab; for this, select the YouTube tab, hit CTRL/CMD + A, CTRL/CMD + C, open the Twitter tab, and hit CTRL/CMD + V. This will copy the list widget, the buttons, and the inputs.
Just like that, all our widgets will be copied to the tab. Now, let’s add the functionality to fetch all the tweets and push them to the Discord channel by following the below steps:
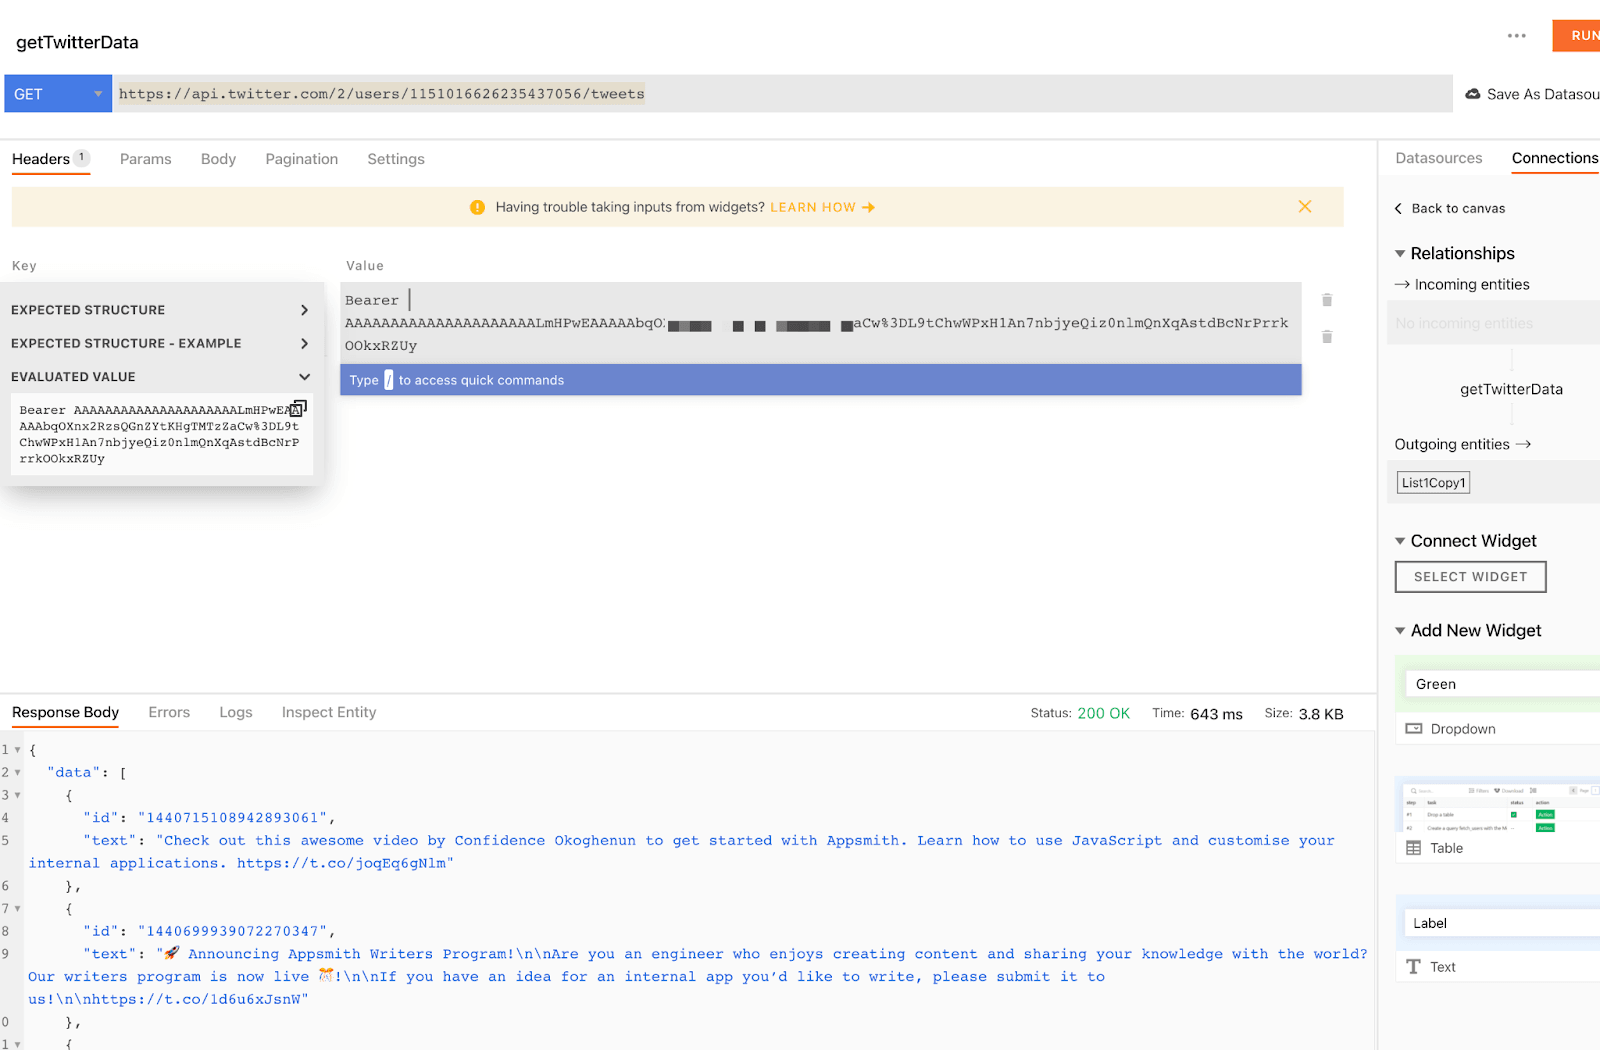
Click on the + icon next to Datasources and hit Create New, rename the API to getTwitterData, and add the following URL:
https://api.twitter.com/2/users//tweetsFor example, let’s update the id with:https://api.twitter.com/2/users/1151016626235437056/tweets. To setup your own Twitter profile, you’ll need to copy the ID.
We’ll need to add the Authorisation key to the API. For this, we’ll need to have a developer account on Twitter and create the API keys.
We can configure this under the API settings.
Following is the screenshot:
Now let’s update the widget properties.
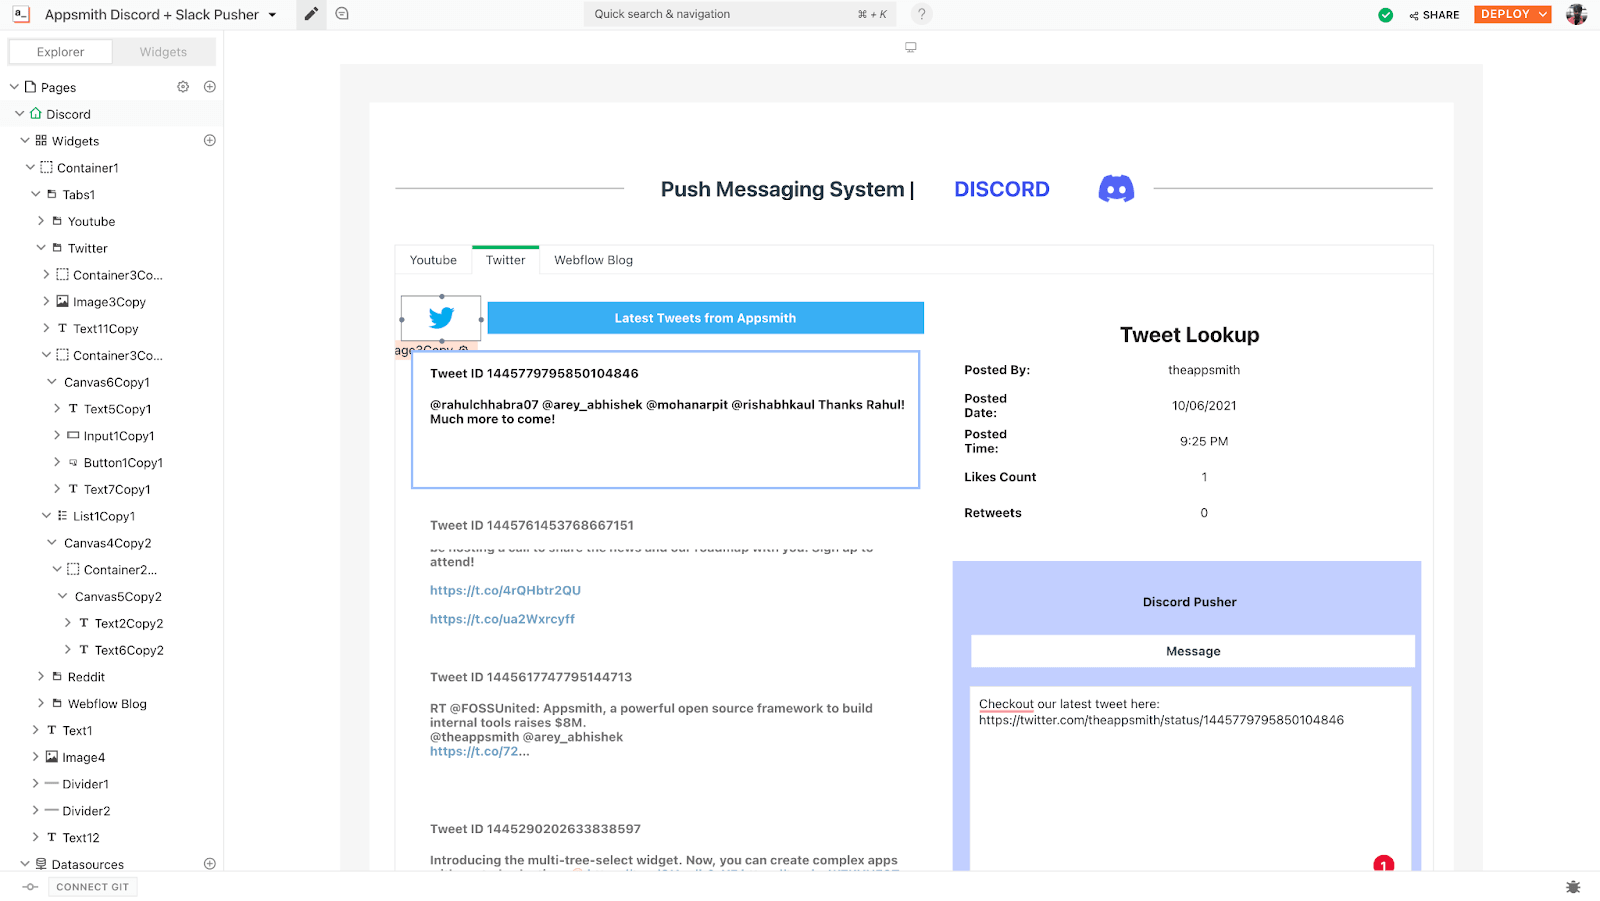
To show all the tweets on a list widget, open the property pane and set the Items value to {{getTwitterData.data.data}}. Next, add two text widgets to the list widget and set the Text Value to the following:
Text Widget One: Tweet ID {{currentItem.id}}
Text Widget Two: {{currentItem.text}}
On the right, in the Discord Push Message Input placeholder to following:
Checkout our latest tweet here:https://twitter.com/theappsmith/status/{{List1Copy1.selectedItem.id}}This is how the application looks like now:
With this, we should be able to schedule/push our social posts from Appsmith to Discord. In case if you’re using other services like Webflow, you can utilize APIs to fetch objects from CMS and use the same template. Building this app from scratch, including writing snippets of code, is likely to take 30 minutes! Isn’t that fast?
If you liked this tutorial, and are planning to build this, let me know. I’d love to help you make it as complex as you’d like.
Write to me at vihar@appsmith.com.


