How to Test Your Proxy Support in Docker


See more from Shrikant on his personal blog
Several network configurations, especially in large companies and universities, have a proxy configured for all outgoing traffic. Any network traffic that tries to go out bypassing this proxy will be blocked. For a self-hosted web application, the server will also need to make any and all outgoing connections via this proxy.
Now several applications, web application servers included, support the HTTP_PROXY and HTTPS_PROXY environment variables to configure such a proxy. But if we don’t have a network that blocks non-proxy traffic, how do we test this? How can we ensure that when a proxy is configured, all outgoing requests are only ever made through the proxy?
This article is my attempt at answering this.
Docker networks
We’ll be using Docker’s networking features. It provides a simple set of primitives to solve what we need here.
By default, Docker sets up a bridge network for us that allows connectivity to external endpoints. With explicit configuration, we can also have an internal network where connections are only allowed to other containers that are also connected to this internal network.
Docker’s official documentation about networking in Docker Compose talks more in detail about this.
Sandbox
We need a sandbox environment where there’s a proxy and a subject application. We want to ensure that outgoing requests made from the subject application always fail unless they go via the proxy.
Let’s start with two containers, in a docker-compose.yml configuration.
- The
subjectcontainer, which is expected to make all outgoing requests via the proxy only. - The
proxycontainer, which runs an HTTP proxy.
For the subject container, we’ll use an ordinary, friendly, memorable, vanilla Ubuntu container with the command set to sleep infinity. This makes the container stay running so that we can get in and play around. Without this, the container would start, do nothing, and just exit. Not very useful.
For the proxy container, we’ll use mitmproxy. Specifically, we will use the web interface version called mitmweb. This is an excellent proxy application, best used for intercepting requests during development. If you haven’t been spoilt by it, I encourage you to check it out.
So, this is our initial version of the sandbox:
version: "3"

services:
  subject:
    image: ubuntu
    command: sleep infinity

  proxy:
    image: mitmproxy/mitmproxy
    command: mitmweb --web-host 0.0.0.0
    ports:
      - "8081:8081"
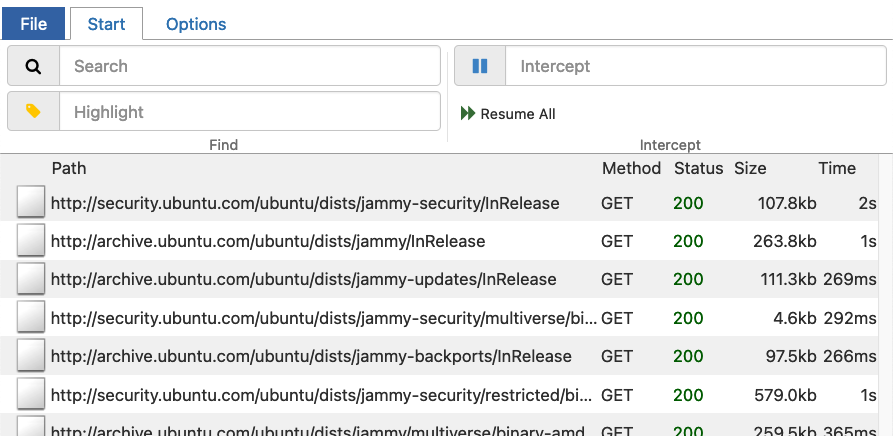
Save this as a docker-compose.yml and do a docker-compose up -d. Once the two containers are running, open localhost:8081. This is where we’ll see all the HTTP requests flowing through our proxy.
Let’s get inside the subject container and make some requests. Start a shell with docker-compose exec subject bash. This will start a shell session that will run inside the subject container. Use the following command to install curl to play with:
apt update
apt install --yes curl
curl httpbun.com/get
This will make an external request and print the response in the terminal, but this request won’t show up in mitmproxy‘s UI. For that, let’s do:
http_proxy=http://proxy:8080 curl httpbun.com/get
This will show the response in the terminal, as well as in mitmproxy‘s UI.

Let’s step this up. We’ll now block direct Internet access to the subject container and only allow connecting via the proxy. Consider the following docker-compose.yml file:
version: "3"

services:
  subject:
    image: ubuntu
    command: sleep infinity
    networks:
      intnet: {}

  proxy:
    image: mitmproxy/mitmproxy
    command: mitmweb --web-host 0.0.0.0
    ports:
      - "8081:8081"
    networks:
      intnet: {}
      extnet: {}

networks:
  intnet:
    internal: true
  extnet: {}
This is the same as the previous one, except for networks configurations. We define two networks: an internal network named intnet and an external network named extnet. The subject container is only connected to intnet, so it can only connect to other containers that are also connected to intnet. The proxy container is connected to both intnet and extnet, so it can both access other containers in the intnet as well as access the wider Internet.
With this setup, we expect direct network connections from subject to fail, unless they go via the proxy container.
Let’s do a docker-compose up -d with this file, open a shell with docker-compose exec subject bash, and try to install curl again. But notice that when we run apt update, it doesn’t work, since this too requires the Internet and we’ve blocked it. We’ll use this as proof that blocking the Internet is working!
Instead of apt update, issue the command http_proxy=http://proxy:8080 apt update. This should make all requests via that proxy and should even show up in mitmproxy‘s UI. Make sure you refresh the page, since the mitmproxy container has been recreated. Effectively, we do:
docker-compose exec subject bash
http_proxy=http://proxy:8080 apt update
http_proxy=http://proxy:8080 apt install --yes curl
Notice that these commands will show a bunch of requests in mitmproxy‘s UI made to the Ubuntu package archives. Now, we can try out our test with curl:
curl httpbun.com/get
This will eventually timeout. The subject container doesn’t have access to the Internet, so this can’t run. Let’s try:
http_proxy=http://proxy:8080 curl httpbun.com/get
This should work, and the request should show up in mitmproxy‘s UI.
Proxying HTTPS Requests
The setup we have so far works with proxying HTTP requests, but not for HTTPS requests. The whole point of HTTPS over HTTP is to make man-in-the-middle interventions impossible in a request. But that’s exactly what a proxy does!
To solve this, we’ll install and setup mitmproxy‘s CA into the subject container. This will ensure that even if mitmproxy intervenes in HTTPS requests, our subject container will gladly accept and mark such requests as verified. This is documented on mitmproxy‘s documentation.
The first time mitmproxy starts, it generates a new random CA certificate. This is the certificate is what we want our subject container to trust. So we’ll use a Docker volume, to share this cert with the subject container.
version: "3"

services:
  subject:
    image: ubuntu
    command: sleep infinity
    networks:
      intnet: {}
    volumes:
      - ./certs:/certs:ro

  proxy:
    image: mitmproxy/mitmproxy
    ports: ["8081:8081"]
    command: mitmweb --web-host 0.0.0.0
    networks:
      intnet: {}
      extnet: {}
    volumes:

     - ./certs:/home/mitmproxy/.mitmproxy

networks:
  intnet:
    internal: true
  extnet: {}
Here we define a volume on each container at the host path ./certs that’ll hold the contents of the /home/mitmproxy/.mitmproxy folder inside the proxy container. This is the path where mitmproxy will save the generated CA root certificate.
We also give the subject container access to this volume at the /certs location inside the container. Notice the :ro suffix here, which means read-only access. We don’t expect the subject container to write anything to this volume, just read the CA certificate.
Let’s start the containers again with a docker-compose up -d and then run our tests again:
http_proxy=http://proxy:8080 apt update
http_proxy=http://proxy:8080 apt install --yes curl
http_proxy=http://proxy:8080 curl httpbun.com/get
https_proxy=http://proxy:8080 curl https://httpbun.com/get
But notice that the last command hitting the HTTPS API fails. This is because the subject container doesn’t trust the mitmproxy‘s CA certificate. We’ll see something like this in the output:
curl: (60) SSL certificate problem: unable to get local issuer certificate
More details here: https://curl.se/docs/sslcerts.html

curl failed to verify the legitimacy of the server and therefore could not
establish a secure connection to it. To learn more about this situation and
how to fix it, please visit the web page mentioned above.
Now the issue is just that the SSL verification has failed. Since the verification failed, curl denies to continue with the request. We can tell curl to ignore the verification failure by using the --insecure flag like this:
https_proxy=http://proxy:8080 curl --insecure https://httpbun.com/get
But that’s not what we want. We want to tell curl to trust the mitmproxy‘s CA certificate. Like this:
https_proxy=http://proxy:8080 curl --cacert /certs/mitmproxy-ca.pem https://httpbun.com/get
This should show up as an HTTPS request in mitmproxy with the ability to view full details of the request and response. Try out the same/similar curl commands without the proxy, and notice that those requests fail.
DNS resolution
When an HTTP proxy is configured, DNS resolution is done by the proxy. This is because to make the request, it is the proxy that connects to the endpoint server. So it needs to know the IP address of the host. As long as the subject container is only making HTTP(s) requests, this is fine. But if we need it to make an explicit DNS query, we see that it fails:
http_proxy=http://proxy:8080 apt install --yes dnsutils
nslookup httpbun.com
This will fail because direct DNS resolution (as opposed to with a proxy, or with DNS-over-HTTPS) requires access to the external network, which the subject container doesn’t have. We can solve this the same way we solved for HTTP requests: with a proxy.
Let’s add the following DNS proxy service to our docker-compose.yml:
dns:
     image: mitmproxy/mitmproxy
     command: mitmdump --mode dns
     networks:
        intnet: {}
        extnet: {}
This is again an mitmproxy container, that runs in DNS mode. And it highlights how awesome mitmproxy is! This brings us a DNS proxy, that we can use to resolve DNS queries.
Now we’ll instruct the subject container to use this dns container, for DNS queries. This is handled by the resolv.conf inside the subject container. Let’s inspect its contents:
docker-compose exec subject cat /etc/resolv.conf
We should see something like this:
nameserver 127.0.0.11
options ndots:0
The IP address next to nameserver is what will be used for DNS resolutions. We need this to be the IP address of the dns container, as on the intnet network. The docker inspect command can help us find this IP address. In the output of docker inspect $(docker-compose ps -q dns), under NetworkSettings.Networks, you’ll find the IP address of the dns container on the intnet network. We want this IP address to be added to the resolv.conf of the subject container.
We can use the below commands to do this:
docker-compose up -d dns
docker-compose exec subject sh -c "echo nameserver $(
  docker inspect "$(docker-compose ps -q dns)" -f $'{{range $k, $v := .NetworkSettings.Networks}}{{$k}}:{{$v.IPAddress}}\n{{end}}' \
    | awk -F: '/_intnet:/ {print $2}'
) >> /etc/resolv.conf"
Note that we add another nameserver line with this IP address instead of replacing the existing one. The reason for this is that the existing one is still useful to resolve internal hostnames, like proxy. Now let’s try the DNS query again:
nslookup httpbun.com
We should see the resolved IP address show up. You can also try to resolve other hostnames, even internal ones like proxy, and see that it responds with that container’s internal IP address.
Connecting from host
So far, our subject container has only been sleeping (pun shamelessly intended). But usually, we’d want it to host a website, or an app that’s available on HTTP from outside the container and outside the intnet network. Let’s install set a small website in the subject container.
First, let’s create a nice index.html for our website:
cat <<EOF > index.html
<h1>My awesome website!</h1>
EOF
Second, let’s change the subject container to run a Python content webserver on port 80:
subject:
    image: python:3-alpine
    command: python -m http.server -d /www 80
    ports:
      - "8090:80"
    networks:
      intnet: {}
    volumes:
      - ./certs:/certs:ro
      - .:/www
To verify that it’s working, let’s curl localhost in the subject container and we should see the “My awesome website!” show up.
We’re also exposing this on port 8090 on the host, so if we open http://localhost:8090 in the browser on the host system, we should see this “My awesome webapp!” page, right?
But, no, it doesn’t work. The reason is that the subject container is only connected to the intnet network, which is inaccessible from outside the network-sandbox that Docker has created.
Remember how we used the proxy container to let subject access Internet resources? We’ll do the reverse here. We’ll define a reverse-proxy that connects to both intnet and extnet, and will forward all incoming requests to subject. We can use mitmproxy here as well because it can act as a reverse proxy too (yes, mind blown).
rproxy:
    image: mitmproxy/mitmproxy
    command: mitmdump --mode reverse:http://subject --listen-port 80
    ports:
      - "8091:80"
    networks:
      intnet: {}
      extnet: {}
Although, if you prefer to use a real reverse-proxy like NGINX, this is the kind of configuration we’ll want:
worker_processes  1;
error_log /dev/stderr info;

events {
    worker_connections 1024;
}

stream {
    server {
        listen 80;
        proxy_pass http://subject;
    }
}
The point is to just listen on port 80 and forward all HTTP requests to the subject container’s webapp.
Let’s bring it up with docker-compose up -d rproxy.
Now if we open http://localhost:8091 in the browser on the host system, we should see the response from our little piece of awesome.
Testing Appsmith
Appsmith is a low-code internal tool builder. It’s a webapp that lets you build internal tools, without writing code. It’s a great tool for building internal tools, but it’s also a great tool to test internal tools.
We wanted to test Appsmith and make sure it works well with a proxy. We also want to make sure that when a proxy is configured, it doesn’t make any requests trying to bypass it.
To do that, we started with the following docker-compose.yml file:
version: "3"

services:
  appsmith:
    image: appsmith/appsmith-ce
    environment:
      HTTP_PROXY: http://proxy:8080
      HTTPS_PROXY: http://proxy:8080
    networks:
      intnet: {}
    volumes:
      - ./stacks:/appsmith-stacks
      - ./resolv.conf:/etc/resolv.conf:ro

  proxy:
    image: mitmproxy/mitmproxy
    command: mitmweb --web-host 0.0.0.0
    ports:
      - "8081:8081"

   networks:
      intnet: {}
      extnet: {}
    volumes:
      - ./certs:/home/mitmproxy/.mitmproxy

  rproxy:
    image: mitmproxy/mitmproxy
    command: mitmdump --mode reverse:http://subject --listen-port 80
    ports:
      - "8091:80"
    networks:
      intnet: {}
      extnet: {}

  dns:
    image: mitmproxy/mitmproxy
    command: mitmdump --mode dns
    networks:
      intnet: {}
      extnet: {}

networks:
  intnet:
    internal: true
  extnet: {}
A few things are happening here:
- We start Appsmith in the internal network with proxy configured to use the
proxycontainer. We don’t expose any ports for Appsmith, because we’ll be accessing it through therproxycontainer. - We start the
proxycontainer which will act as a proxy for all HTTP and HTTPS requests made by Appsmith. The proxy runs on port8080, but the web UI runs on port8081, which we expose to the host. - We start the
rproxycontainer, which will act as a reverse proxy for the host (i.e., us) to access Appsmith from the browser. - We start the
dnscontainer, which will act as a DNS server for the internal network. - The Appsmith container uses two volumes: the
stacksto hold all its data and theresolv.confto add thednscontainer as another nameserver. - The
proxycontainer has thecertsvolume, to store the CA certificate formitmproxy.
Now, there’s still a few missing pieces:
- We need the
mitmproxy‘s CA cert to be installed in the Appsmith container. This can be done, as detailed in the documentation, by copying the cert intostacks/ca-certsfolder. - We need the
dnscontainer’s internal IP address added to Appsmith container’sresolv.conffile.
docker-compose up -d dns
mkdir -pv stacks/ca-certs
cp -v certs/mitmproxy-ca.pem stacks/ca-certs/mitmproxy-ca.crt
cat <<EOF > resolv.conf
nameserver 127.0.0.11
options ndots:0
nameserver $(
  docker inspect "$(docker-compose ps -q dns)" -f $'{{range $k, $v := .NetworkSettings.Networks}}{{$k}}:{{$v.IPAddress}}\n{{end}}' \
    | awk -F: '/_intnet:/ {print $2}'
)
EOF
docker-compose up -d
This will pick up the new CA cert, install it to the trust store, and also start using the new entry in resolv.conf.
With this setup, if the Appsmith container makes any outgoing HTTP requests with the configured proxy, it should work fine and should show up in mitmproxy‘s web UI. But if it tries to make a request without the proxy, it should fail. This will highlight any features and functionality that get affected due to this.
Further explorations
- Configure static IP addresses for the containers in the
docker-compose.yml, especially thednscontainer. This should make it easier to configure theresolv.conffile. - Use NGINX
streamreverse proxies to have the subject container connect to external databases.
Conclusion
Since requests directly to the Internet fail, we can use this setup to test if our application doesn’t leak any requests when a proxy is configured. Ideally, when I configure a proxy to be used by an application, I don’t expect it to make any request without that proxy. This sounds like an obvious thing to expect, but the best of expectations fail when it comes to software. This is why we test. This guide should help us test proxy support for applications better
Cover artwork by Jemma Jose