Build a Project Management Tool with Firestore and Appsmith

They say that the only sure things are death and taxes, but really, those are both just deadlines (pun intended). Getting the work done well and at the right time is a function of time management. The problem is that managing time can be quite complicated. You often must implement several techniques, systems, and approaches to get good results.
Keeping a list of tasks, or even using a basic Todo app, can be helpful for some people. However, a reliable project management tool is critical for people with multiple projects and tasks all assigned at once. The primary purpose is to help organize your various deadlines and assignments, so you know exactly what you should be working on at any given time.
Wouldn’t it be great to have a tool to manage deadlines that you can easily customize to work precisely the way you want? Great news! This tutorial will provide a detailed breakdown describing how to build your own version. To build this app, we will use Appsmith’s native Firestore integration for the database and the updated Table widget for CRUD operations. This approach provides a quick, reliable foundation for implementing your customizations and optimizations.
“”Firestore is a NoSQL document database built for automatic scaling, high performance, and ease of application development. While the Firestore interface has many of the same features as traditional databases, as a NoSQL database, it differs in the way it describes relationships between data objects.
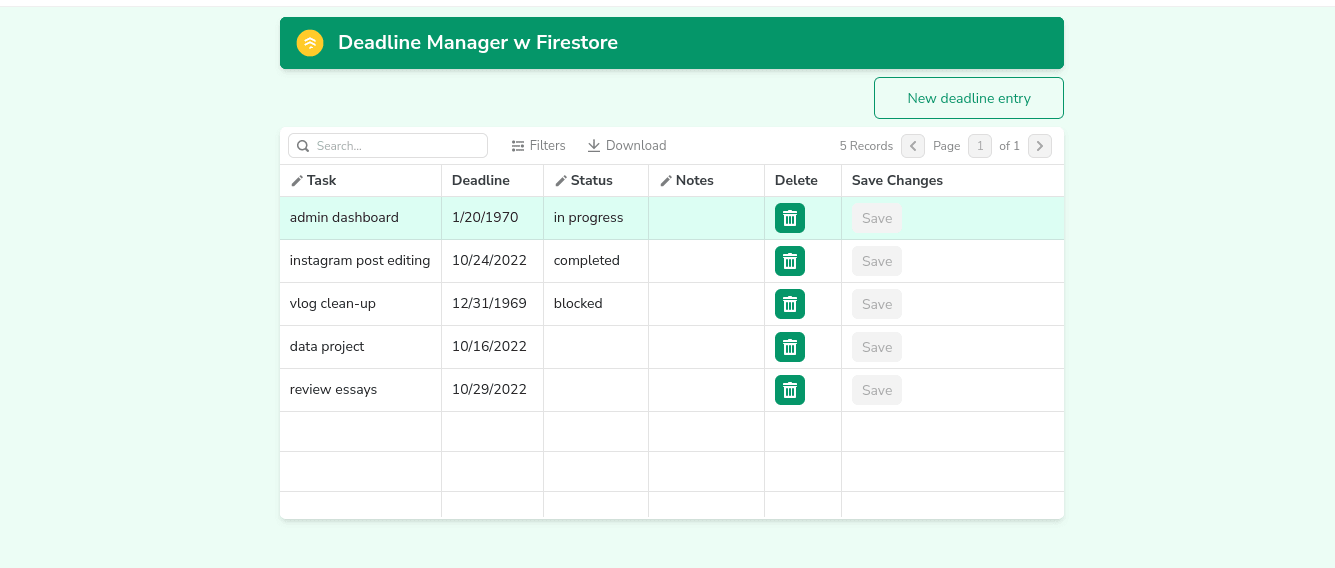
Here is what the final application would look like:
Ok, enough background info; let’s dive into building the application!
Getting Started
Setting up Appsmith
Go to https://app.appsmith.com/ to sign up for a new account or log in to an existing one.
Create a new application in your preferred organization, and you’ll see an editor where you can drag and drop UI widgets to build UI.
Create the UI for your app
To build the UI, choose a theme you like and drag-drop the following widgets:
Container and text widget for the app header
A button for a new deadline entry
A table widget for viewing the deadlines and editing existing deadlines.
Now that we have the U.I. set up for the app, let’s connect the Firestore database.
Connecting to Firestore
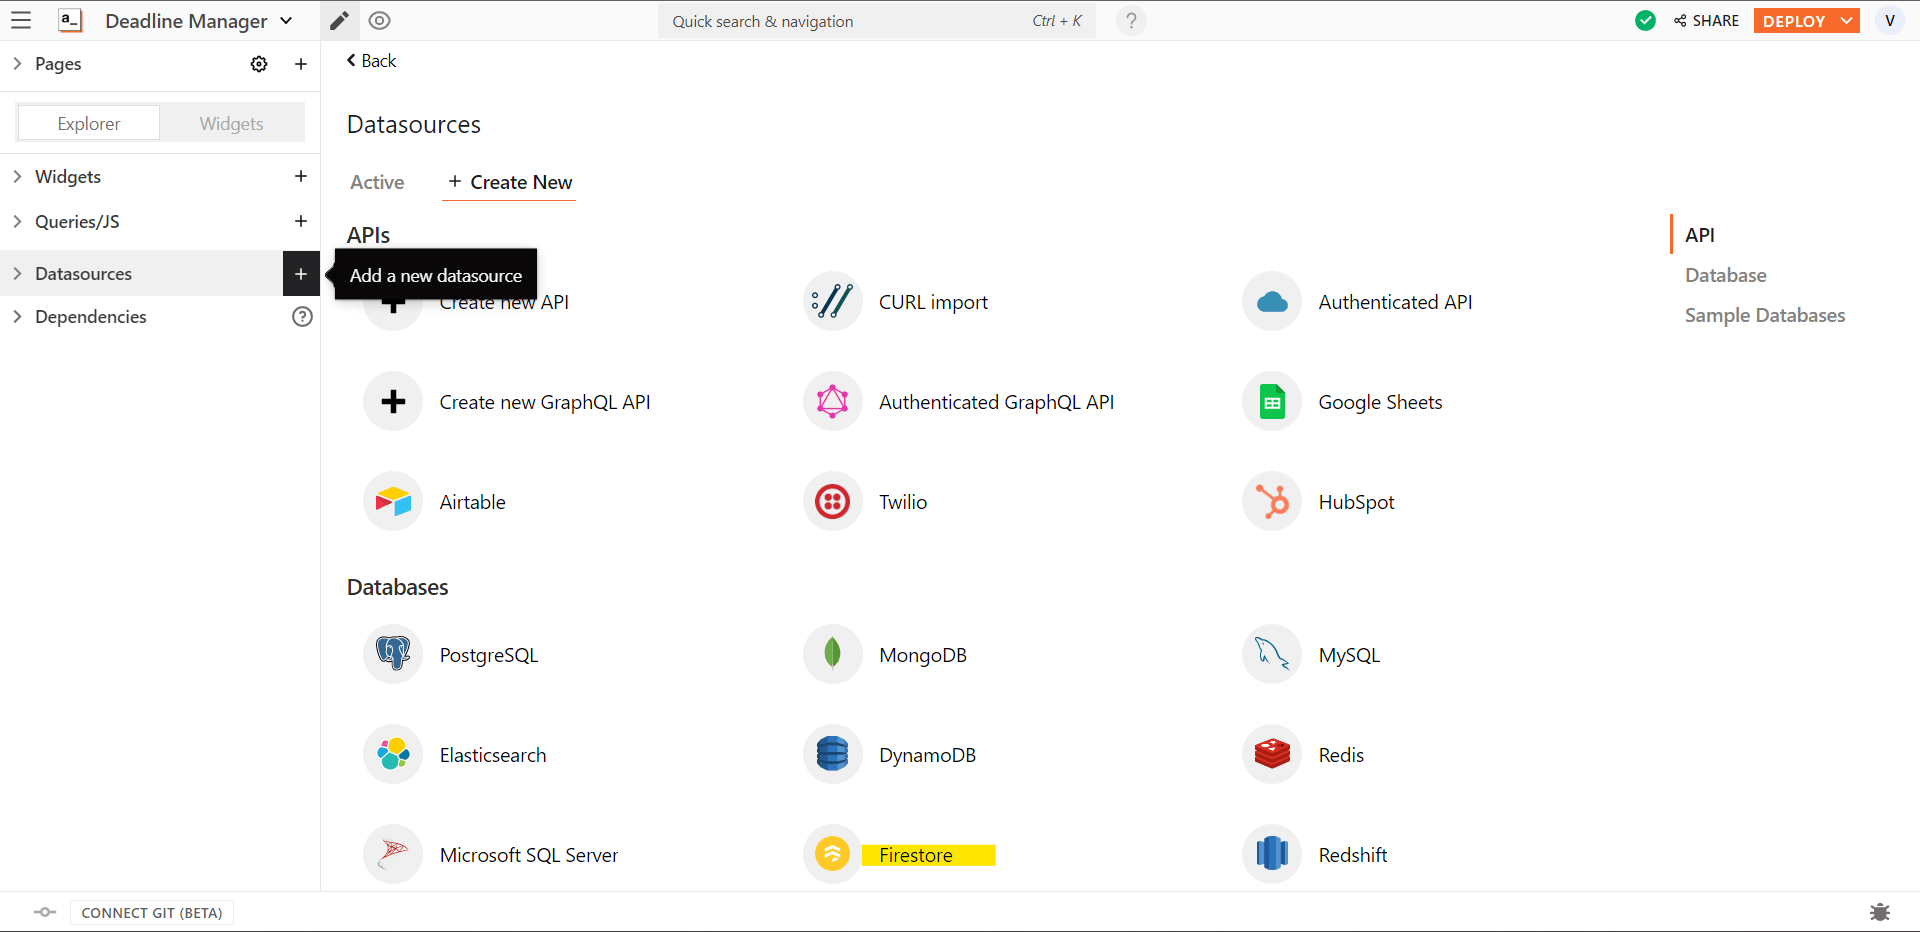
Click on the Datasources tab.
Click on the + icon to add a new datasource and select ‘Firestore’ from the Databases section.
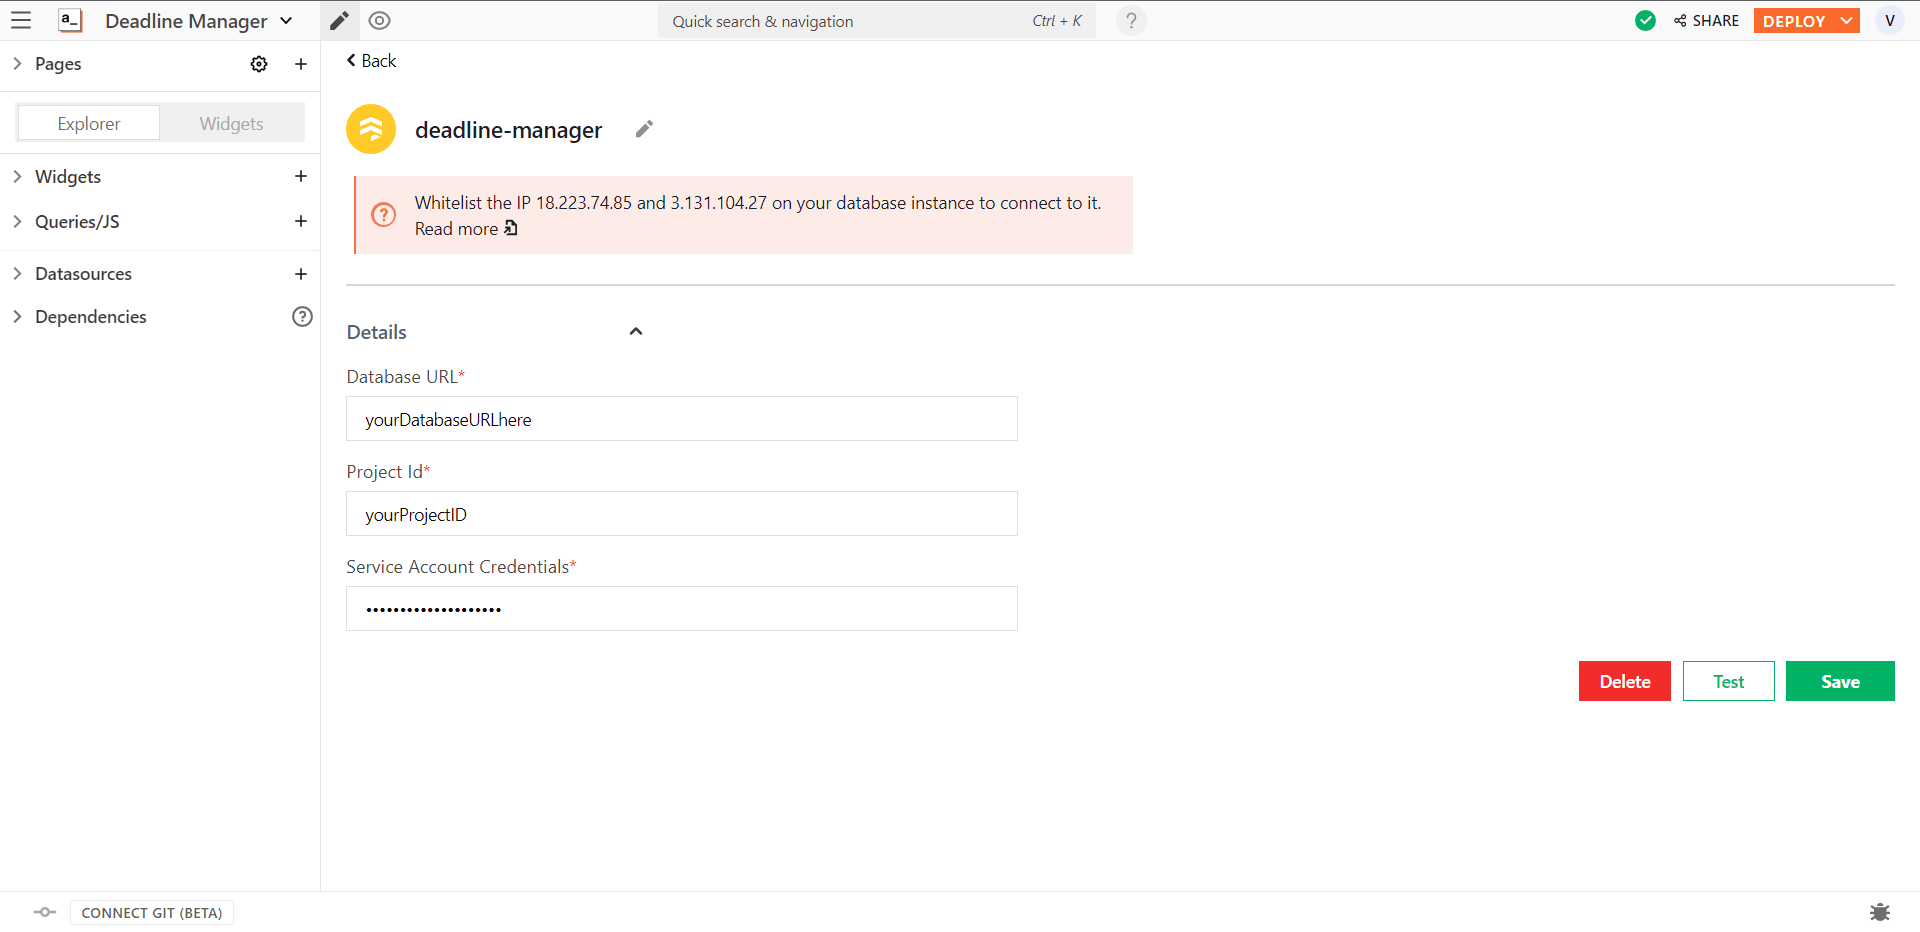
Name the datasource ‘deadline-manager’ and enter the credentials from the project settings of your Firebase datasource.
Hit test to test the connection and save the datasource.
You can read more about connecting with Firestore on Appsmith here.
Creating a new deadline entry
Now, we have the UI and a connection to the datastore. Next, we must implement basic changes to enable full CRUD control of the data. First on the list - creating a new deadline entry!
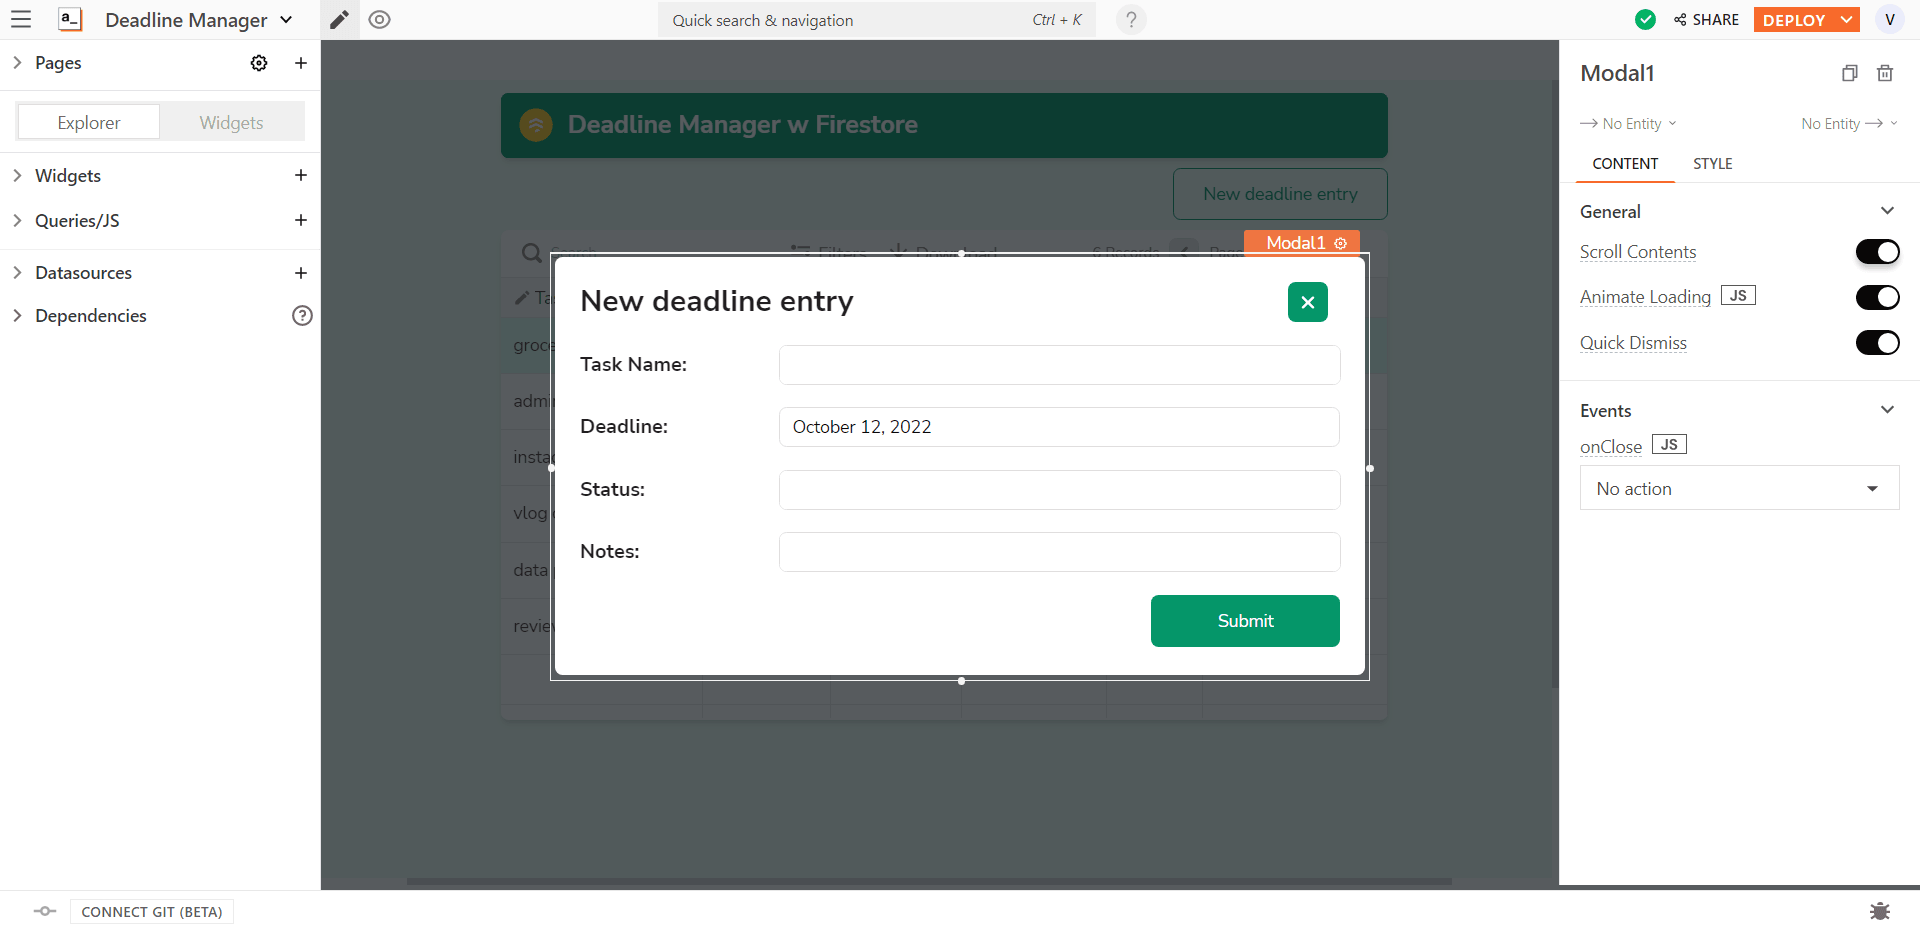
We need to build a simple form to create a new deadline entry. Let's put it in a modal window, so it is out of the way when we don’t need it.
Add a modal widget with text and input widgets for a form. We need to capture a name, deadline, status, and any notes for the task.
Edit the ‘New deadline entry’ button we created earlier, and set the action to open the modal we just created.

Now that we have a way to collect the new deadline data, we need to push that data into Firestore.
Add a new query using the Firestore datasource and name it ‘createDeadlines’
Set ‘Create Document’ as the command for the query
Add your collection/Document path and
{{Math.random().toString(36).substring(7)}}after the path to create a UUID for each one.In the body, assign the input data from the modal form:
{
"deadline": {
    "seconds": "{{ moment(DatePicker1.formattedDate).unix() }}"
    },
    "task": "{{Input1.text}}",
    "status": "{{Input2.text}}",
    "notes": "{{Input3.text}}"
}
Edit the submit button of the modal form and bind
{{createDeadlines.run()}}to runonClick, and then{{getDeadlines.run()}}to runonSuccess.Populate the form and test out the query!
We can easily create new deadlines, so the next step is to read and display the data.
Reading data from Firestore

Here’s what the data in Firestore looks like right now. Every document consists of a timestamp field named ‘deadline’ and three string fields called ‘task’, ‘status’, and ‘notes’. We need a way to get this data and display it in the table we created earlier.
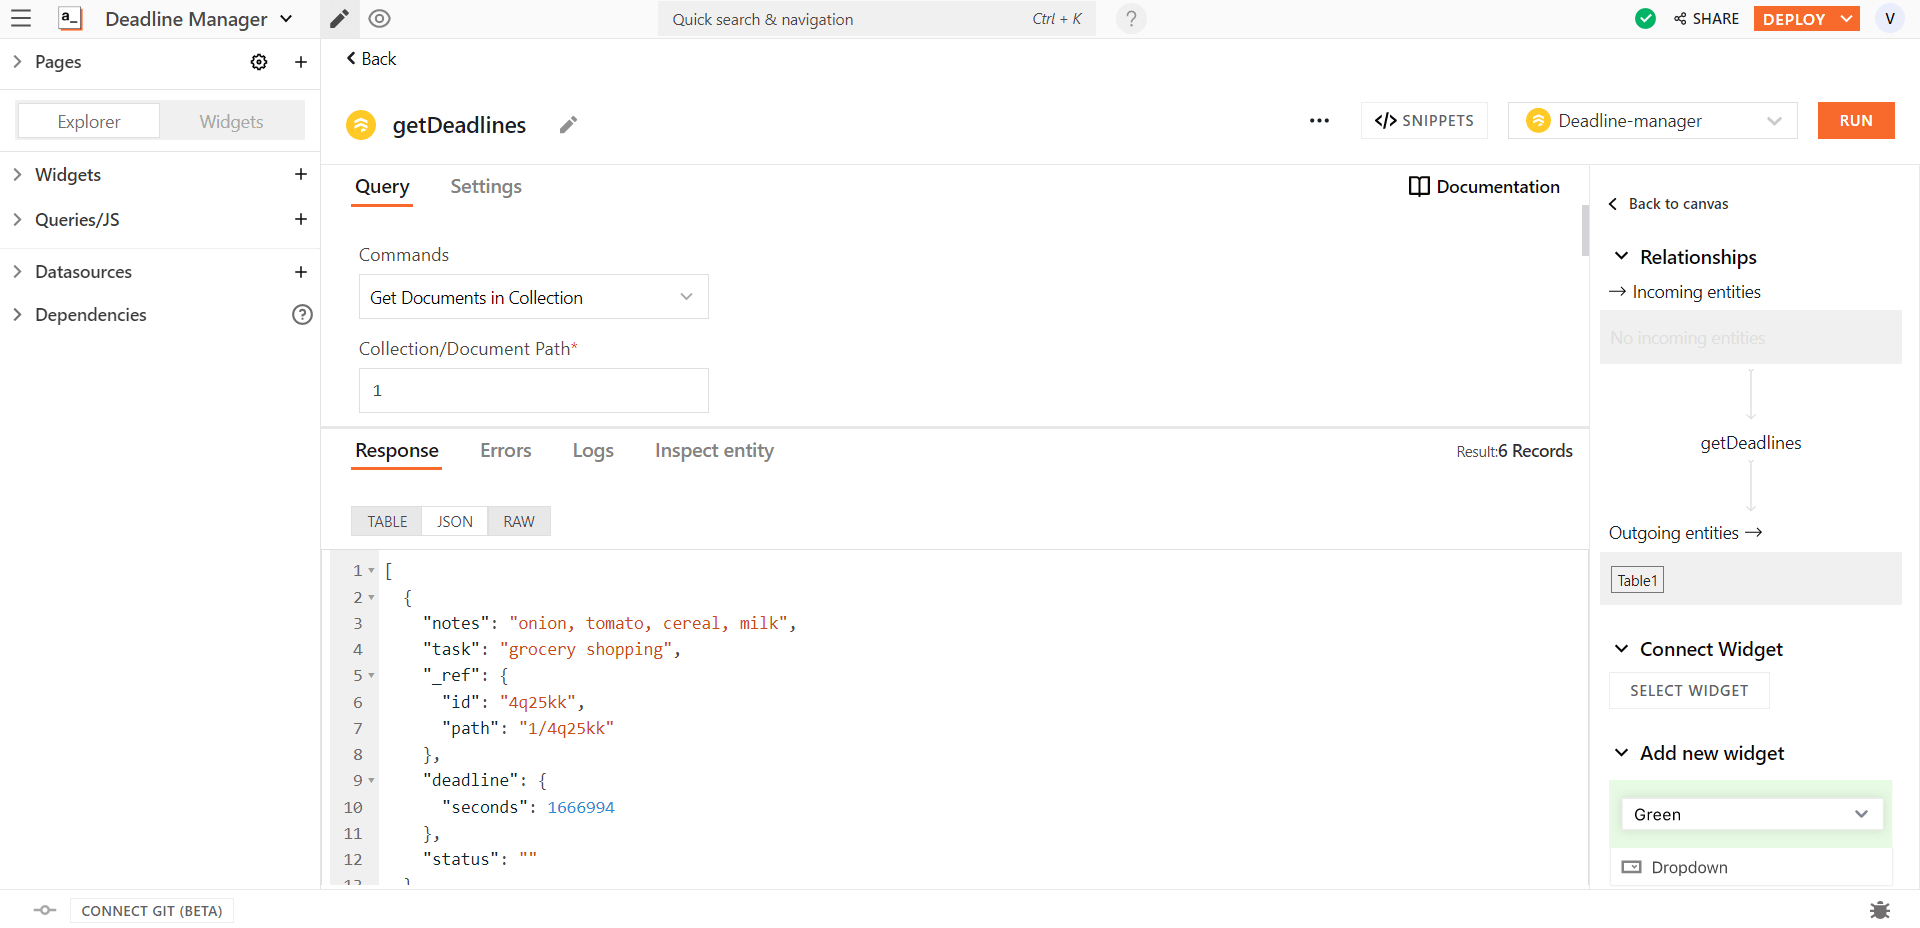
We need to create a new query that reads data from Firestore. To do this,
click on the + icon in the Queries/JS tab and select the ‘deadline-manager’ datasource.
Rename the query to ‘getDeadlines’.
Select the ‘Get Documents in Collection’ option and add your Collection/Document path from Firestore
Hit ‘Run’, and you should see the data in the response tab.
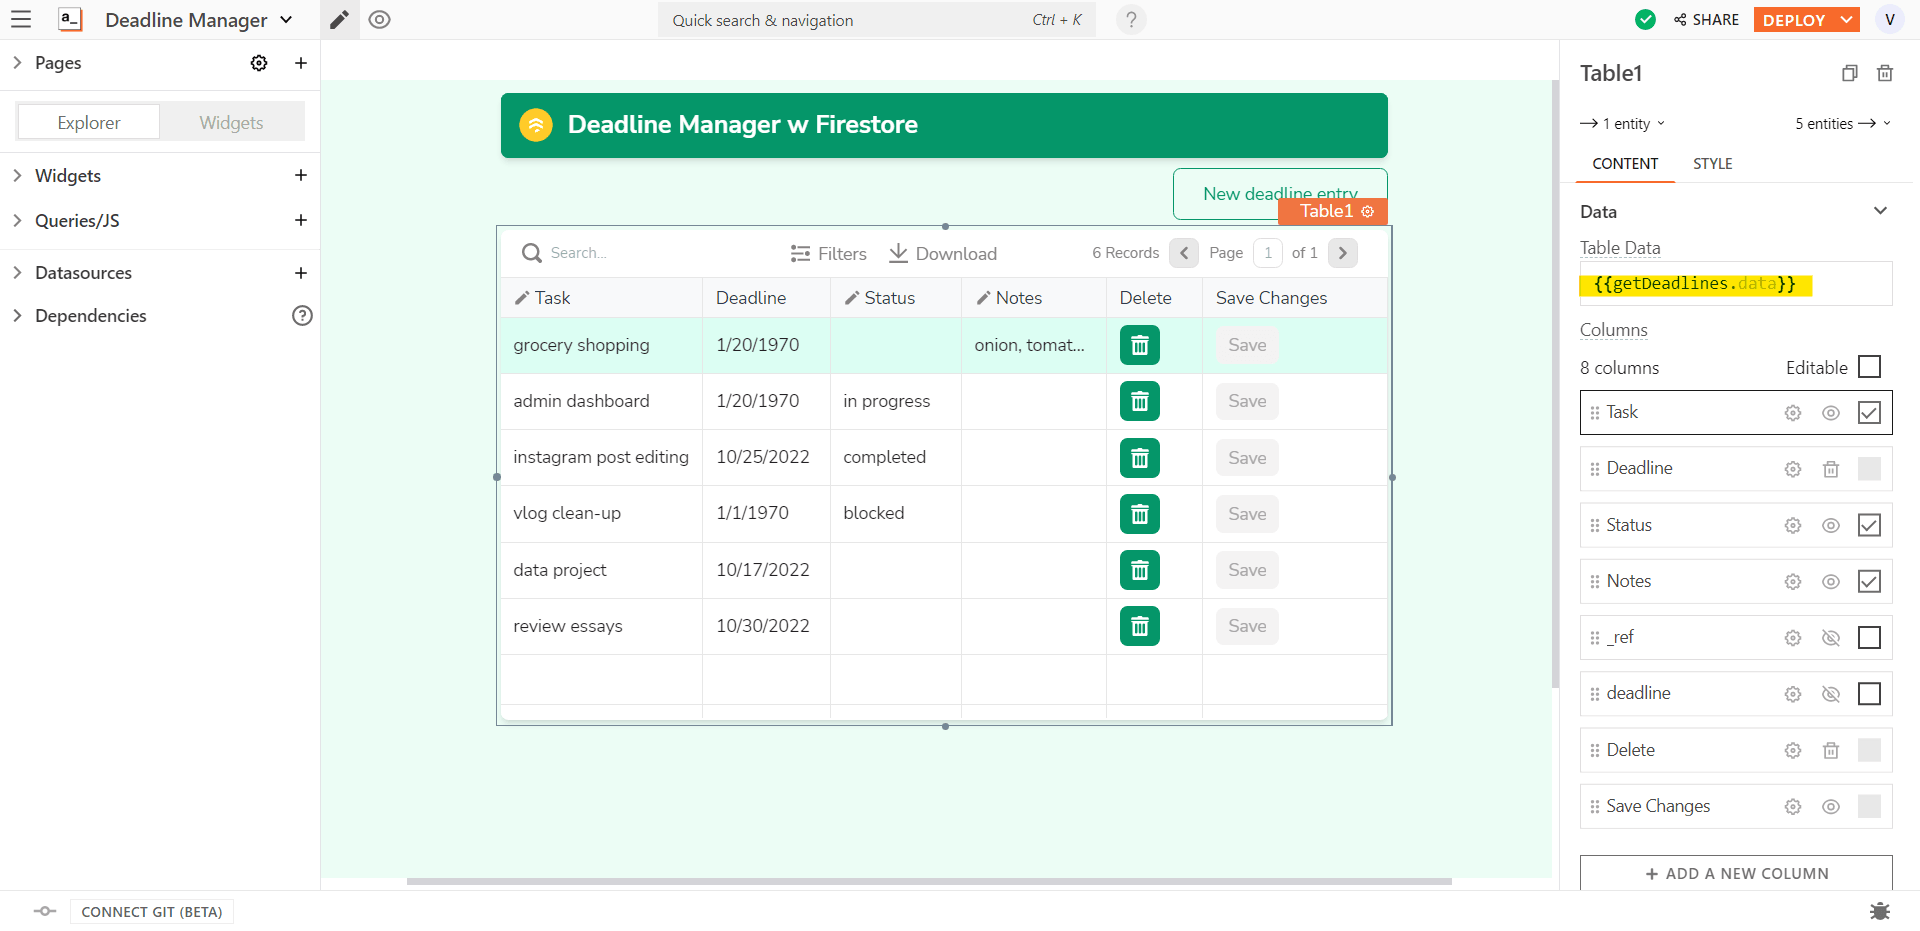
Now that we can retrieve the data from Firestore, we need to bind it to the table widget to view it. This will ensure that even as we create, update, and delete the data, the table will always show what is in Firestore.
Edit the table widget and enter
{{getDeadlines.data}}in the Table data field, which will automatically create the columns for you.Rearrange the columns as you like and enable editing by checking the checkboxes beside the column names to allow inline editing within the table rows.
Remember when we talked about those awesome features in the table widget that make your life easier? Inline editing is one of them. By checking the box, you have a way to view and edit your data all in one go. We also see that the table created the initial columns automatically based on the response from Firestore.
Pretty great, right? Don’t worry - it gets even better.
Updating an existing deadline
Inline editing is great, but how do we get those changes into Firestore? We just need to create an update query on the datastore! This query will take a table row as input and push those changes into Firestore.
To create the update query,
create a new query using the + icon in the Queries/JS tab.
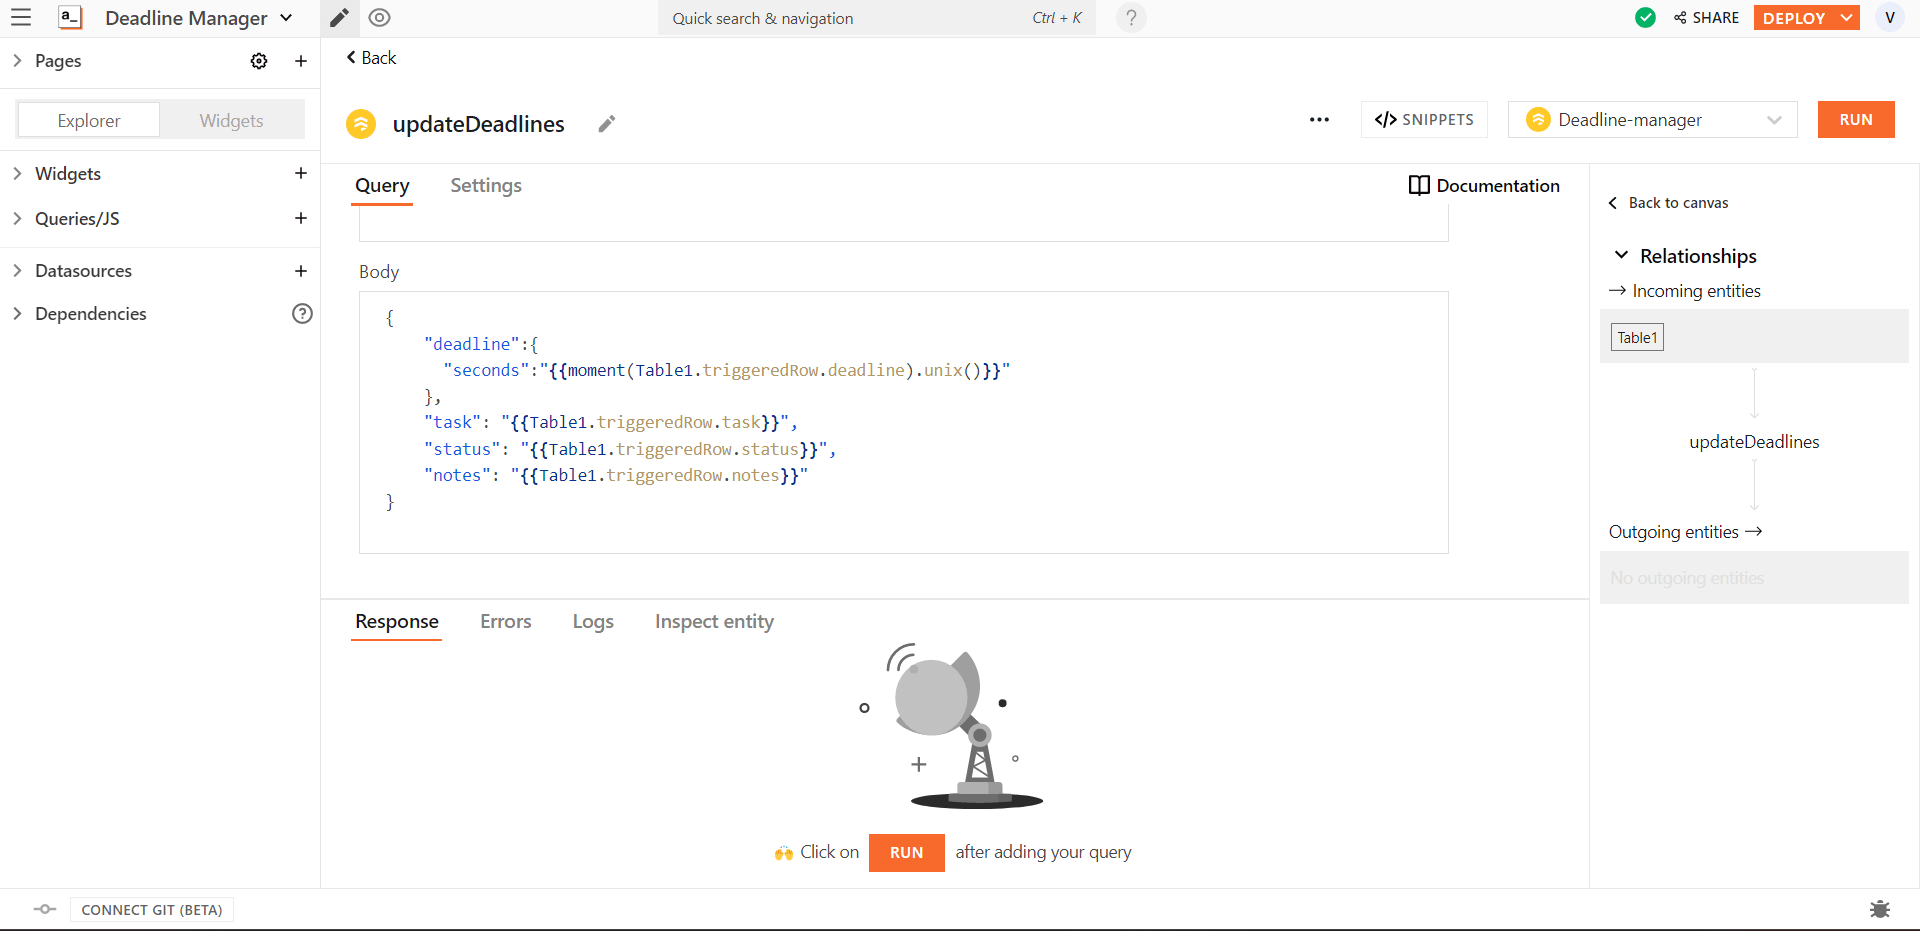
Name the query ‘updateDeadlines’.
Select the ‘Update Document’ option.
Add
{{Table1.triggeredRow._ref.id}}after your collection/document path to use the currently edited row id.Just like with the Create query, we need to assign the table row data to the query body. See the image above for details.
We are almost done. We simply need to assign this query to the table update button.
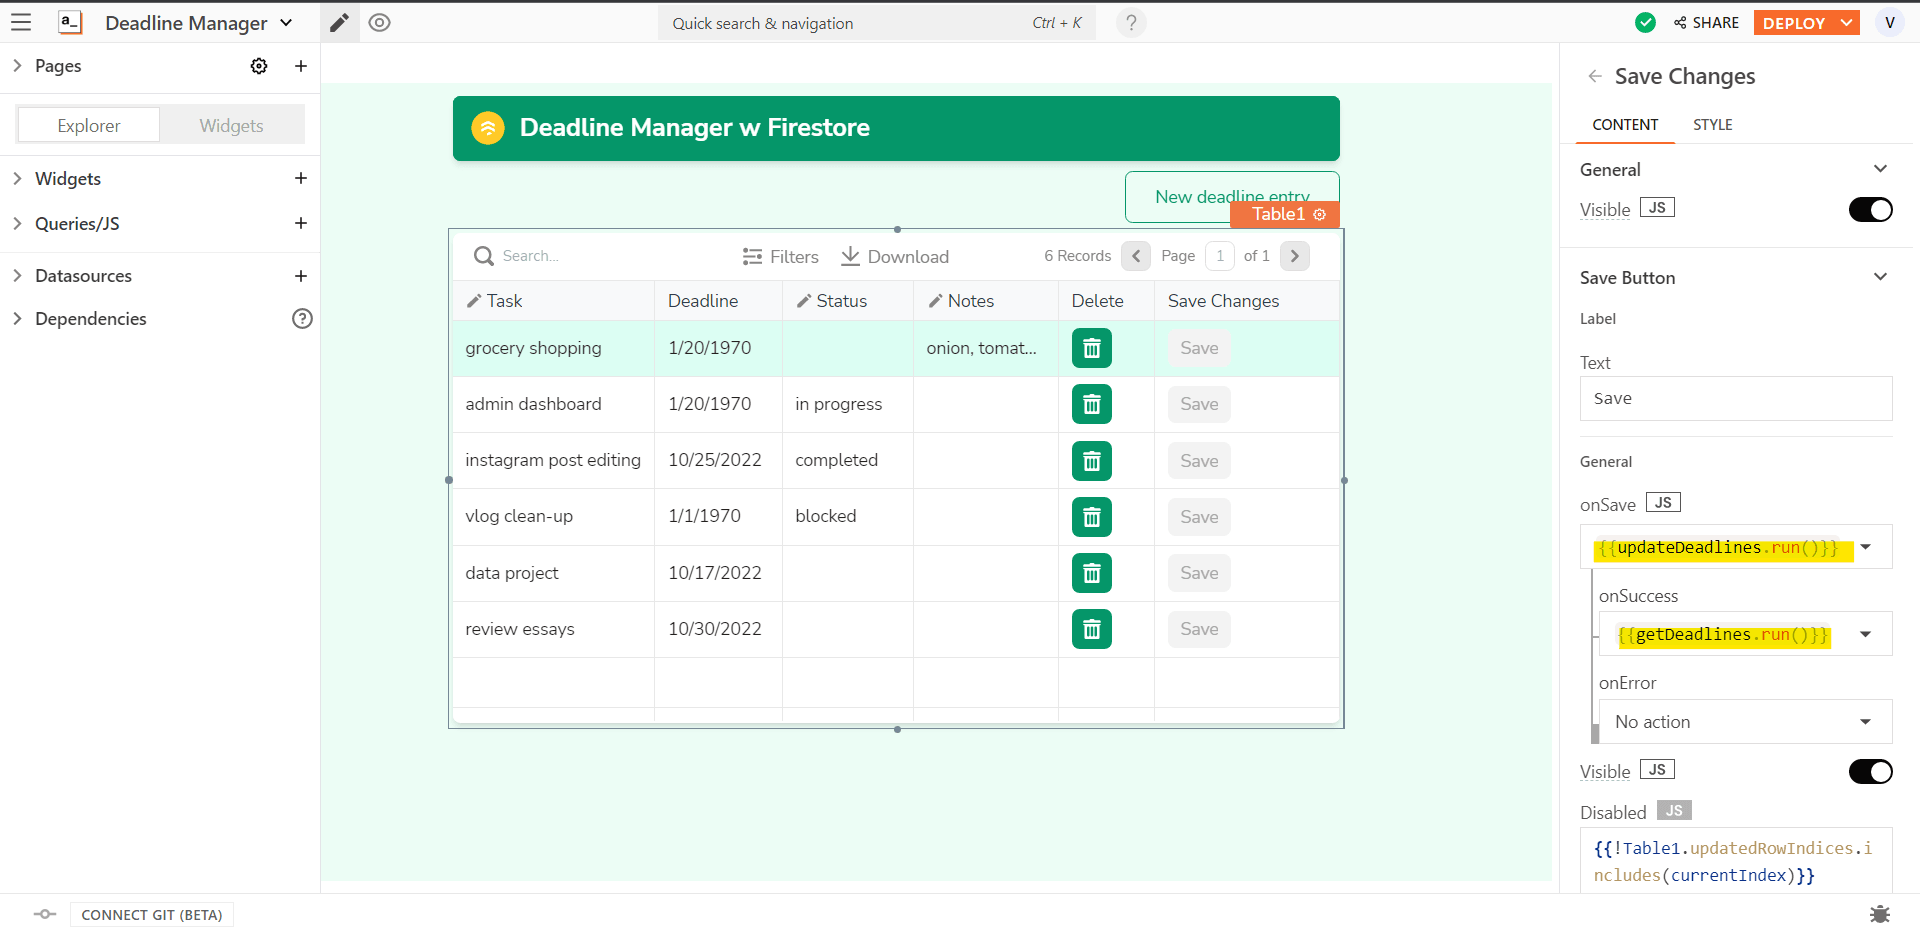
Earlier, we marked certain fields as editable in the table. You should see an edit icon beside the editable column names and a column called “Save Changes”.
Edit the properties of the Save column to run the ‘updateDeadlines’ query on onClick and the ‘getDeadlines’ onSuccess.
And then… well, there is no “and then”! We can now edit any of these fields and save that back to Firestore. After the data is saved, the table will update. No muss, no fuss. The only letter left in CRUD is “delete”, so we need to have a way to get rid of deadlines from the datastore.
Deleting an entry
Let's extend the inline editing feature and add our own inline delete button. This will provide an easy way to delete deadline items from the list.
First, create the delete query.
Create a new query from the + icon in the Queries/JS tab
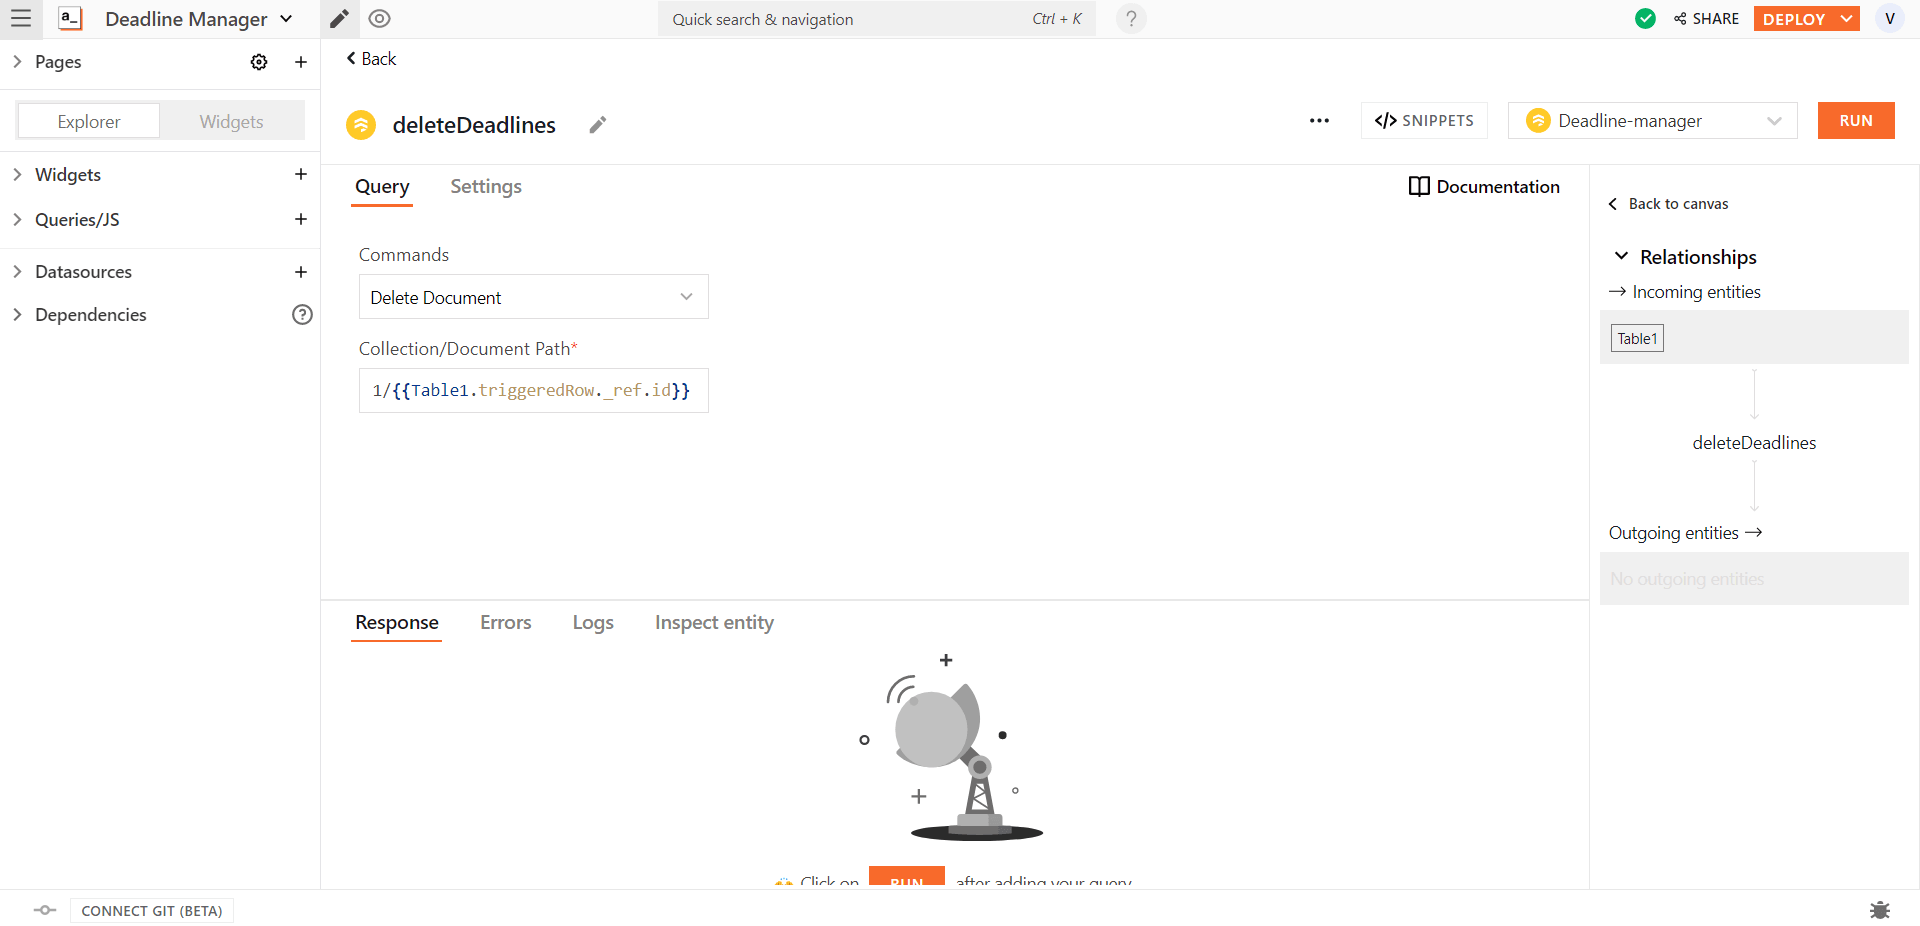
Name the query as ‘deleteDeadlines’
Set the command to be ‘Delete Document’ and add
{{Table1.triggeredRow._ref.id}}after your collection/document path.
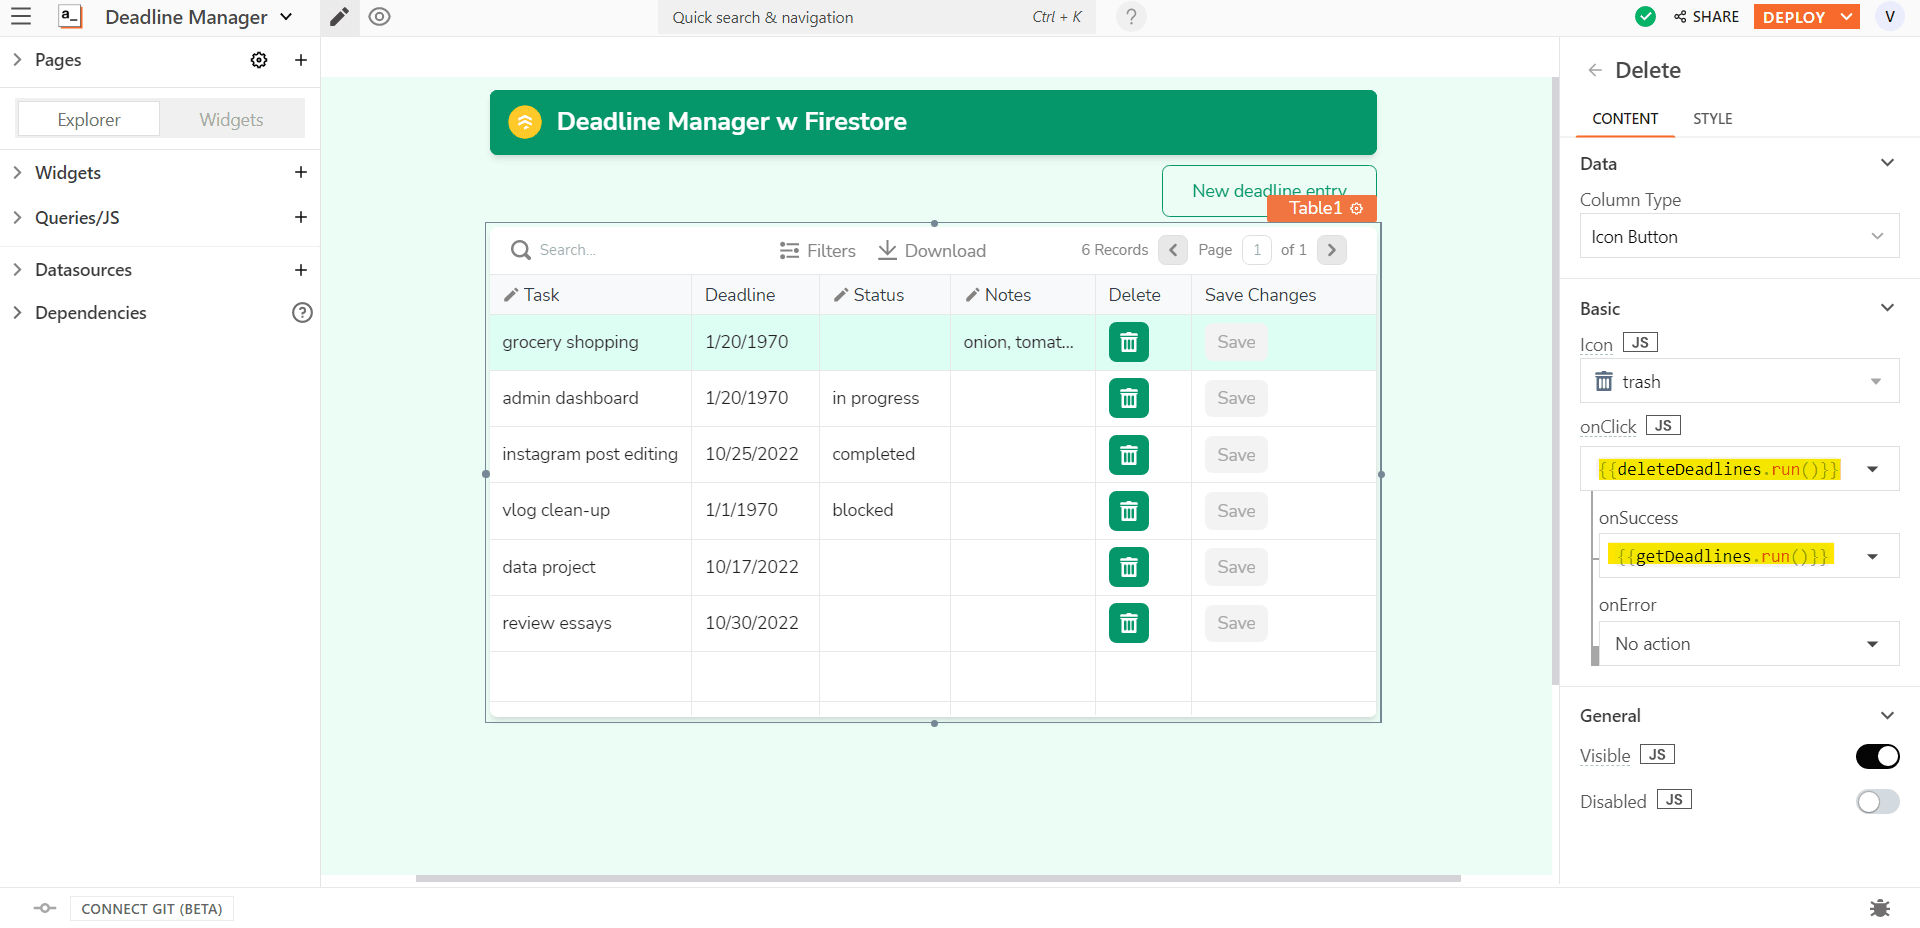
Now we need to create a delete button for each row and bind that to the delete query.
Create a new custom column in the table and rename it to ‘Delete’. Change the column type to an ‘icon’ type
Bind the ‘deleteDeadlines’ query to run on
onClickof the delete icon and ‘getDeadlines’ to runonSuccessof the onClick.
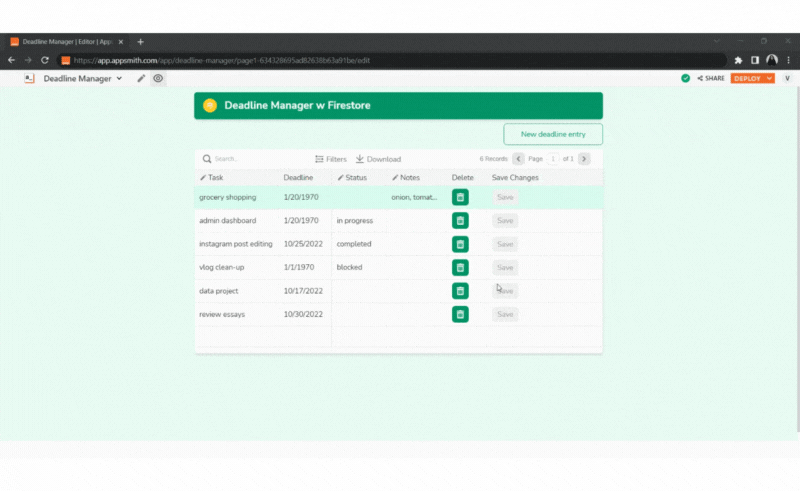
That does it! We now have a full CRUD application for our Firestore project management tool and used many of the advanced features of the table widget to get it done quickly and easily.
Customizing your App
Using Appsmith and Firestore, you have created a basic project management app. However, you probably already have ideas on how you want to alter it. Go ahead and customize the functionalities as you like! Some ideas:
Add a confirmation modal to the delete button.
Add extra fields of data.
Pull in additional data from other sources.
Track your time per task.
See a list view of your tasks in descending order.
Create charts or graphs to view stats on your work.
This app JSON is stored in our Foundry repository on Github, so you can import the app and immediately get started.
Hit us up on Discord for any queries and follow us on Youtube and Twitter to stay up to date. Happy smithing!


