Building CRUD Apps with Firebase


Since its release back in 2012, Firebase has received lots of love from the developer community because it aims to remove the burdens many engineers have to deal with during development, including database, storage, authentication, hosting, and more. One of its core products, the Firestore database, has been a game-changer in the database world because it allows highly flexible schemaless database access. But sometimes, it can be a bit challenging to work with, especially for new developers trying to build CRUD apps with Firestore. Firestore and, by extension, Firestore is a great product, but it's only one side of the coin. However, to build production-grade applications, an interface is required for users to interact with and services provided by Firebase. Appsmith is the open-source UI framework that fills this gap if you're making something for your colleagues. Appsmith saves you the time of building UI and routers, focusing on the logic and the architecture of your app. In this article, I will show you how to build CRUD applications using Firestore with Appsmith. We're going to cover the core concepts of Firestore, such as connecting to the database, reading data, and writing to the database by building a Todo app. Here's what the finished application will look like:

Awesome! Let’s start hacking away.
Connecting to Firestore
Firstly, we need to create an app on Appsmith. Go ahead and sign in to your Appsmith account and click on the + create new app button. You should then be taken to a new app where we can begin building our Todo app. You might also want to rename the app from Untitled Application to something like Todo app.
Now that we have a new app setup, we can go on to connect to Firestore. Click on the + button to the right of the DB Queries section, and then the new data source button. We’ll be connecting to Firestore, so select Firestore from the list of supported databases.
On the opened form, fill in your Firebase connection credentials. Note that your Project Id can be gotten from your project settings in the Firebase console. Also your Database URL is
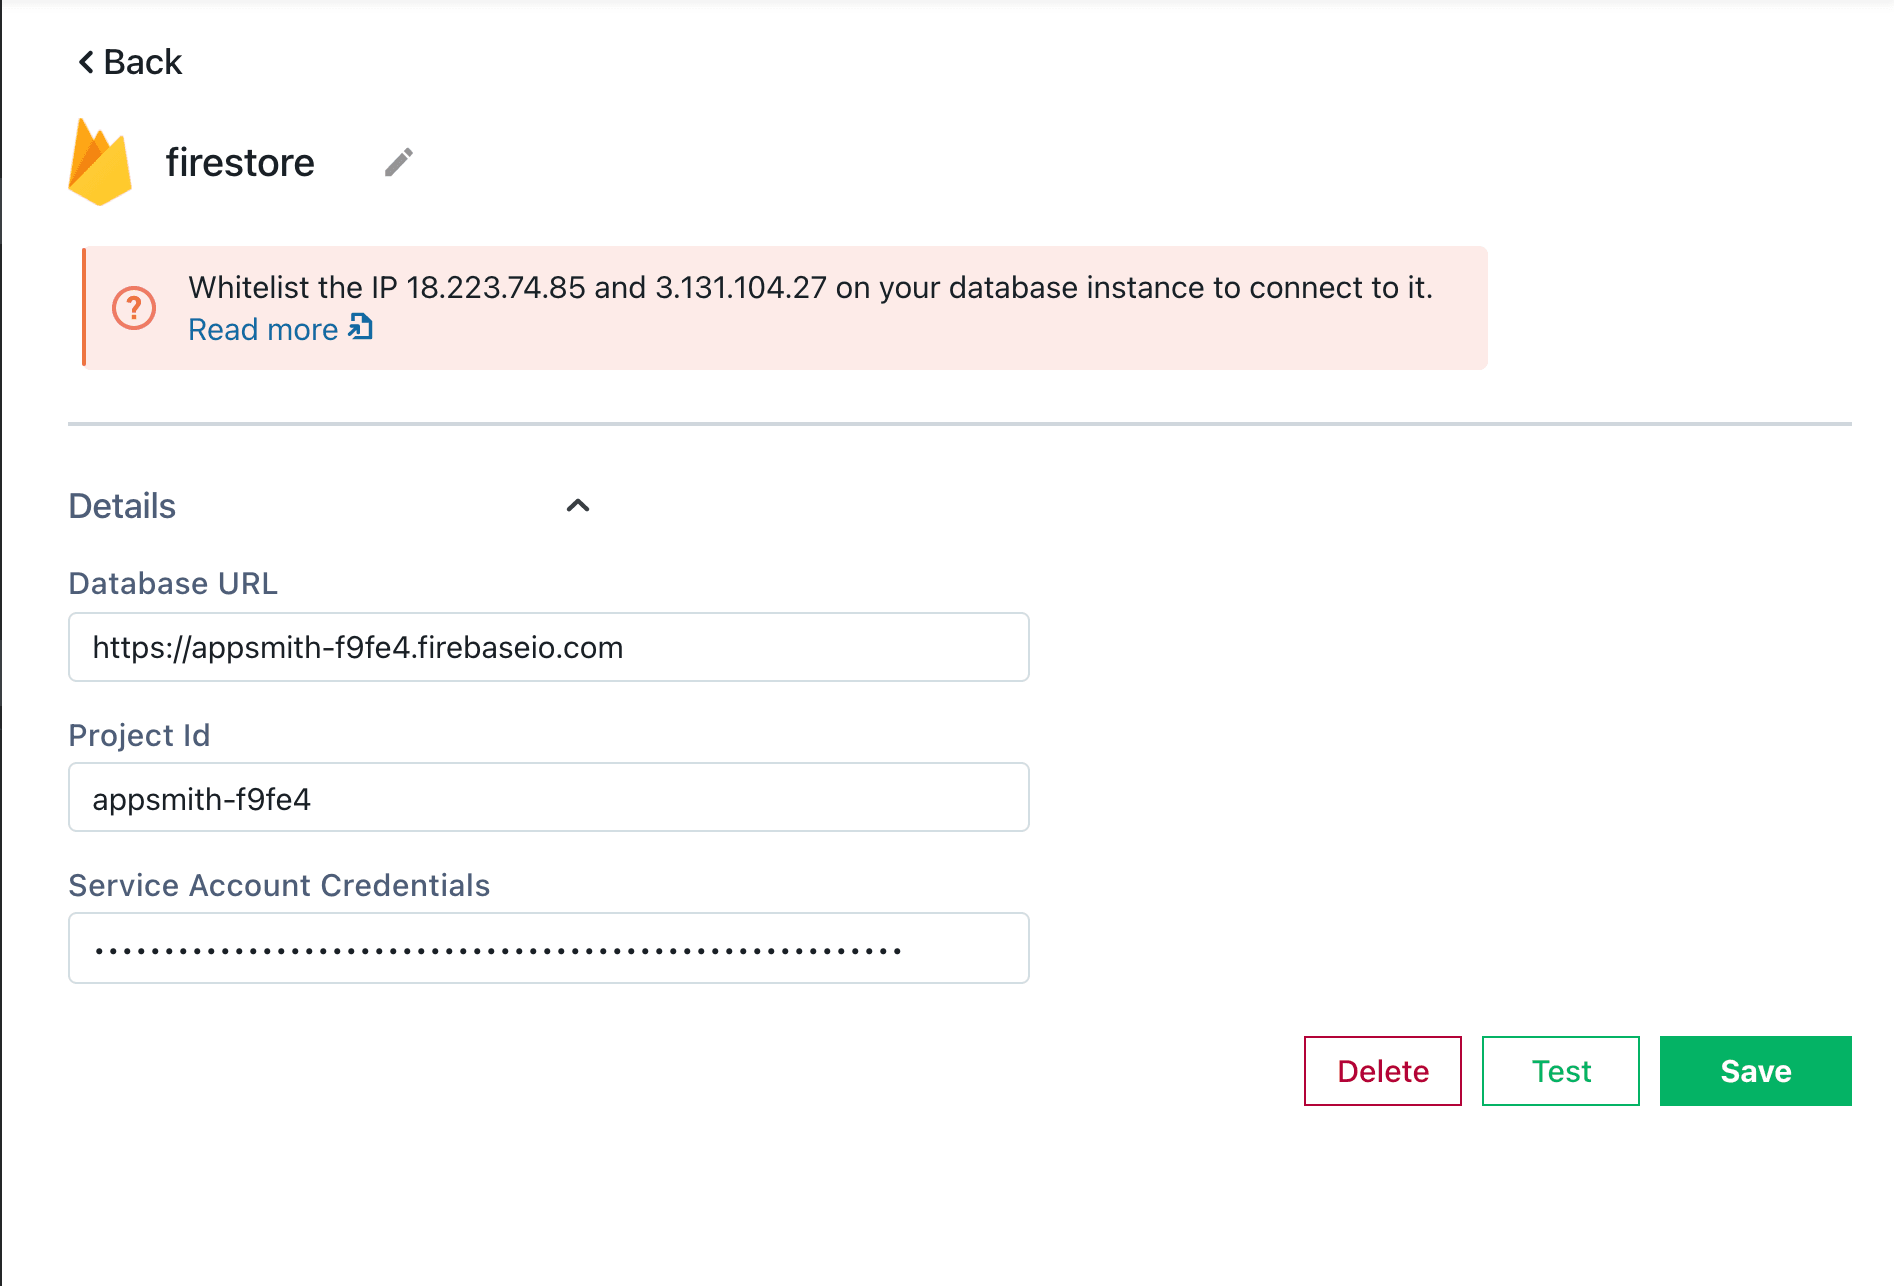
Lastly, you’ll need your Service Account Credentials. Go to the Service accounts tab in your project settings on Firebase. Click on the Generate new private key button. It’s going to download a JSON file, so copy its content and paste it in the Service Account Credentials input. Save your connection and we’re good to go!
Reading data from Firestore
Now we have a connection to the database and we can begin to make use of it. Assume that we have a bunch of todos from the database with the following structure:
{
  "due": Date,
  "task": String,
  "created": Date
}
We can easily fetch todos from the database by writing a query. Click on the New Query button on the Firestore card, and let us write a query to get todos. Give this query a nice name i.e _gettodos. Its Method will be set to Get Documents in Collection. For the collection path, fill in your collection path. And we can go ahead to set the Order By to ["-created"], doing this will sort the documents by their created date. Here’s my query:

Give this query a nice name i.e _gettodos. Its Method will be set to Get Documents in Collection. For the collection path, fill in your collection path. And we can go ahead to set the Order By to ["-created"], doing this will sort the documents by their created date. Here’s my query: Click on the Run button and you’ll get an array of todos from your Firestore database. Now we can go back to the canvas and display this data using a List widget. Head to the widgets section and drag in a List widget into the canvas. On its configuration menu (called Property pane), replace the content of the Items field with the bellow binding that pulls in data from the get_todos query into the widget:
{
{get_todos.data}
}
You wouldn’t notice any change but rest assured that we’re now feeding data from the query into the widget. Now we can go on to display the todos on the List widget. You can delete the Image widget in the list as we do not have images in our todos Drag in a few Text widgets to display the todos text and due dates. For each of the respective Text widgets, use the following bindings in their Text property to display data: For the task field
{
{currentItem.task}
}
For the due date field. We’re using the built in moment library to format the due date
{
{moment(currentItem.due).fromNow()}
}
Great work! The app is coming to life!
Creating new Todos
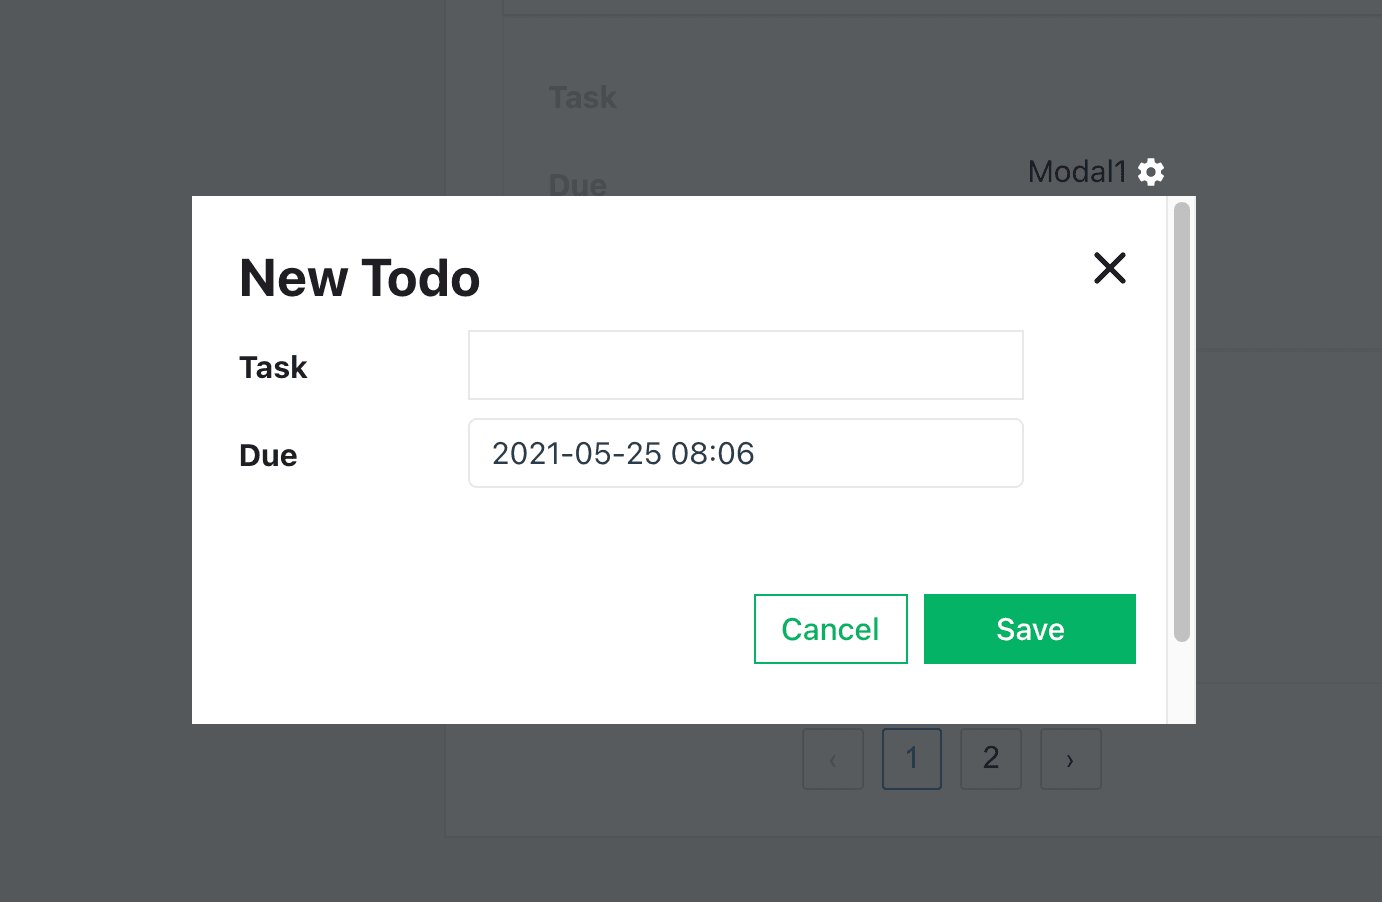
Wouldn’t it be cool if we could create new todos? Yeah, let’s do that. We’ll need a form for this. So, drag in a Modal widget into the canvas. You can close up the modal because will need a button on the UI to open it up. To do this, drag a Button widget into the canvas. On its property pane, set the onClick Action to showModal and the Modal Name to the modal we just created, that is Modal1. Now clicking on the button should automatically open the modal. Sweet! On the modal, we’ll need a few new widgets to capture the todo information. So go ahead and drag in an Input widget to collect the task info, and a Datepicker widget to collect the due date info. A screenshot of mine is shown below:
It is also important to rename the widgets so that we can easily access them later on. Here’s a gif showing how you can do that:
Awesome! Now we can go ahead to write the query to create a todo.
Like we did previously, go ahead and create a new query using the Firestore datasource we earlier configured. You can call your query _createtodo and set’s its Document Path to:
todo_app/{{Math.random().toString(36).substring(7)}}What we have above generates a random string ID for the document. Then set its Body to grab data from the Input widgets we configured on the modal:
{
    "task": "{{task_input.text}}",
    "created": "{{moment().format()}}",
    "due": "{{due_datepicker.selectedDate}}"
}
Awesome! Now we can go back to write an onClick Action for the confirm button on the Modal widget. Enable the Javascript mode by clicking on the small JS button close to it and set its content to:
{
{create_todo.run(() => {
    get_todos.run();
    closeModal('Modal1');
})}
}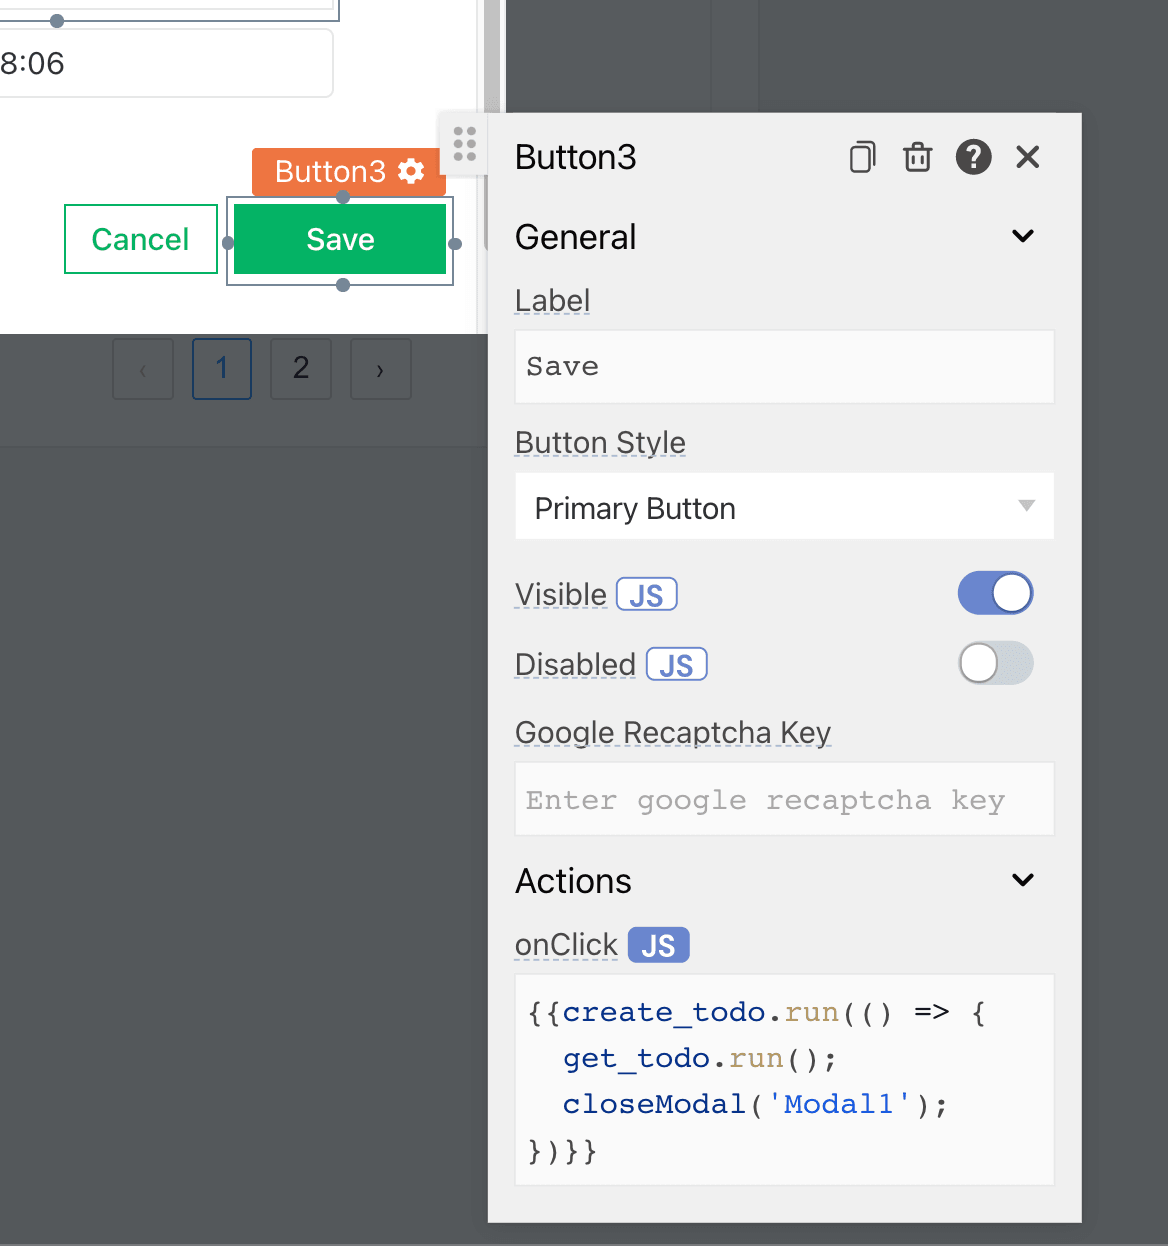
The script above will run the _createtodo query, after which it will update the list by running the _gettodos query and the close form modal. Go ahead and give it a try. Fill in a task and set a due date, click on the button to see the magic happen!
Deleting a Todo
The last feature we’ll like to add to our app is the ability to delete a to-do that has been completed. We’ll need a few new tricks to do this. Let’s go ahead to write a delete query. Call this _deletetodo. Set this query’s Method to Delete Document then its “Document Path* to the following binding which will read the todo_path from the local store API on Appsmith:
{{appsmith.store.todo_path}}Now, let’s go and drag a Button widget into the list. For the button’s onClick Action, we need to store the current todos path in the local store and then run the delete_todo query. We’ll also need to update the list by running the get_todos query. Here’s what you need:
{{
    (() => {
      storeValue('todo_path', currentItem._ref.path);
      delete_todo.run(() => get_todos.run());
    })();
}}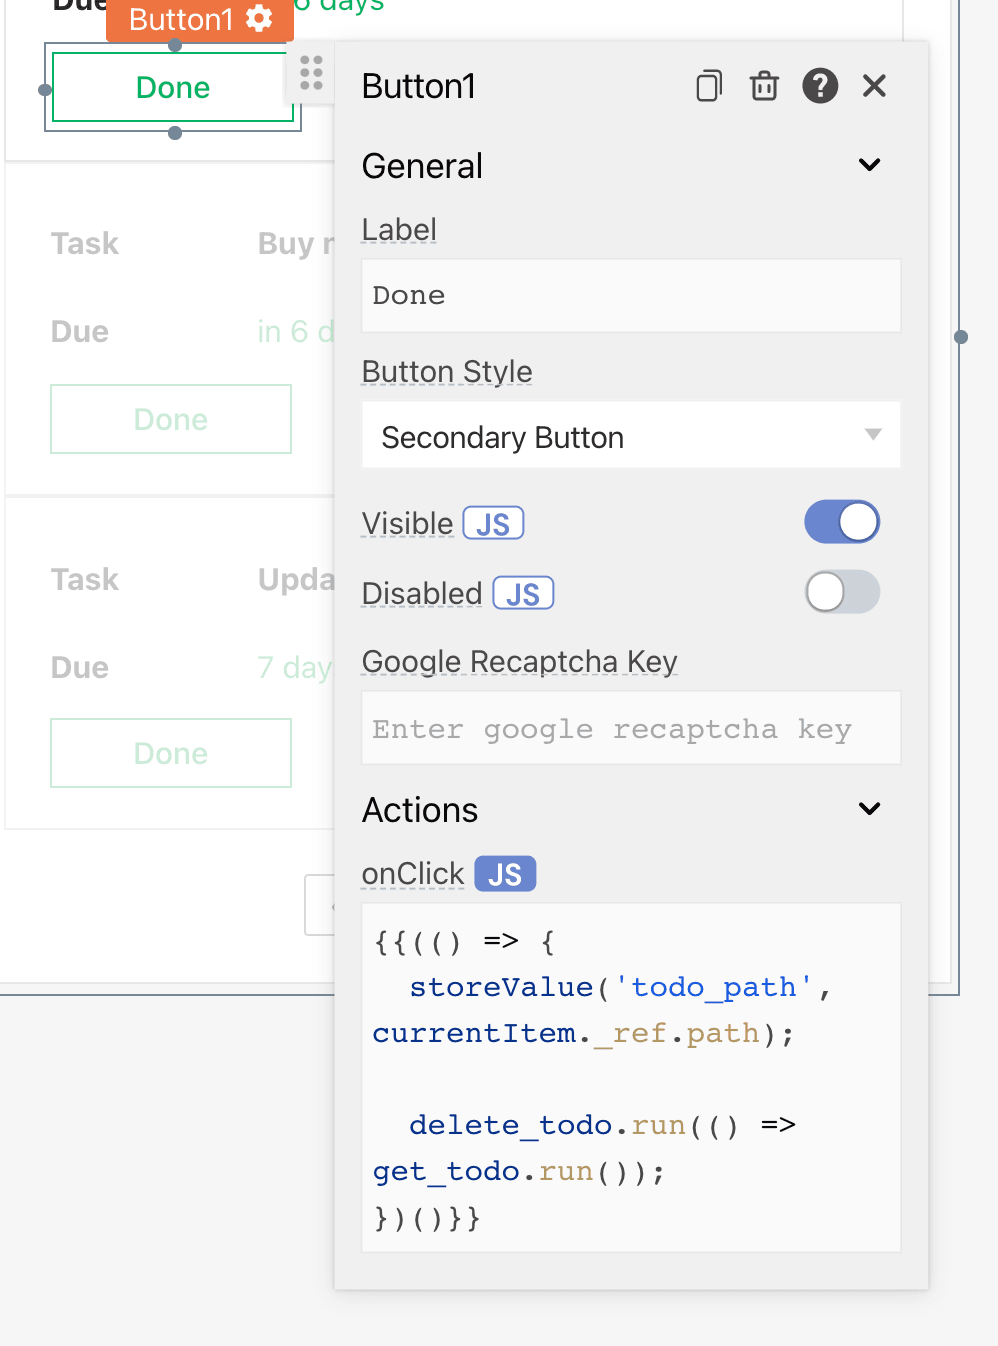
Paste that in and give it a test run. Cool right?
Conclusion
We’ve been able to create a full-blown CRUD todo Firebase app using Appsmith. Here is a gif of the app in action:
Awesome! Now you can click on the DEPLOY button to deploy it and share the app with friends (be sure to update sharing permissions by clicking on the SHARE button). If you found this helpful, show some love and leave a star on our GitHub repo https://github.com/appsmithorg/appsmith


